1. Introduction
Acrylic resins are used for various applications in dentistry, such as denture base materials. The most common material used for denture base is poly (methyl methacrylate) (PMMA) [
1].
Among PMMA properties, surface roughness emerges as a clinically significant factor, directly or indirectly impacting microbial plaque retention in tissues in contact with the denture base. A clinical threshold, devoid of statistical relevance to microbial colonization, was established at 0.2 µm [
2]. Beyond this value, the potential for pathological conditions, such as prosthetic stomatitis and oral candidiasis, rises due to microbial accumulation. To counteract this, mechanical and chemical polishing processes on the prosthetic base surface are recommended to enhance the material’s biocompatibility [
3,
4,
5].
The surface roughness of dental acrylic resins is mainly affected by acrylic resins’ inherent features, the polishing technique, and the operator’s manual skills [
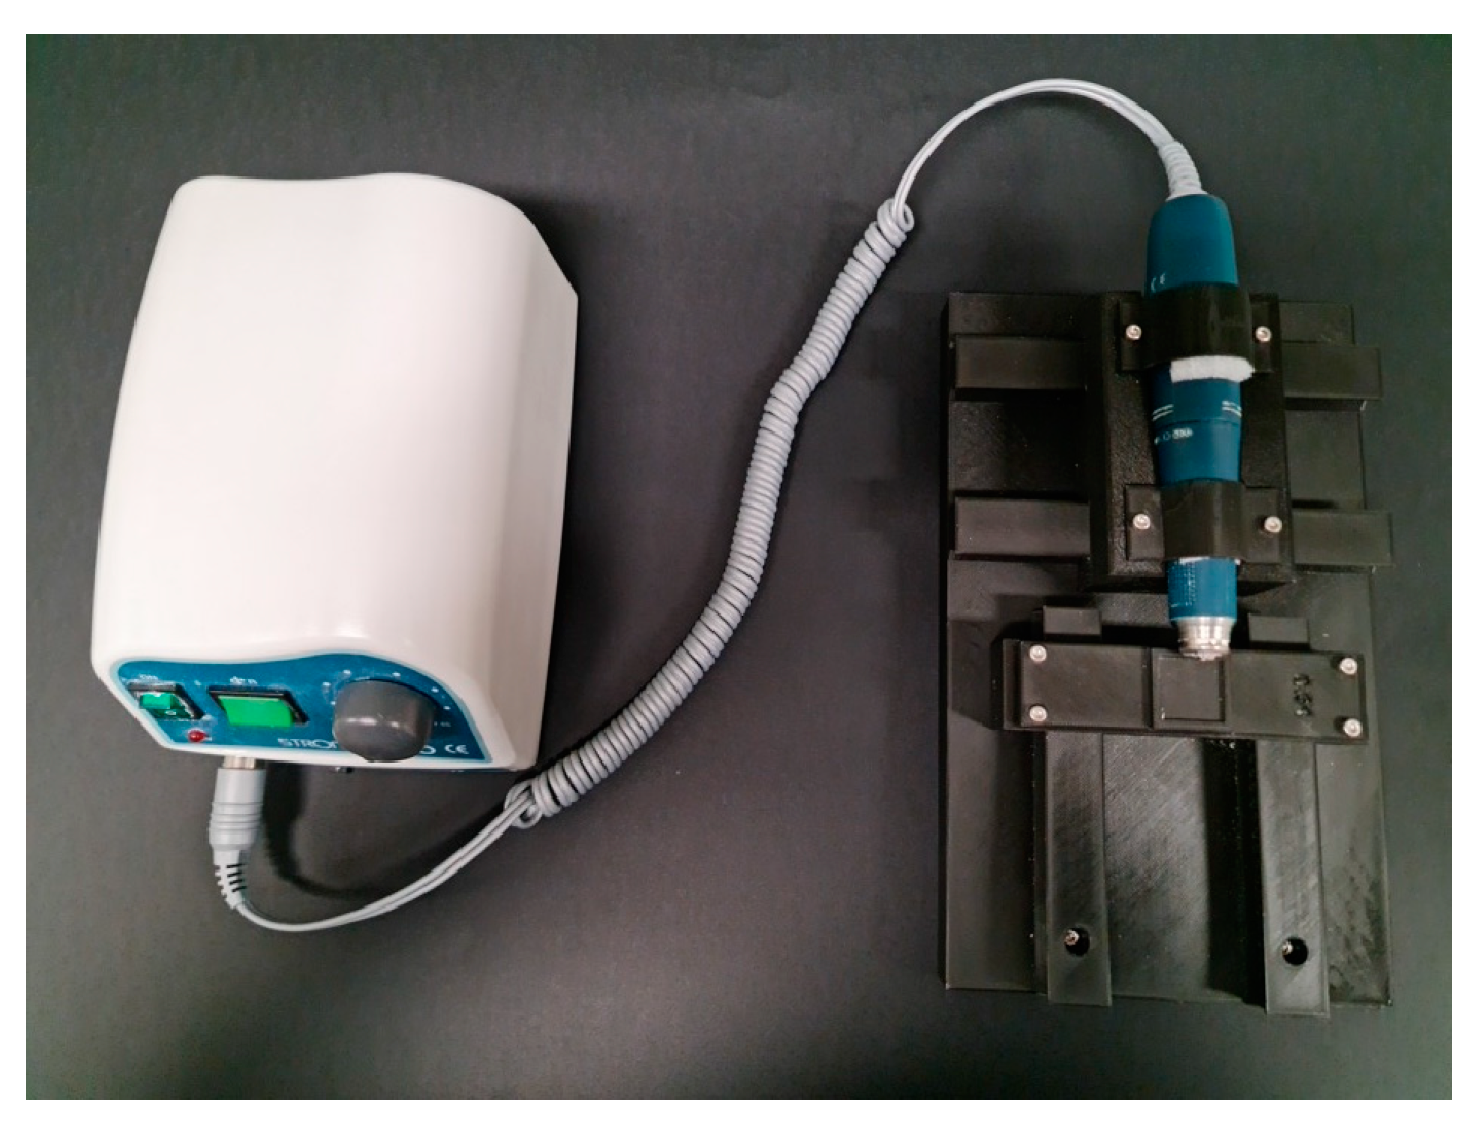
1,
4,
6]. The authors of the present study propose a mechanical device for polishing acrylic resins, regardless of the individual operator’s skills. When assessing surface roughness, this variable should be excluded [
1].
Different surfaces exhibit different tribological properties, with surface roughness performing a major role [
7]. Functional performance is significantly correlated with surface finish, encompassing surface texture, and the mechanical characteristics of the surface [
8,
9]. Manipulating surface roughness affects the mechanism and structure of acrylic resins, not only from the visual aspect but also from a clinical perspective, since it extends to properties such as fatigue life, wear resistance, corrosion resistance, and micro-organism deposit formation or colonization on acrylic resins [
9].
To characterize and classify different surfaces, surface roughness parameters were developed and standardized through the American National Standard Institute (ANSI) and the International Organization for Standardization (ISO) [
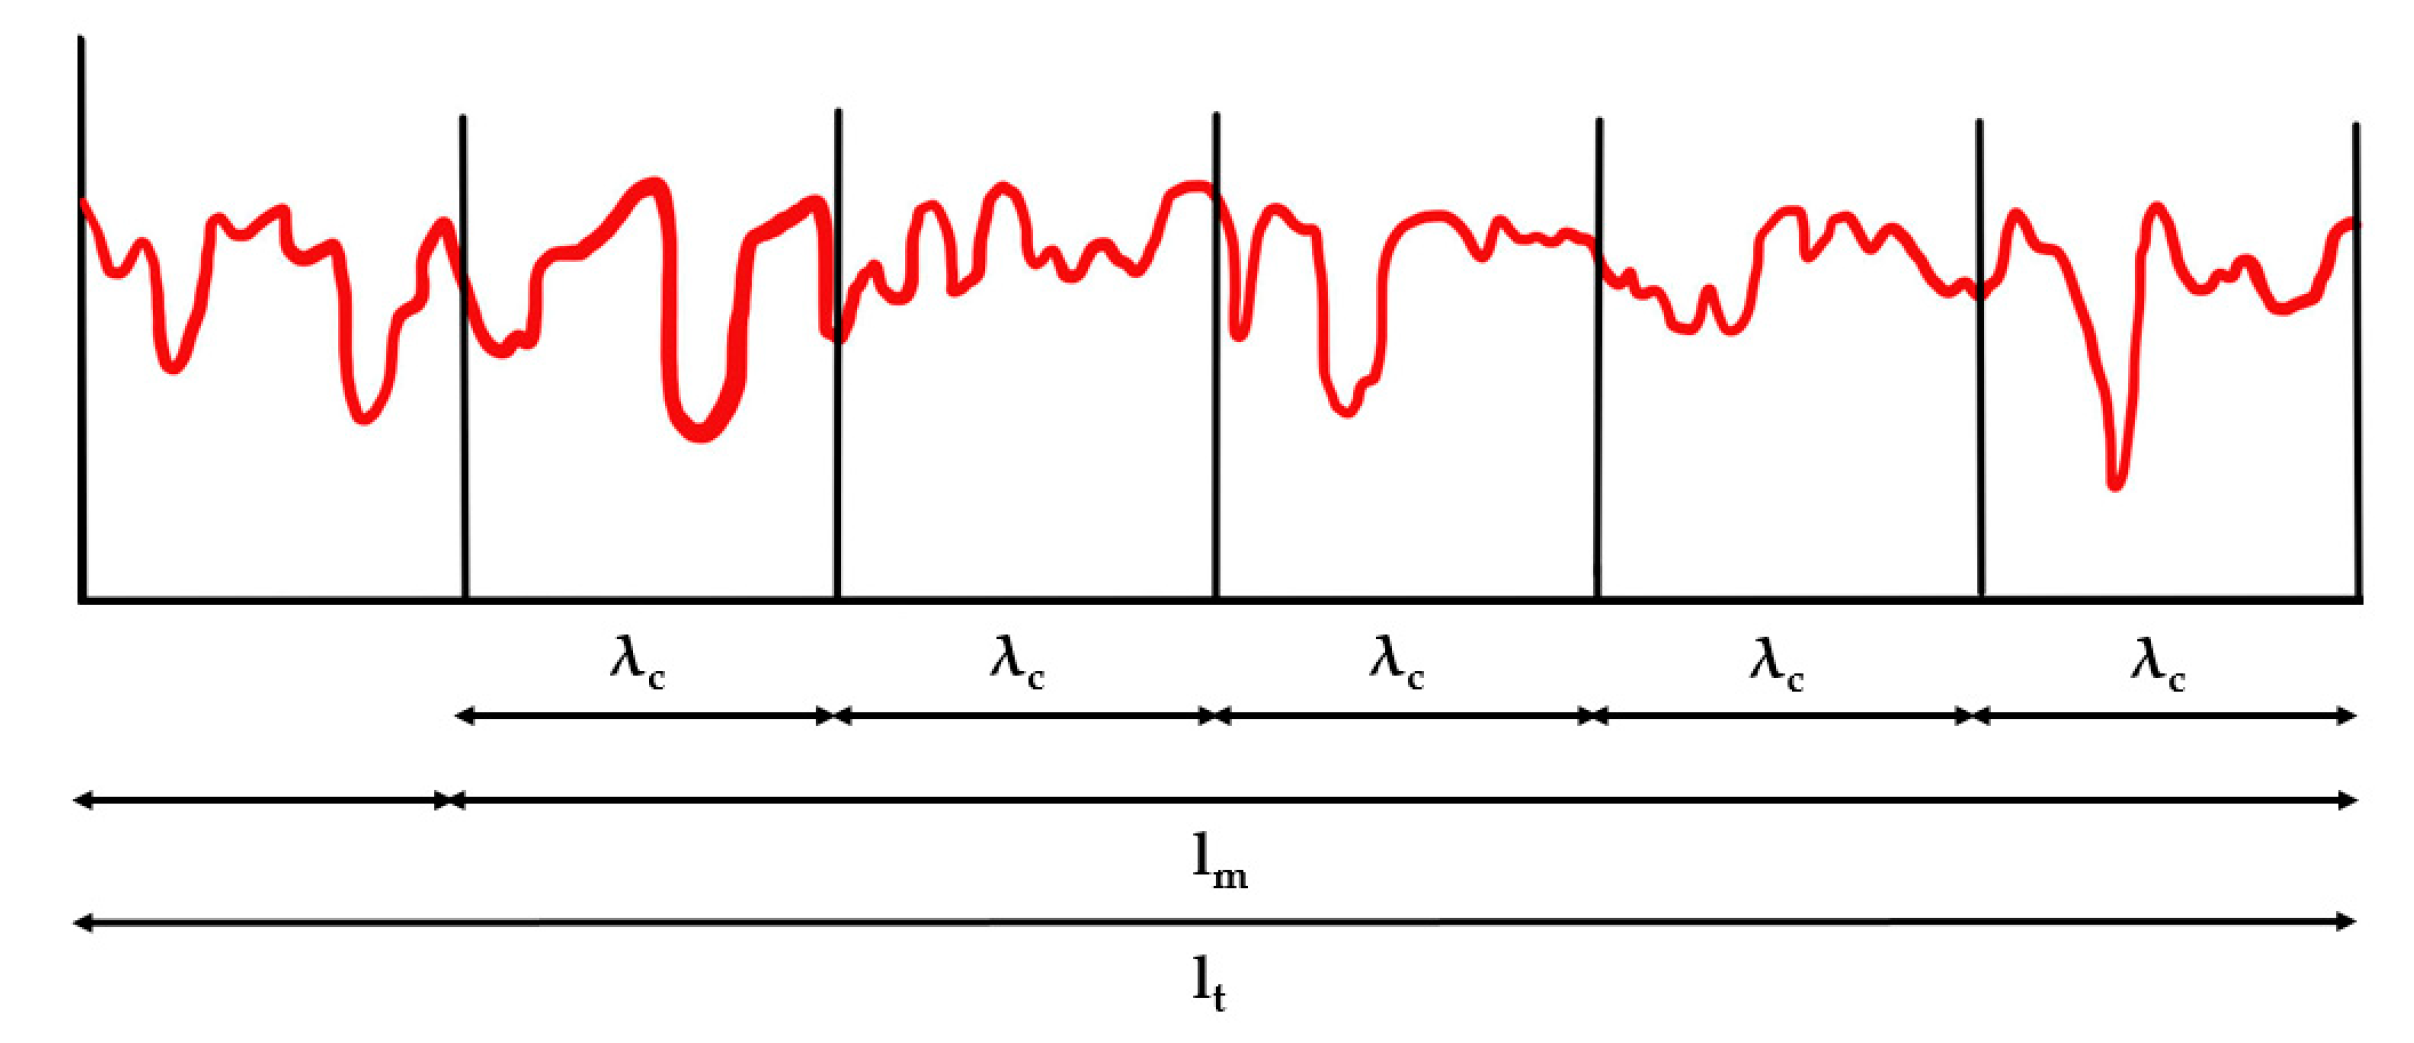
10]. ISO 4288:1996 [
11] has presented rules and procedures to assess surface texture.
In general, profilometers are the most used contact instrument for measuring surface roughness, quantifying it based on the recorded surface height. The operating principle of the device consists of a diamond tip in contact with a surface that performs a straight-line scan, where height variations are converted into electrical signals, referred to as micrometric magnitudes. The measurements obtained only represent two dimensions (2D), considering that the tip only moves vertically and horizontally along a central line [
12,
13]. From a graphical perspective, surface roughness corresponds to variations in height on a surface relative to a reference plane [
10,
14,
15]. However, profile graphs do not provide the quantitative data required to estimate the functional value of a surface [
14,
16]. Such data can be extracted from surface profile graphs by analyzing statistical parameters. These parameters measure the vertical (amplitude), the horizontal deviations (spatial), or a combination of both amplitude and spatial aspects [
12,
13,
14].
This challenge emerges from the need to select suitable surface parameters for monitoring whether the desired functional surface properties are met [
17]. The most common metric to analyze surface roughness is Ra (the arithmetic average of the absolute values of the profile height deviations from the mean line, recorded within the evaluation and length). Although this parameter provides a good overall description of height variations, it does not provide information relative to the shape of the surface and does not provide information about the frequency and regularity of their occurrence [
1,
7,
14]. It also lacks details about wavelengths and is not responsive to minor changes in the profile. For example, different authors [
10,
14] describe the possibility of the same Ra value for a surface with profiles of different shapes and frequencies. A correlation between the cutting parameters and surface finish can be established when the valleys transform into peaks or the opposite. This argument cannot be established using Ra [
9,
16].
A single roughness parameter is insufficient to analyze surface texture or recognize patterns [
17]. The amplitude parameters skewness (Rsk) and kurtosis (Rku) assess surface structure, surface defects, and wear conditions, offering a more comprehensive surface characterization [
10,
14,
16]. Skewness (Rsk) [
7,
14] is an effective parameter to characterize the symmetry level within the distribution function. It is particularly responsive to occasional deep valleys or high peaks, allowing us to differentiate between asymmetrical profiles that might otherwise share the same Ra value [
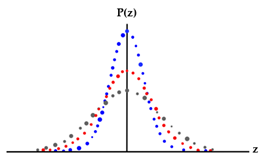
7]. Kurtosis (Rku) quantifies the sharpness of the probability density distribution within the profile by measuring the extent of pointedness or flatness in a distribution function [
7,
14]. The conjunct analysis of Rsk and Rku can precisely determine the surface condition and elucidate whether it exhibits excessively high peaks or valleys [
17].
Considering the constraints highlighted in prior investigations, the present authors propose an analytical comparison between two different polishing methods, manual and mechanical, to establish a different approach for analyzing the surface roughness height parameters in dental acrylic resins.
3. Results
Table 6 shows the mean and standard deviation roughness parameters measured for the unfiltered (Pa) and filtered (Ra) groups.
In terms of Pa, the mechanized technique demonstrated the lowest mean value at 1.49 μm, followed closely by the manual technique at 1.49 μm. The control technique exhibited the highest mean value at 11.11 μm (
Table 6). The ANOVA F-statistic of 90.139, along with the associated
p-value of <0.001, underscores a statistically significant difference in Pa distribution among the three techniques. However, the lack of homogeneity among variances between the samples precluded the identification of significant differences in the post-hoc analysis, as revealed by the Games–Howell test.
Similarly, for Ra, the mechanized technique displayed the lowest mean value at 0.89 μm, followed by the manual technique at 0.52 μm, and the control technique at 2.13 μm. The ANOVA F-statistic of 53.028, coupled with a p-value of <0.001, indicates a statistically significant difference in the Ra distribution among the three techniques. Post hoc analysis further corroborated noteworthy differences in Ra between all three techniques, with both the mechanized and manual techniques surpassing the control technique in performance.
The coefficient of variation (CV) for Pa displayed relatively similar values across the three techniques, ranging from 0.334 for mechanized to 0.377 for control (
Table 7).
By contrast, the CV for Ra exhibited a distinct pattern, with the control group registering a lower value of 0.067 compared to 0.362 for mechanized and 0.323 for manual.
Table 8 and
Table 9 show the filtered and unfiltered groups for skewness (Rsk/Psk) and kurtosis (Rku/Psk), respectively.
The skewness values indicate a leftward tendency for the three categories, aligning with the text’s observation of heightened skewness heterogeneity in this category. The mechanized and manual categories exhibit a larger magnitude value compared to the control. A more pronounced distribution with lower values is found in the manual category (
Table 7).
The kurtosis values indicate a platykurtic distribution (Pku/Rku < 3) for the control category. After the polishing procedures (mechanized and manual), the probability of occurrence of extreme values increased with a distribution tendency for leptokurtic (Pku/Pku > 3). On the other hand, a platykurtic distribution (Pku = 0.819) is found on the profile of kurtosis for manually polished samples (
Table 9).
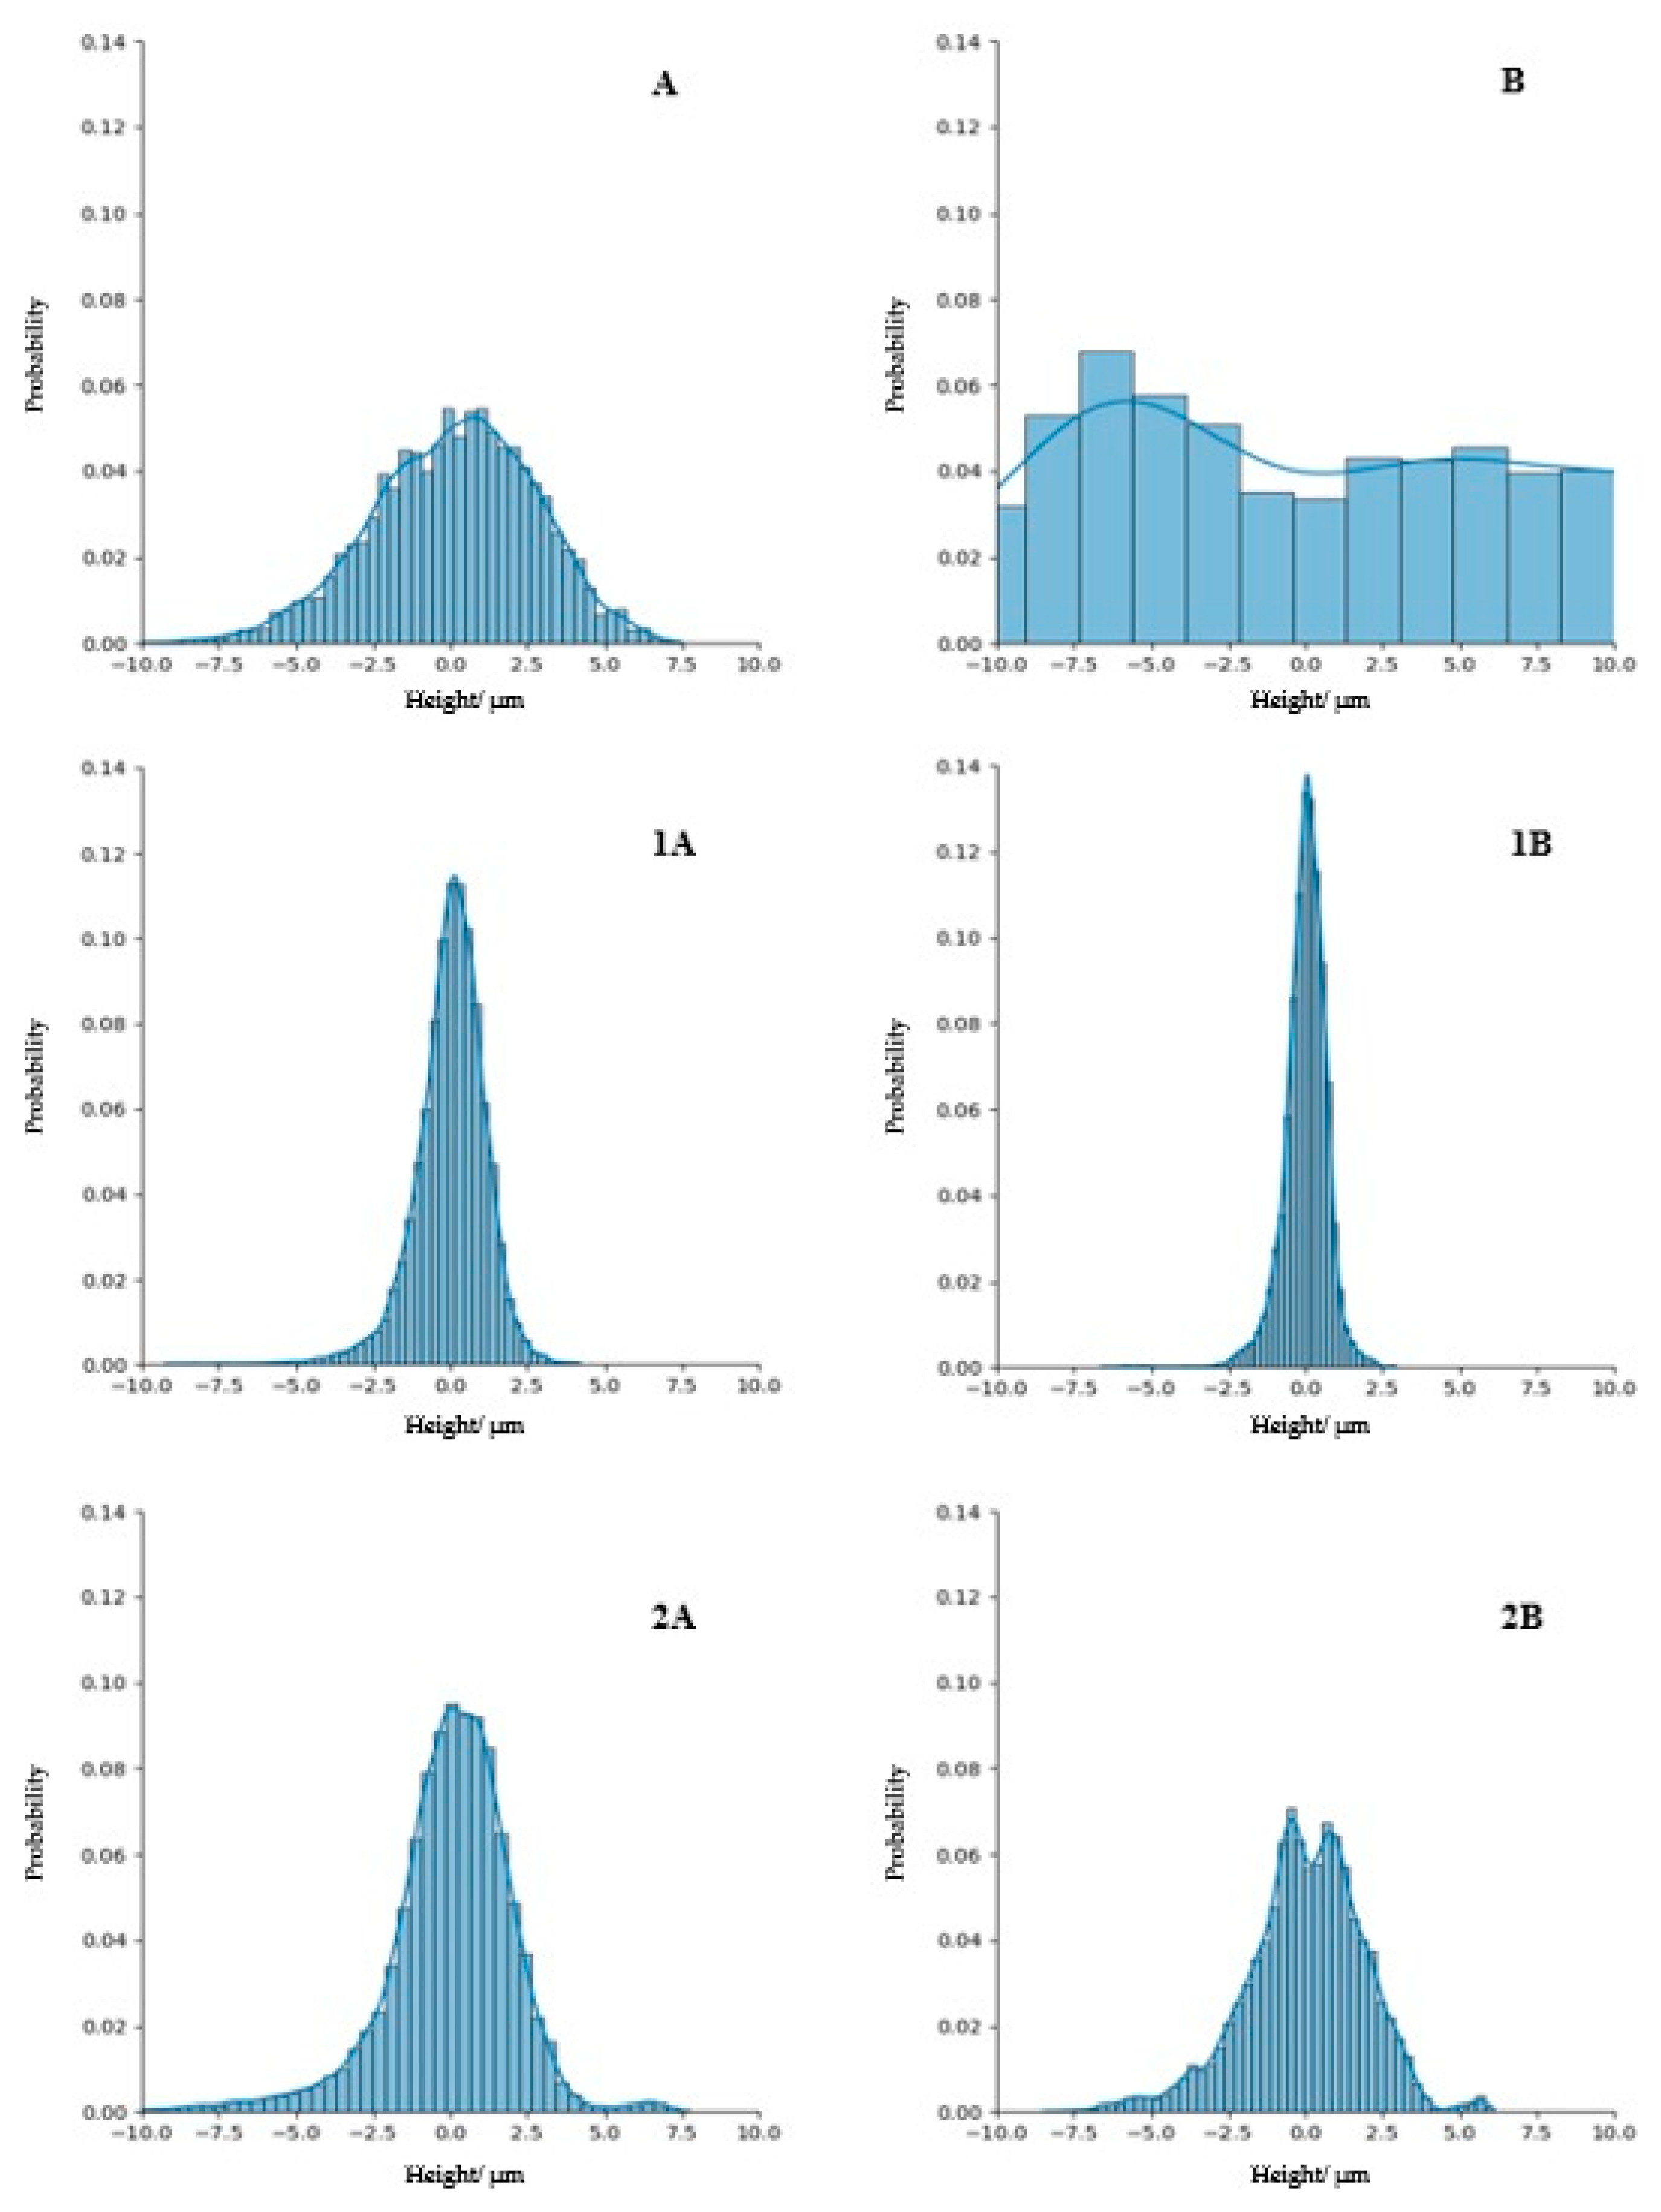
Figure 4 represents the height distribution curve for the filtered and unfiltered profiles: control (A, B), mechanically polished (1A, 1B), and manually polished (2A, 2B).
4. Discussion
PMMA remains the predominant choice for denture base materials. Additives such as polymerization initiators, accelerators, bonding agents, and colorants have been incorporated into the base composition. These additives play a crucial role in shaping the physical and chemical properties of these materials. Among these properties, surface roughness influences the retention of microbial plaque in tissues in contact with the denture base [
1,
6,
19].
The inherent physical characteristics of surface roughness are influenced by factors such as the operator’s manual dexterity, the polishing protocol employed, and the inherent composition of the material itself.
In the literature [
4,
21], there is a lack of knowledge concerning the development of an effective mechanical protocol for polishing acrylic resin surfaces. To overcome this deficiency, a prototype was developed [
1]. The authors proved its validity by determining significant differences between resin groups polished with the prototype (
p = 0.031) [
1]. Nevertheless, only differences in average roughness values (Ra) between the groups were assessed. One limitation was the absence of other height parameters to compare both polishing techniques (mechanized and manual).
Selecting the most suitable and pertinent surface roughness parameters to monitor desired surface properties is challenging. The need to promptly identify a subset of parameters that correlate with surface functionality has been emphasized [
17].
As studied for other materials, the present authors propose the introduction of a primary profile to the analyses of a surface. The primary profile is the most critical aspect of evaluating surface roughness because it directly represents surface details, including peaks and valleys and all height variations [
10,
14,
15]. The main parameter used to characterize the surface roughness of acrylic resins is Ra. It is an optimal value for evaluating the effect of surface polishing and finishing protocols because it considers variations in height and depth roughness [
4,
9,
15,
19,
21]. However, it only addresses the profile’s vertical deviation, failing to offer insights into the slopes, shapes, asperity sizes, or the frequency and regularity of their occurrence [
15,
16]. These features directly define the functionality of a surface in relation to bacterial adhesion, microbial growth, and stress [
17,
22].
Pa, directly extracted from the primary profile, can be considered an extension of Ra to the profile, as shown in
Table 3. Both represent the deviation of each point’s height from the arithmetical mean in different profiles [
23]. From a clinical perspective, the significance of Pa is relevant because it addresses the actual profile of the resin surface. Pa represents the average of unfiltered peak and valley distances from the mean surface profile. The observed differences are comparable to the Ra results of the filtering operation, eliminating the deepest asperities of the surface [
21]. Significant differences were found in three groups (
p < 0.01) for Ra; however, the heterogeneity among samples for Pa makes it difficult to determine these significant differences. Specific parameters, such as skewness and kurtosis, are described to differentiate surfaces with different shapes and the same value for Pa [
14], as described in the values for the mechanical and manual techniques (1.49 ± 0.50 µm) (
Table 5).
Figure 4(1B,2B), show differences between the distribution curves, respectively.
Height distribution is indicated by height probability density, which compares the probability of having a given surface height relative to the centerline for each group, and is shown in
Figure 4. Beyond the average roughness values, skewness (Rsk/Psk) and kurtosis (Rku/Pku) should be considered to provide information about the distribution of irregular heights on the surface [
14,
17]. Previous studies [
4,
21] showed a quasi-normal Gaussian distribution for mechanically polished specimens and a clearly asymmetric distribution for manually polished specimens. By contrast, after the polishing procedure (manual or mechanized), the present authors verified that the height distribution displayed an increase in kurtosis and a leftward skewness tendency, signifying asymmetry in height data and extreme values associated with valleys (
Table 8 and
Table 9). Negative skewness describes a significant number of local maxima below the mean, as compared to a Gaussian distribution [
10,
14,
24], which corresponds to areas with deep valleys and a lack of high peaks. A parameter Sku >3 (leptokurtic) describes surfaces with high peaks and deep valleys. By combining both parameters, a plateau-like smooth surface with deep valleys is observed, similar to the mechanized samples (
Figure 4, 1A and 2A).
In terms of CV, the control group registered the lowest CV value of 0.067 compared to the polishing techniques, exhibiting a height distribution with lower kurtosis (
Table 9) and a skewness near zero (
Table 8).
This finding implies that the control group, directly resulting from the processing technique, produces a more uniform surface finish for Ra than the other two techniques, which increases the dispersion of surface roughness values. The literature also describes that surface height distribution features are contingent on the processing method used [
6]. The ultimate shape of surfaces generated through cumulative processes, such as 3D printed resin, results from the aggregation of numerous random local events, displaying a cumulative effect that follows a Gaussian form (Rsk = 0 and Rku = 3) (
Figure 4) [
10,
14]. Similar values were obtained for Pa, and a distinctive pattern was seen for Ra. Surface roughness parameters revealed an increased CV value for mechanically polished specimens (
Table 7). Measurements of Pa and Ra for manual polished resins reflect not only the intrinsic roughness characteristics of the surface, but also the influence of the operator’s factors, such as the technician’s skill, wrist stability, attention level, and other relevant considerations associated with the manual polishing process. In contrast to the results obtained by Corsalini [
21], mechanized polishing exhibited significantly higher Ra dispersion values. The efficiency of mechanized over manual protocols is questionable since it did not have the most reliable process for value dispersion or the Ra and Pa values obtained in relation to the control group.
Notably, surface polishing influences the features of height data distribution [
7,
24]. Improvements to the polishing device and the present protocol should be implemented. As previously mentioned [
4,
21], a protocol not dependent on the operator is more reliable. Obstacles to clinical usage of the proposed mechanical polishing system include the curvature exhibited on a denture base surface and the shape irregularity of removable prostheses [
21].
This is a preliminary and analytical study. Studies analyzing this specific approach are not described in the literature for prosthetic acrylic resins. However, the integration of skewness and kurtosis has already been studied in other dental materials. For example, the authors performed a functional analysis on the shear bond strength of prosthetic rehabilitations in zirconia ceramics and resorted to these parameters [
22].
Table 10 summarizes the differences between both approaches and clarifies the importance of analyzing additional parameters.
Future studies should emphasize the clinical context of the presented parameters when assessing surface characteristics and applications.
PMMA exhibits relatively low hardness, and its surface is prone to daily wear. Roughness parameters undergo continuous changes over time.
The functional performance of a surface is closely linked to the surface finish, including the surface layer’s texture and mechanical properties. These properties accompany daily use and consequent wear in the oral cavity [
8]. As studied in other materials [
8,
9,
17], skewness and kurtosis in surface roughness are critical parameters for clinically assessing retention and fit, fatigue life, corrosion, resistance, wear resistance, tissue response, aesthetics, cleaning, and maintenance of dental prostheses made of acrylic resins. For example, Das et al. [
17] emphasize the importance of selecting abrasive grain sizes, as they can directly modify surface roughness and functionality, such as susceptibility to microbial contamination or the accumulation of fluid/debris. Grzesik (2016) [
8] exhibited a strong correlation between skewness and kurtosis with the grit size of abrasive tools. With the additional influence of the primary profile, professionals can make informed decisions to optimize the surface finishing process of acrylic resins.


