Article

Influence of Drill Geometry on Adhesion Layer Formation and Tool Wear During Drilling of AFRP/Al7075-T6 Stacked Composites for Aircraft Industry Applications

by
Jebaratnam Joy Mathavan
1,
Choo Then Xiang
2,
Muhammad Hafiz Hassan
2,* and
Gérald Franz
3,*
1
Department of Engineering Technology, Faculty of Technology, University of Jaffna, Kilinochchi Premises, Ariviyal Nagar, Kilinochchi 44000, Sri Lanka
2
School of Mechanical Engineering, Universiti Sains Malaysia, Nibong Tebal 14300, Malaysia
3
Laboratoire des Technologies Innovantes, UR UPJV 3899, Avenue des Facultés, Le Bailly, 80025 Amiens, France
*
Authors to whom correspondence should be addressed.
J. Compos. Sci. 2025, 9(12), 658; https://doi.org/10.3390/jcs9120658 (registering DOI)
Submission received: 1 November 2025 / Revised: 21 November 2025 / Accepted: 26 November 2025 / Published: 1 December 2025
(This article belongs to the Section Composites Manufacturing and Processing)

Abstract

Aramid Fiber Reinforced Plastic (AFRP) and aluminum alloy Al7075-T6 are widely used in the aerospace industry because they offer a high strength-to-weight ratio and reliable structural performance. However, drilling through stacked AFRP and Al7075-T6 materials in a single operation presents considerable challenges due to the differences in their mechanical and thermal properties. In this study, three types of customized twist drill bits were designed and fabricated to evaluate their effectiveness in single-shot drilling of these stacked materials. The drill geometries included the W-point design, the tapered web design, and the burnishing design. Each drill bit was tested using its own optimized drilling parameters to produce a total of one hundred holes. The aim was to determine which drill geometry provided the best overall performance in terms of tool wear and hole quality. After the drilling experiments, the tool tips were examined using a Scanning Electron Microscope (SEM) to observe wear characteristics and analyze elemental composition. The analysis revealed that aluminum adhered to the cutting lips of all drill bits. The percentage of adhesion layer, known as percentage of adhesion layer (PAL), was calculated to assess the severity of material adhesion. In addition, the morphology of the produced chips and dust was analyzed to support the PAL results. The findings showed that the drill bit with the lowest PAL value demonstrated superior wear resistance, a longer tool life, and the ability to produce holes of higher quality when drilling AFRP and Al7075-T6 stacked materials.

1. Introduction

The single shot drilling of Aramid Fiber Reinforced Plastic (AFRP) and Al7075-T6 materials highlights the challenges of drilling dissimilar materials, where the hardness disparity and adhesive bonding characteristics require precise parameter optimization to maintain tool life and hole quality. Drilling holes poses significant challenges due to the wear experienced by cutting tools, which must be managed to prevent damage to both the tools and the workpieces. The heterogeneous [1] and anisotropic [2] nature of fiber-reinforced composites further aggravate tool wear, making the drilling process more complex and often leading to delamination issues [3]. Therefore, an in-depth examination of tool wear is essential to evaluate factors such as tool lifespan, robustness, and cutting efficiency.
An in-depth assessment of tool wear behavior under different drilling conditions provides valuable insights into tool lifespan, robustness, and cutting efficiency. The four key tool geometry variables that affect the cutting mechanism are the point angle, helix angle, primary clearance angle, and chisel edge angle. SenthilKumar et al. [4] reported that wear concentrated at the chisel edge notably increases thrust force, thereby reducing tool robustness and accelerating wear progression. Fernández-Pérez et al. [5], in their investigation of Ti/CFRP/Ti stack drilling, used SEM analysis to observe brittle fractures extending from the cutting edge toward the tool tip. Their findings indicated that delamination and subsequent loss of the diamond coating shortened the effective cutting-edge length, inducing thermal stresses due to mismatched thermal expansion coefficients between the diamond layer and carbide substrate. Such thermal–mechanical interactions were found to degrade the cutting efficiency and shorten the tool lifespan. Furthermore, the reduction in built-up edge (BUE) formation with increasing cutting speed, as noted by previous studies [6], enhances cutting stability by minimizing material adhesion. At elevated temperatures, the softened BUE weakens and detaches from the cutting edge, reducing cutting resistance but simultaneously exposing the tool to abrasive wear and micro-fracturing [7]. These wear mechanisms directly influence surface integrity and hole quality, which are critical parameters defining drilling efficiency. Additionally, Bakkal et al. [8] analyzed chip morphology during the drilling of bulk metallic glass and identified six distinct chip forms, linking long ribbon-like chips to tool failure due to chip entanglement and poor evacuation. Such findings highlight that tool wear mechanisms, combined with drill geometry and chip evacuation behavior, collectively determine tool robustness, operational lifespan, and overall cutting performance [4,5,6,7,8].
This paper presents an experimental investigation aimed at identifying the most suitable drill bit design that delivers the best performance among three customized geometries developed for drilling AFRP/Al7075-T6 stacked materials. The variations in drill geometry were intended to improve chip evacuation efficiency, minimize the adhesion layer formation on the cutting edges, and enhance overall hole quality. To evaluate the performance of each drill bit, Scanning Electron Microscopy (SEM) was used to examine the tool tips, while chip and dust morphology analyses were conducted to assess material removal characteristics. The percentage of adhesion layer (PAL) was calculated to quantitatively assess tool wear and identify the drill bit exhibiting the highest wear resistance and most stable drilling performance, characterized by consistent hole quality and reduced risk of edge chipping.
Although extensive work has explored single shot drilling of CFRP/Al7075-T6 and CFRP/Ti6Al4V stack ups, especially in relation to machining parameters, tool geometry, and coatings, research on single shot drilling of AFRP/Al7075-T6 remains limited within the aerospace sector. This gap is significant given the growing adoption of aramid fibre composites in lightweight structural applications. Accordingly, this study aims to address this deficiency by proposing and evaluating a customized tool geometry specifically designed for efficiency, and damage controlled single shot drilling of AFRP/Al7075-T6 aerospace stack ups. In addition, this study investigates the wear mechanisms associated with adhesion layer formation during drilling and evaluates the influence of different drill geometries on chip formation, which in turn affects the resulting surface roughness. The combined effects of tool wear, chip behaviour, and drill design are comprehensively examined in this paper.

2. Materials and Methods

2.1. Preparation of Materials and Tools

Figure 1a illustrates three distinct drill bit geometries named w-point, tapered web and burnishing, specifically designed to improve drilling performance for stacked materials [3,4]. In this study, 6.35 mm tungsten carbide rods were utilized as the base material for fabricating these tools due to their remarkable hardness and high melting point [9]. These properties enable the tools to withstand the intense heat and friction generated during the drilling process, effectively minimizing wear. The tungsten carbide rods used in this research have a density of 14.35 g/cm3 and hardness ranging from 70 to 90 HRA. They comprise approximately 93.36% tungsten carbide (WC) and 6.64% cobalt (Co) which provide high strength and wear resistance, making them suitable for a wide range of drilling applications. These drill bits feature four key geometries: the helix angle, primary clearance angle, chisel edge angle, and point angle, as detailed in Table 1.
The materials drilled in this study are aramid fiber-reinforced plastic (AFRP) and aluminum alloy (Al7075-T6), as shown in Figure 1b. The AFRP laminate used is HexPly® F155, manufactured by Hexcel Corporation in Stamford, CT, USA, a specialized grade of Kevlar® aramid fiber-reinforced polymer commonly applied in aircraft structural components. It consists of seven plies with the lay-up sequence [90/05/90], providing high strength and dimensional stability. The fiber volume fraction is 65%, determined using a standard burn-off test. The laminate is produced using an aerospace-grade epoxy resin system (e.g., Hexcel F155 epoxy matrix), which offers high temperature resistance and durability suitable for aviation applications. The Al7075-T6 alloy comprises approximately 90 to 91.9% aluminum (Al), 5.1 to 6.1% zinc (Zn), and 2.1 to 2.9% magnesium (Mg), with trace amounts of other elements [10]. The AFRP composite panel dimensions are 185 mm × 85 mm × 2.60 mm, while the Al7075-T6 panel measures 185 mm × 85 mm × 3.30 mm. These materials were bonded using an epoxy adhesive at the adhesive area, but no adhesive was applied in the drilling zone to avoid its impact. Adhesives in the drilling area can increase friction, leading to higher thrust forces, faster tool wear, and reduced hole quality.

2.2. Drilling of AFRP/Al7075-T6

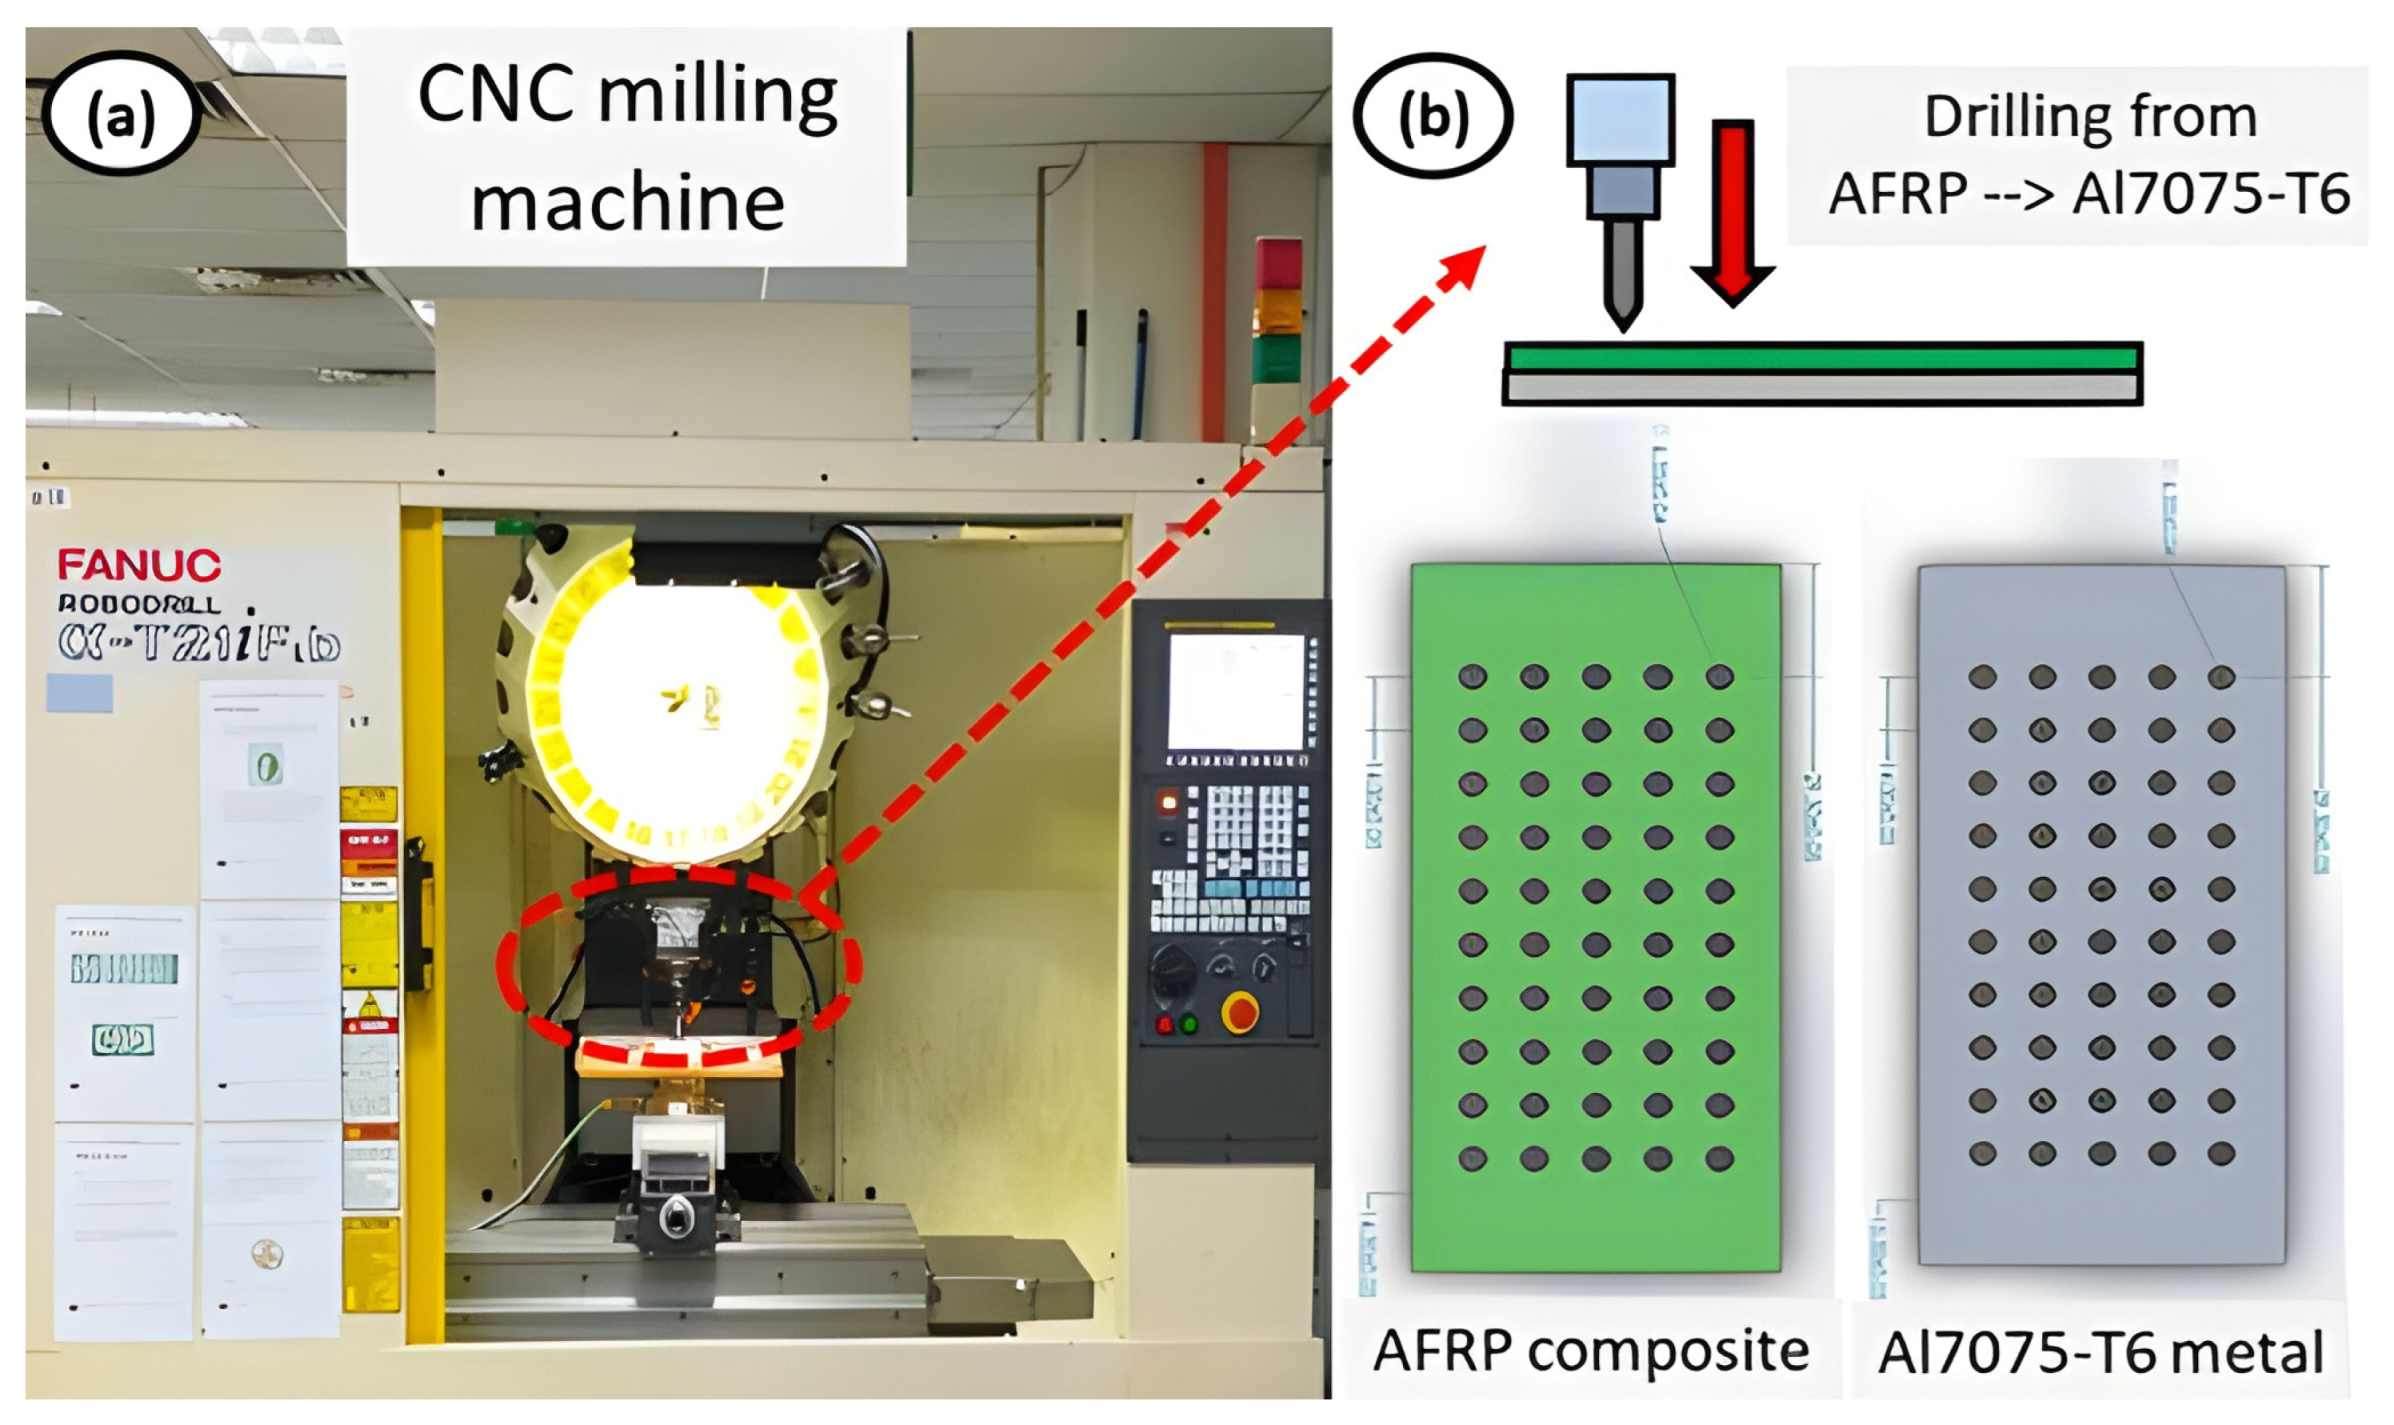
Figure 2a shows the CNC machine used for the drilling experiments, along with the setup of the work piece for the operation. The stacked panels were placed in a fixture and securely clamped during the entire drilling process. The AFRP composite panel was placed on the upper surface, with the Al7075-T6 metal alloy plate positioned beneath. The drilling process started at the AFRP layer and proceeded through to the Al7075-T6 layer as shown in Figure 2b. This sequence is often preferred in practice because it tends to reduce delamination damage in the hole exit because of the supportive role of the bottom metal panel. In addition, the CAD model illustrates the layout of the drilled holes on the panels, with each stacked panel containing 50 holes. The hole diameter is 6.35 mm with a tolerance of ±0.04 mm, while the center-to-center distance between holes is 14 mm with a tolerance of ±0.05 mm. Accurate alignment of the initial hole position was ensured to guarantee precise hole placement. During this drilling operation, each drill bit was used to drill 100 holes, resulting in the drilling of two stacked panels. In total, six stacked panels were drilled. The optimal drilling parameters for AFRP/Al7075-T6 stacked material drilling are a spindle speed of 3958 rev/min and a feed rate of 0.07 mm/rev for the w-point drill, 6000 rev/min and a feed rate of 0.05 mm/rev for the tapered web drill bit, and 2687 rev/min with a feed rate of 0.05 mm/rev for the burnishing drill, respectively [11].

2.3. Tool Wear Analysis

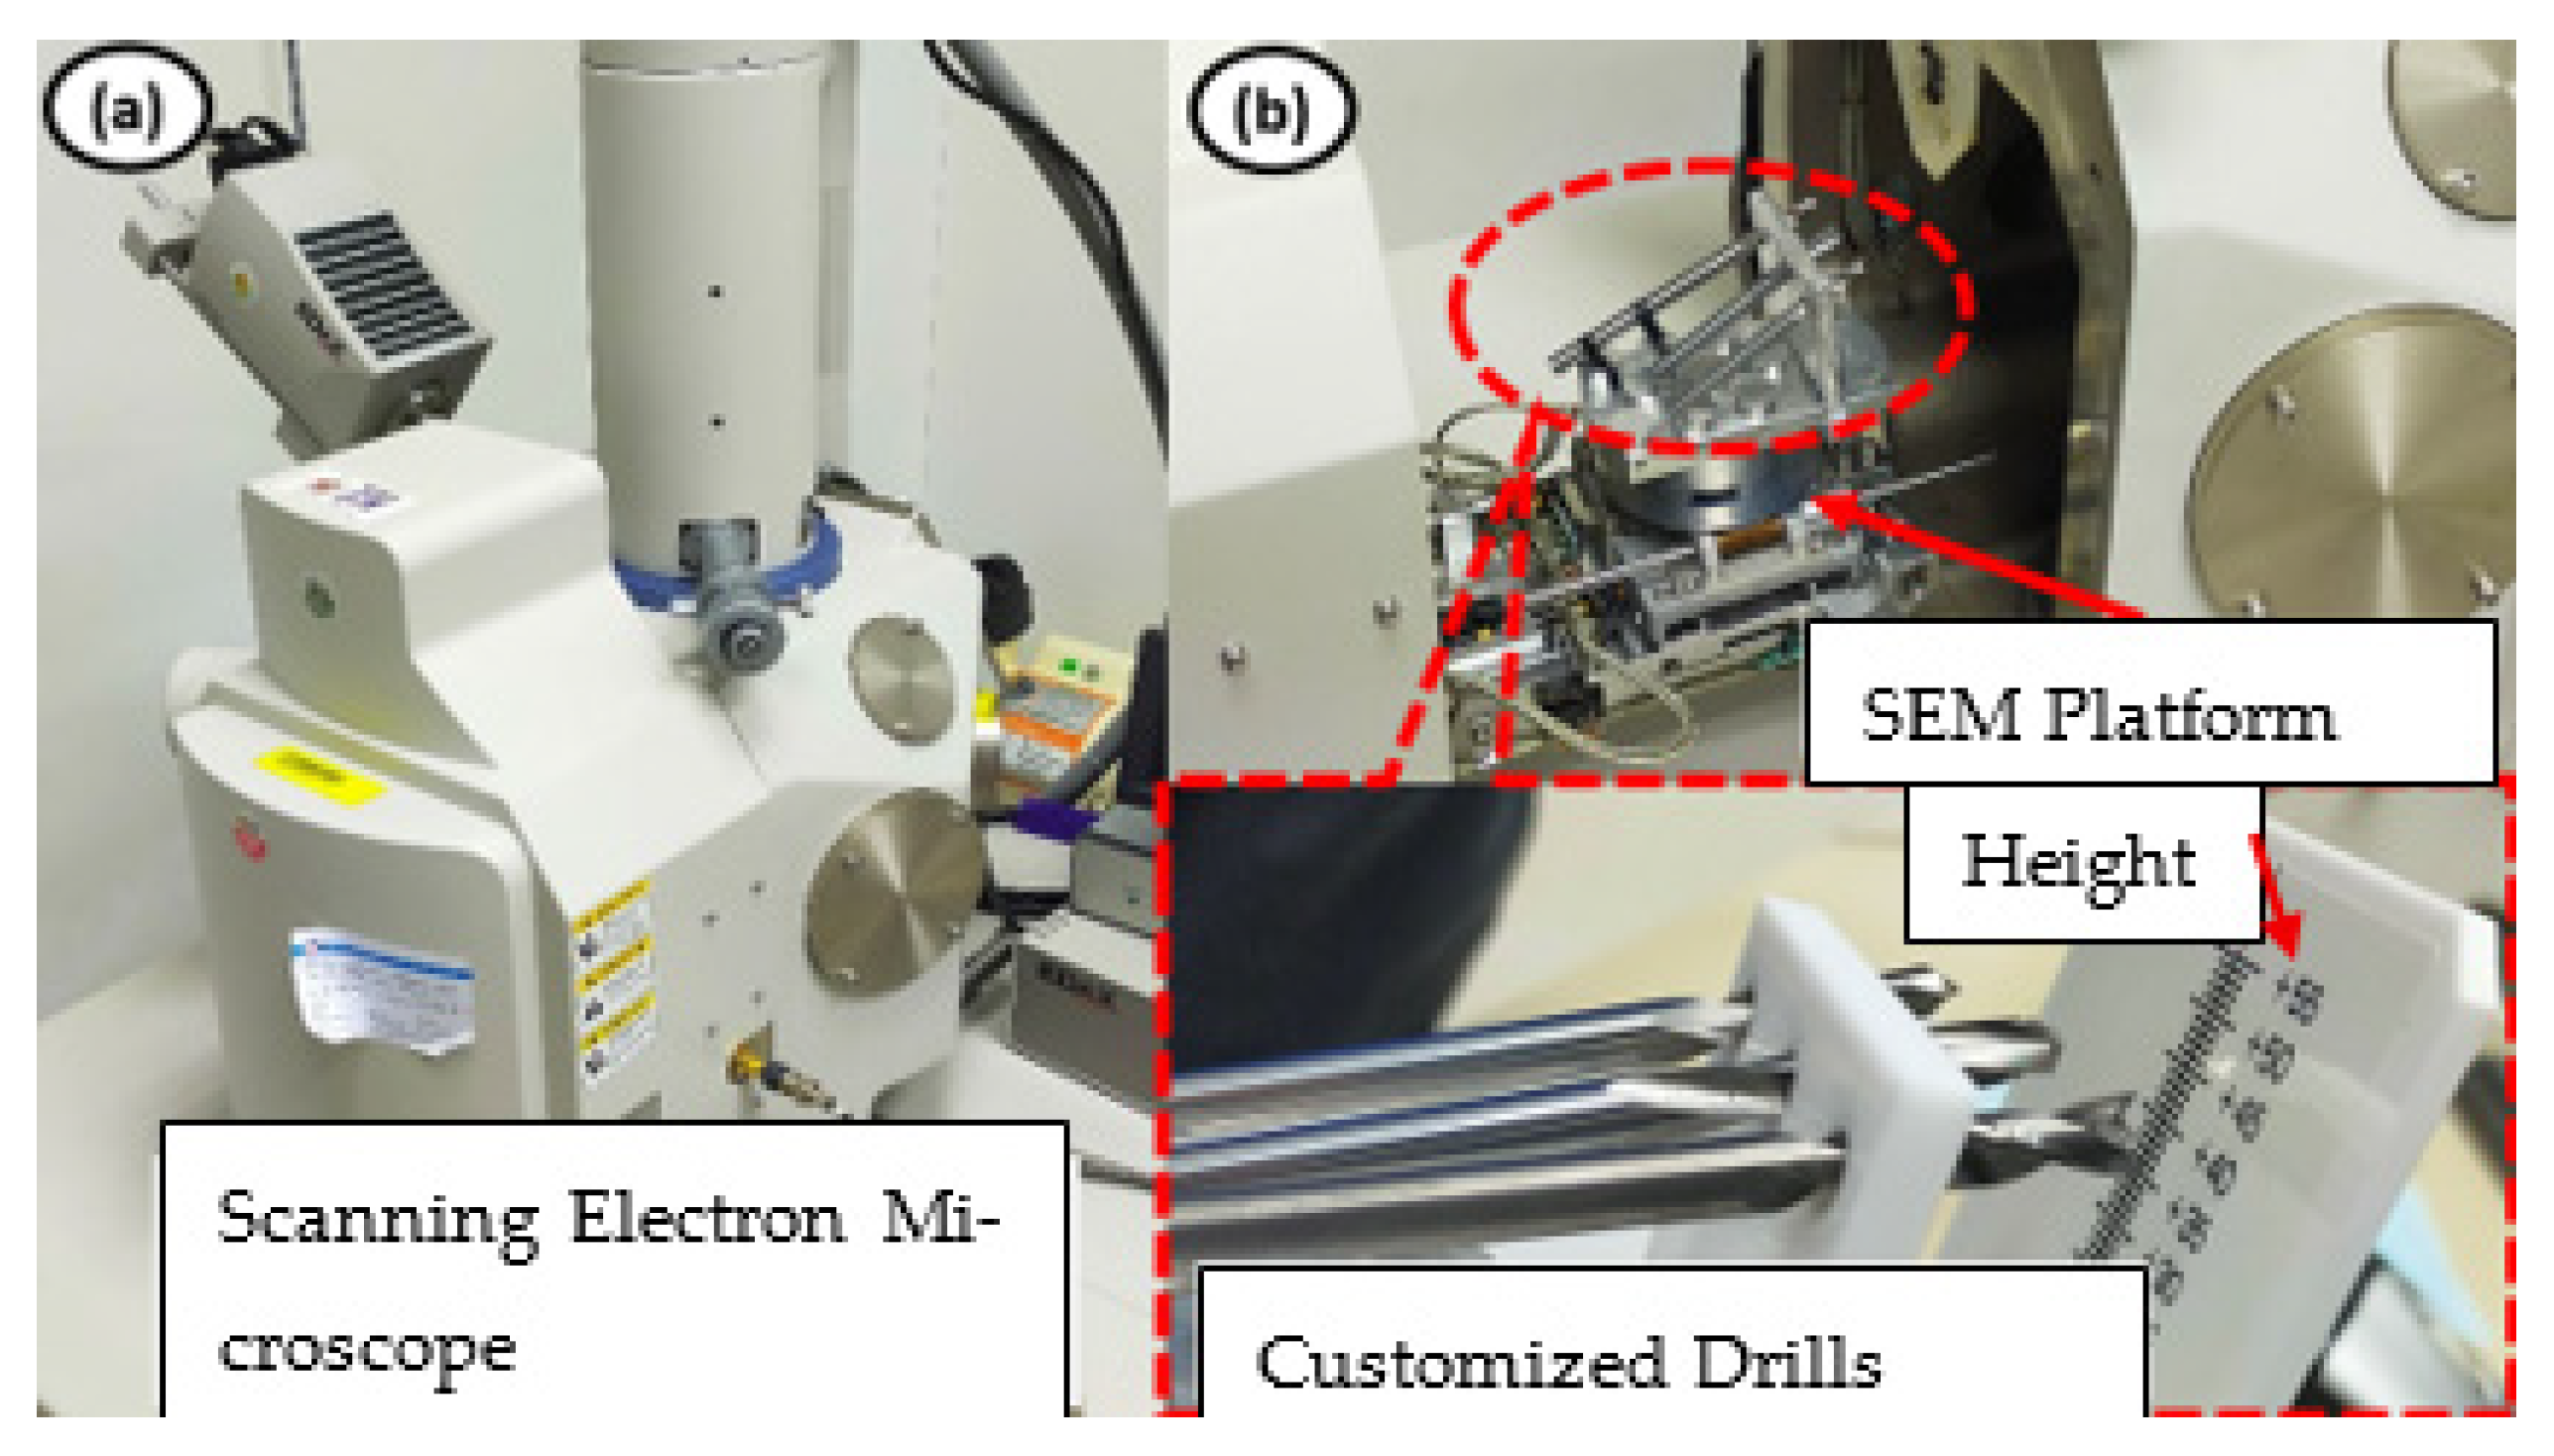
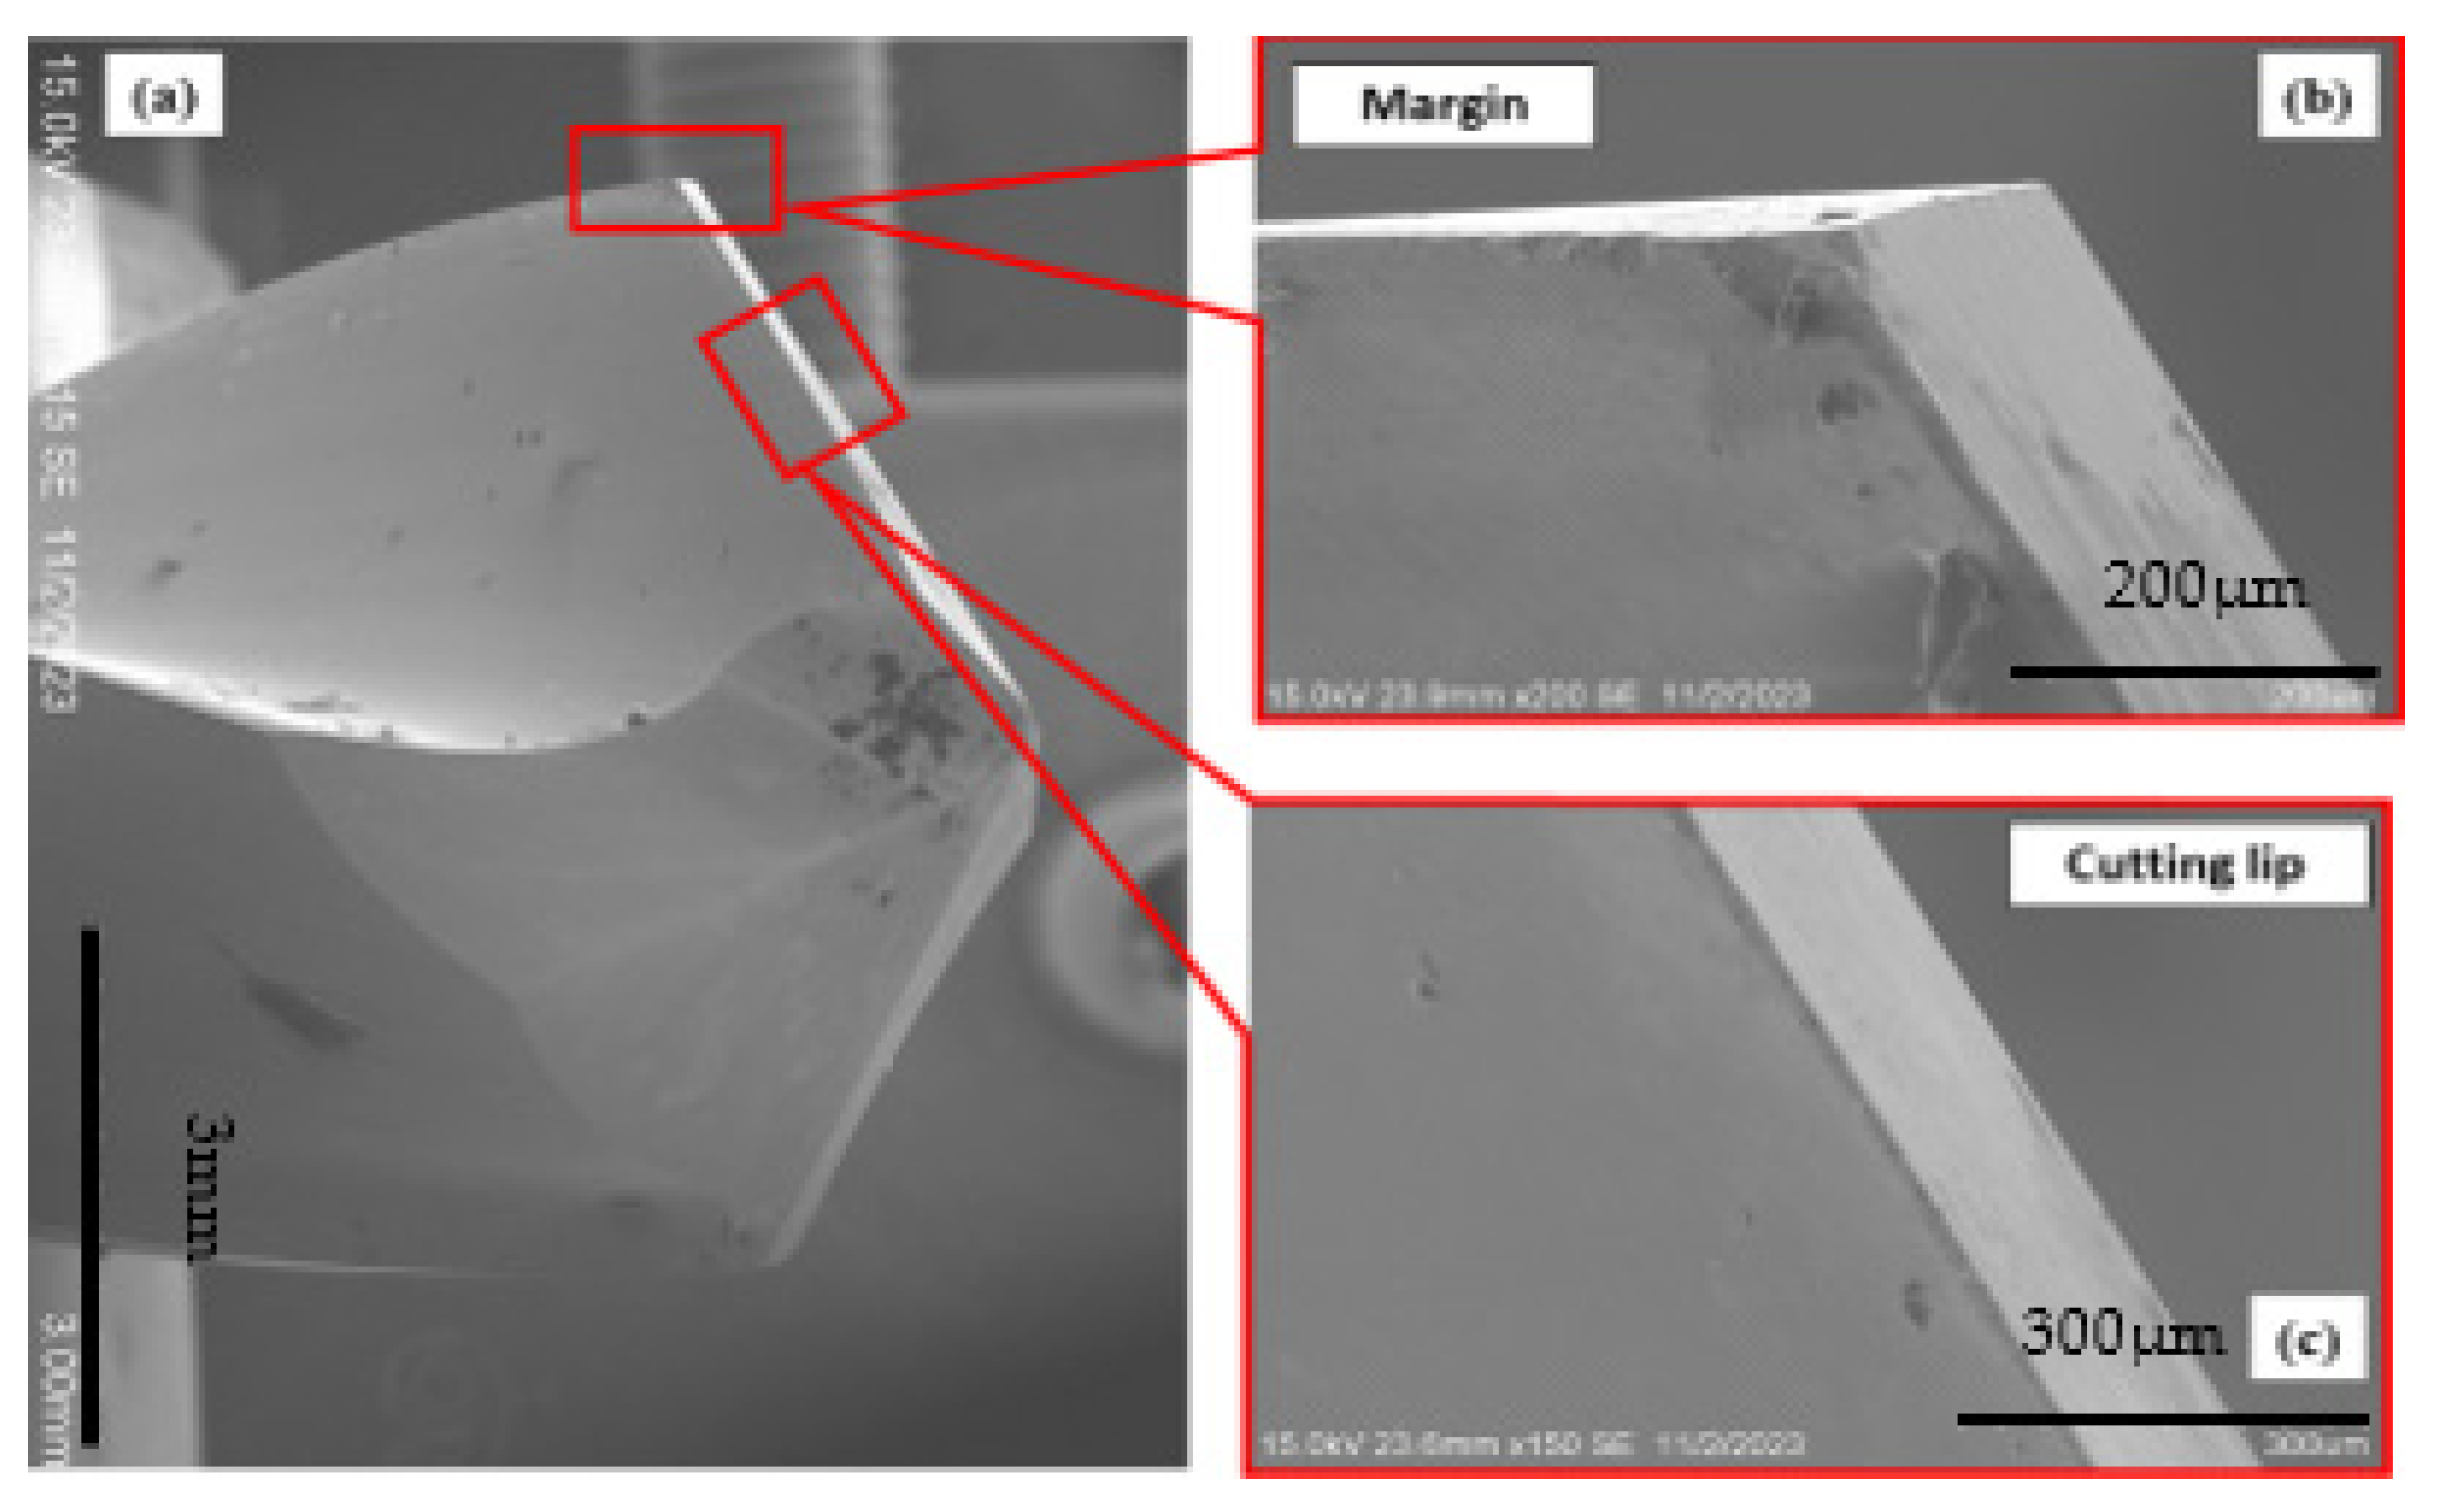
In this section, a scanning electron microscope (SEM) as shown in Figure 3a is used to observe the surface of the tool tip after drilling of stacked materials. The customized drills are fixed onto the jig to ensure stability and are placed onto the SEM platform as shown in Figure 3b. Using SEM observation as shown in Figure 4, the margin and cutting lips of the tool tip were examined and the surface of the tool after drilling was analysed using Energy Dispersive X-ray (EDX) inside the SEM to assess the elemental composition of the tool tip after drilling the AFRP/Al7075-T6 stacked materials.
To assess the extent of adhesion layer development on the drill bit’s margin and cutting lips, as illustrated in Figure 4, the Percentage of Adhesion Layer (PAL) [12] metric was introduced. The corresponding values were determined using Equation (1).
P A L ,   % = w a d w a c w f w a c × 100
As shown in the equation, PAL represents the Percentage of Adhesion Layer, w a d denotes the weight of the drill bit after drilling, w a c indicates its weight after cleaning, and w f corresponds to the weight of a fresh drill bit [11]. The weight measurements were taken after cleaning the tool using a wire brush and employing an etching process to remove any adhesion present on the cutting lips.
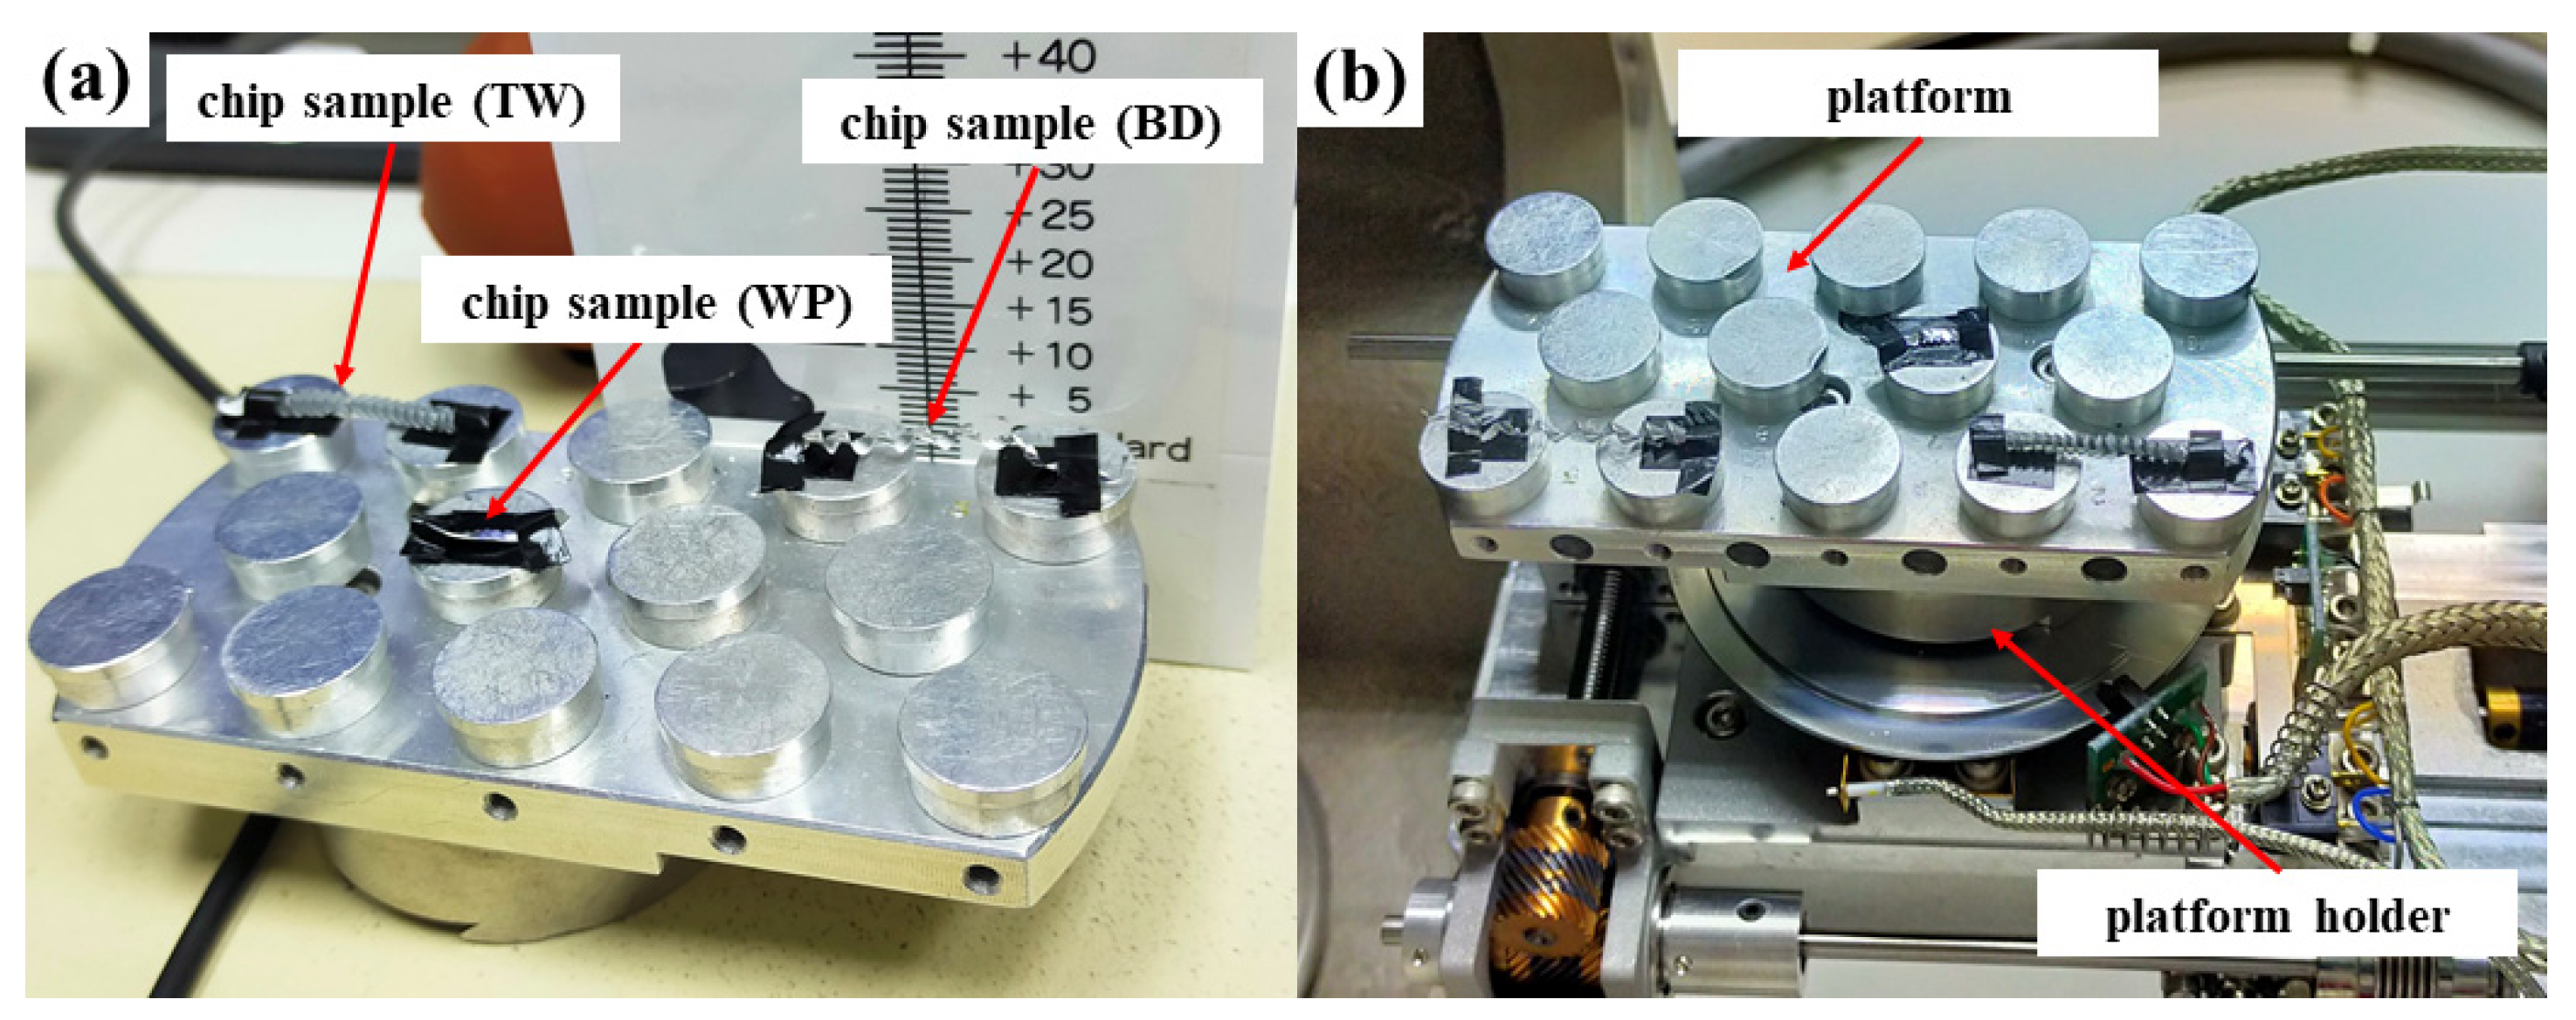
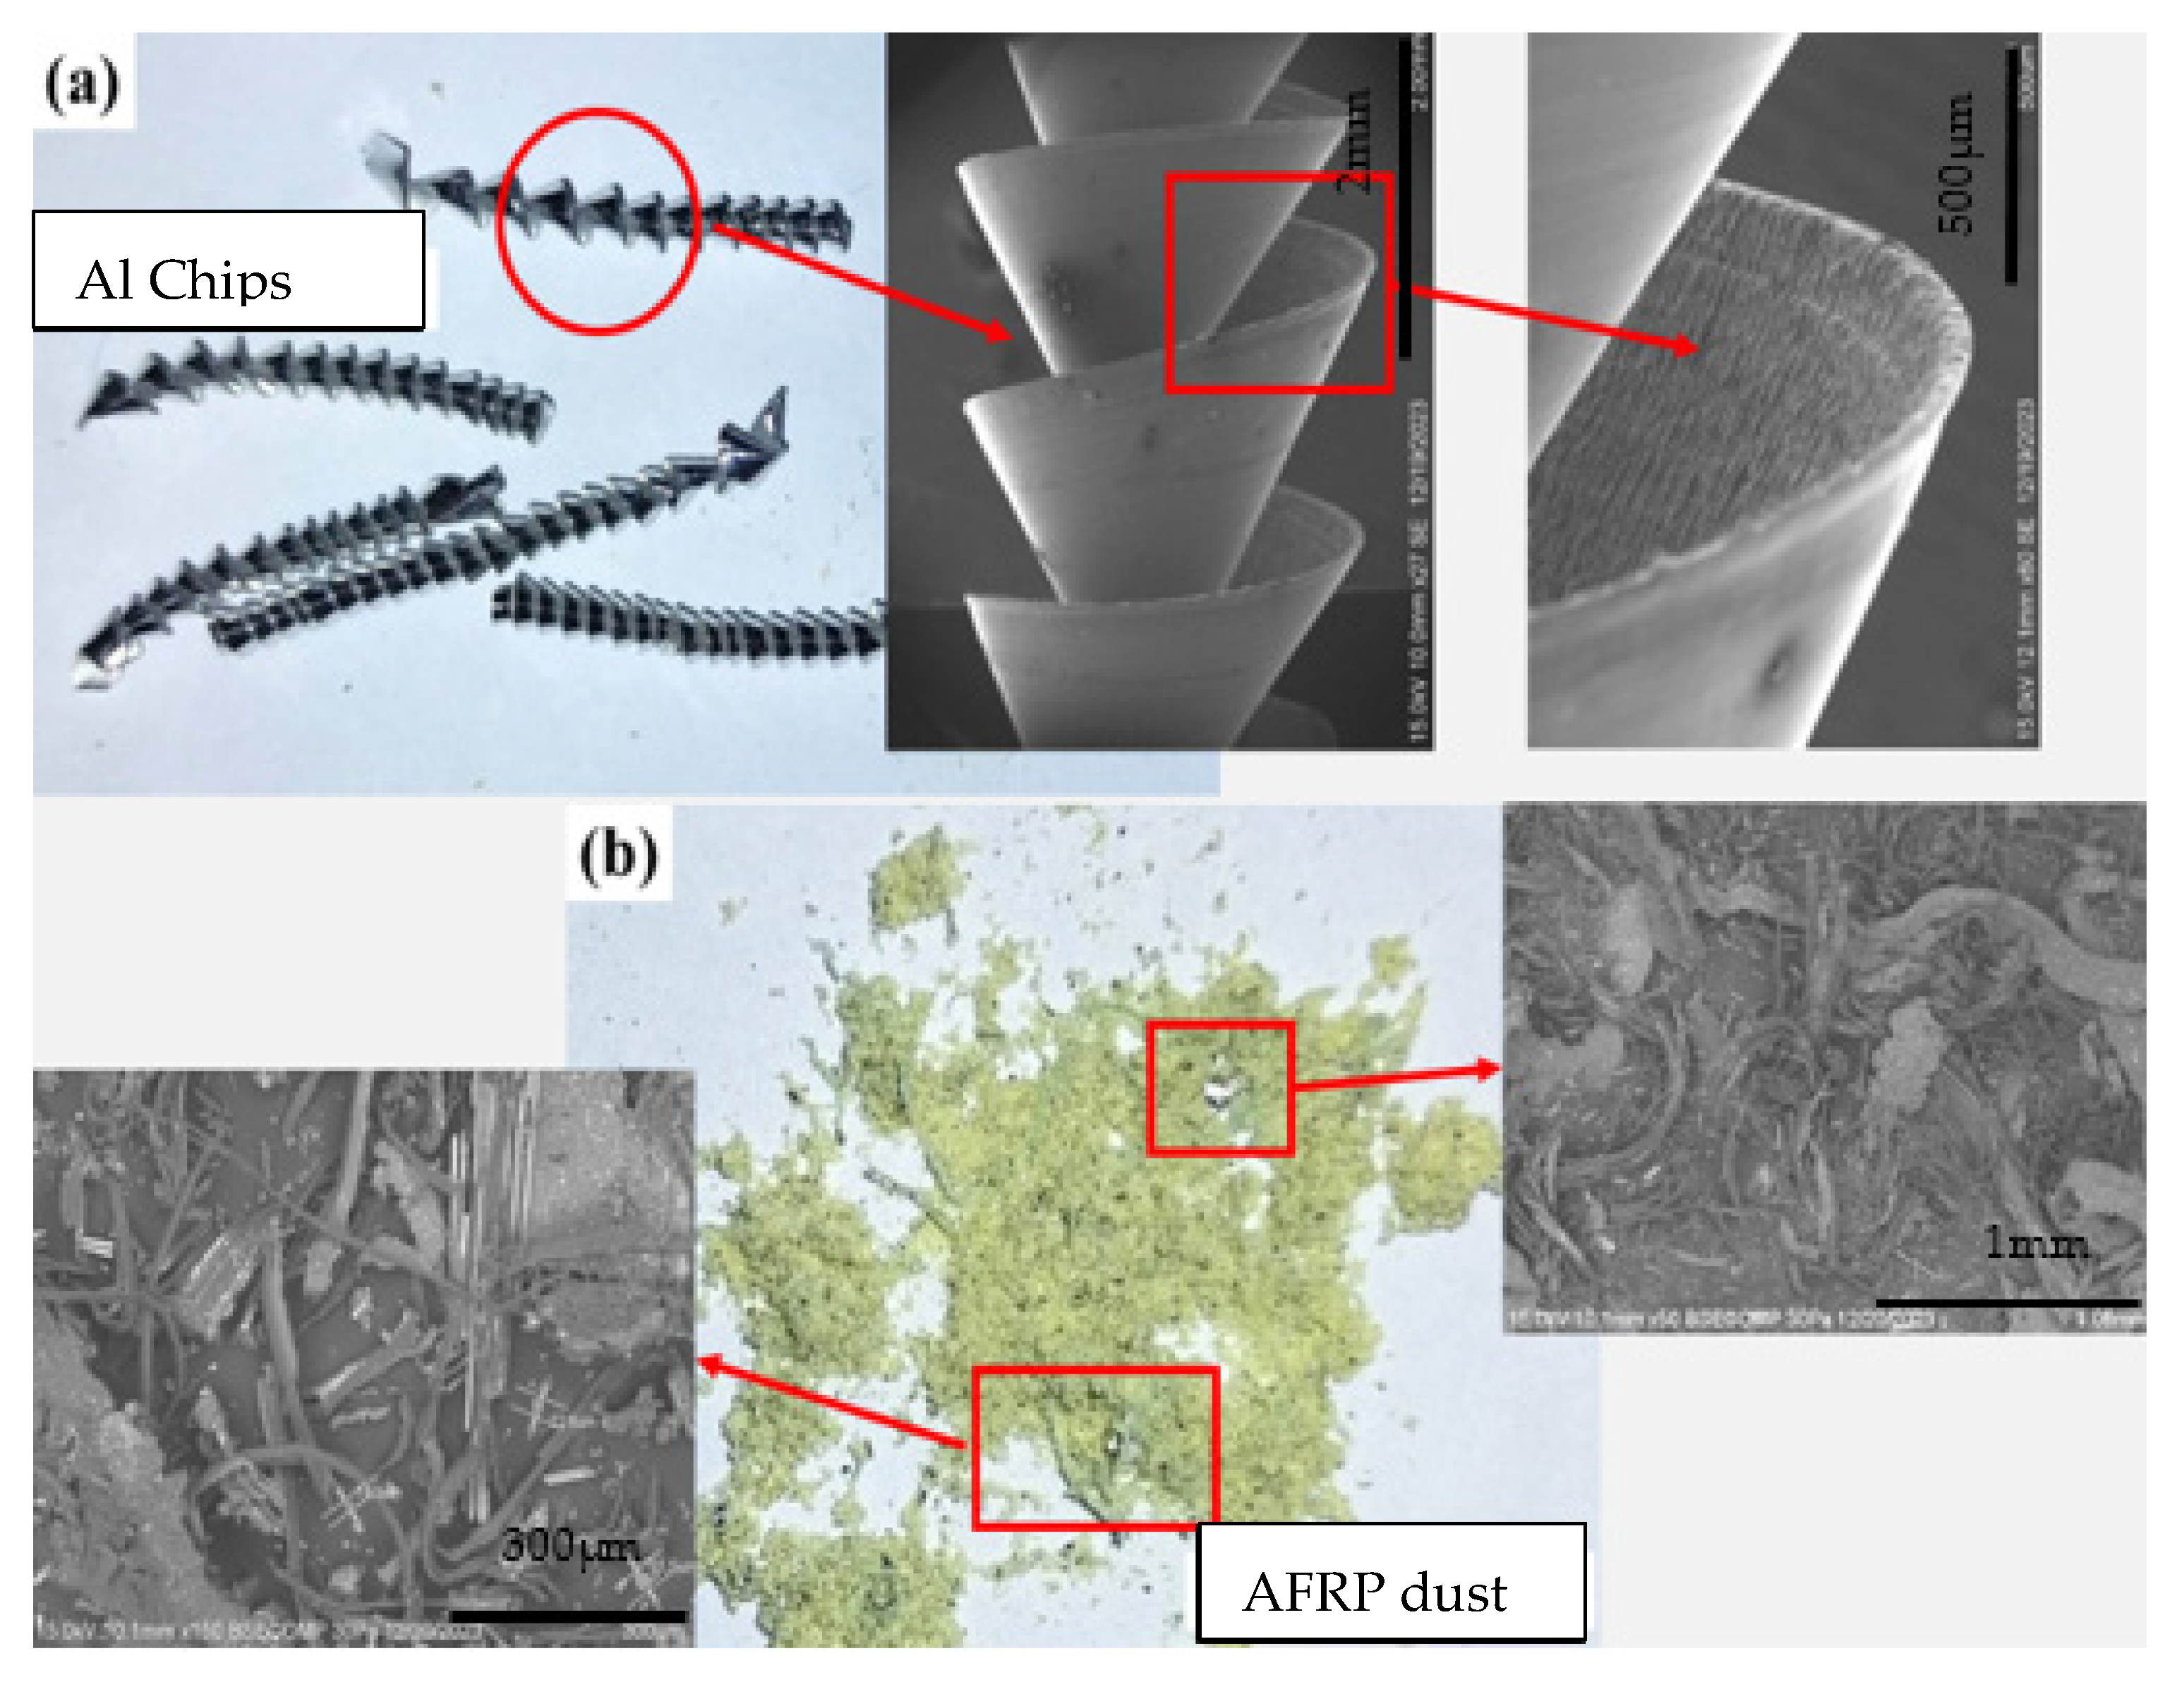
During the drilling of stacked materials, the generation of chips and dust serves as a vital measure for evaluating the efficiency of tool geometry and drilling parameters. Ensuring better chip and dust formation is crucial when performing single shot drilling process on AFRP/Al7075-T6 stack panels. Improved chip and dust formation help to enhance the hole quality by minimizing the occurrence of long aluminum chips and large dust particles that could potentially damage the AFRP hole surface [8]. This can be accomplished by drilling the stacked material using an optimized combination of spindle speed and feed rate. Monitoring the formation of chips and dust provides a detailed understanding of their characteristics, assisting in identifying the most suitable drilling parameters and tool designs. Figure 5a,b illustrates the preparation of chips for SEM analysis. The findings on chip morphology and dust particle characteristics observed during drilling are presented in Figure 6, which provides an in-depth review of these features using microscopic techniques.

2.4. Measuring Hole Surface Roughness

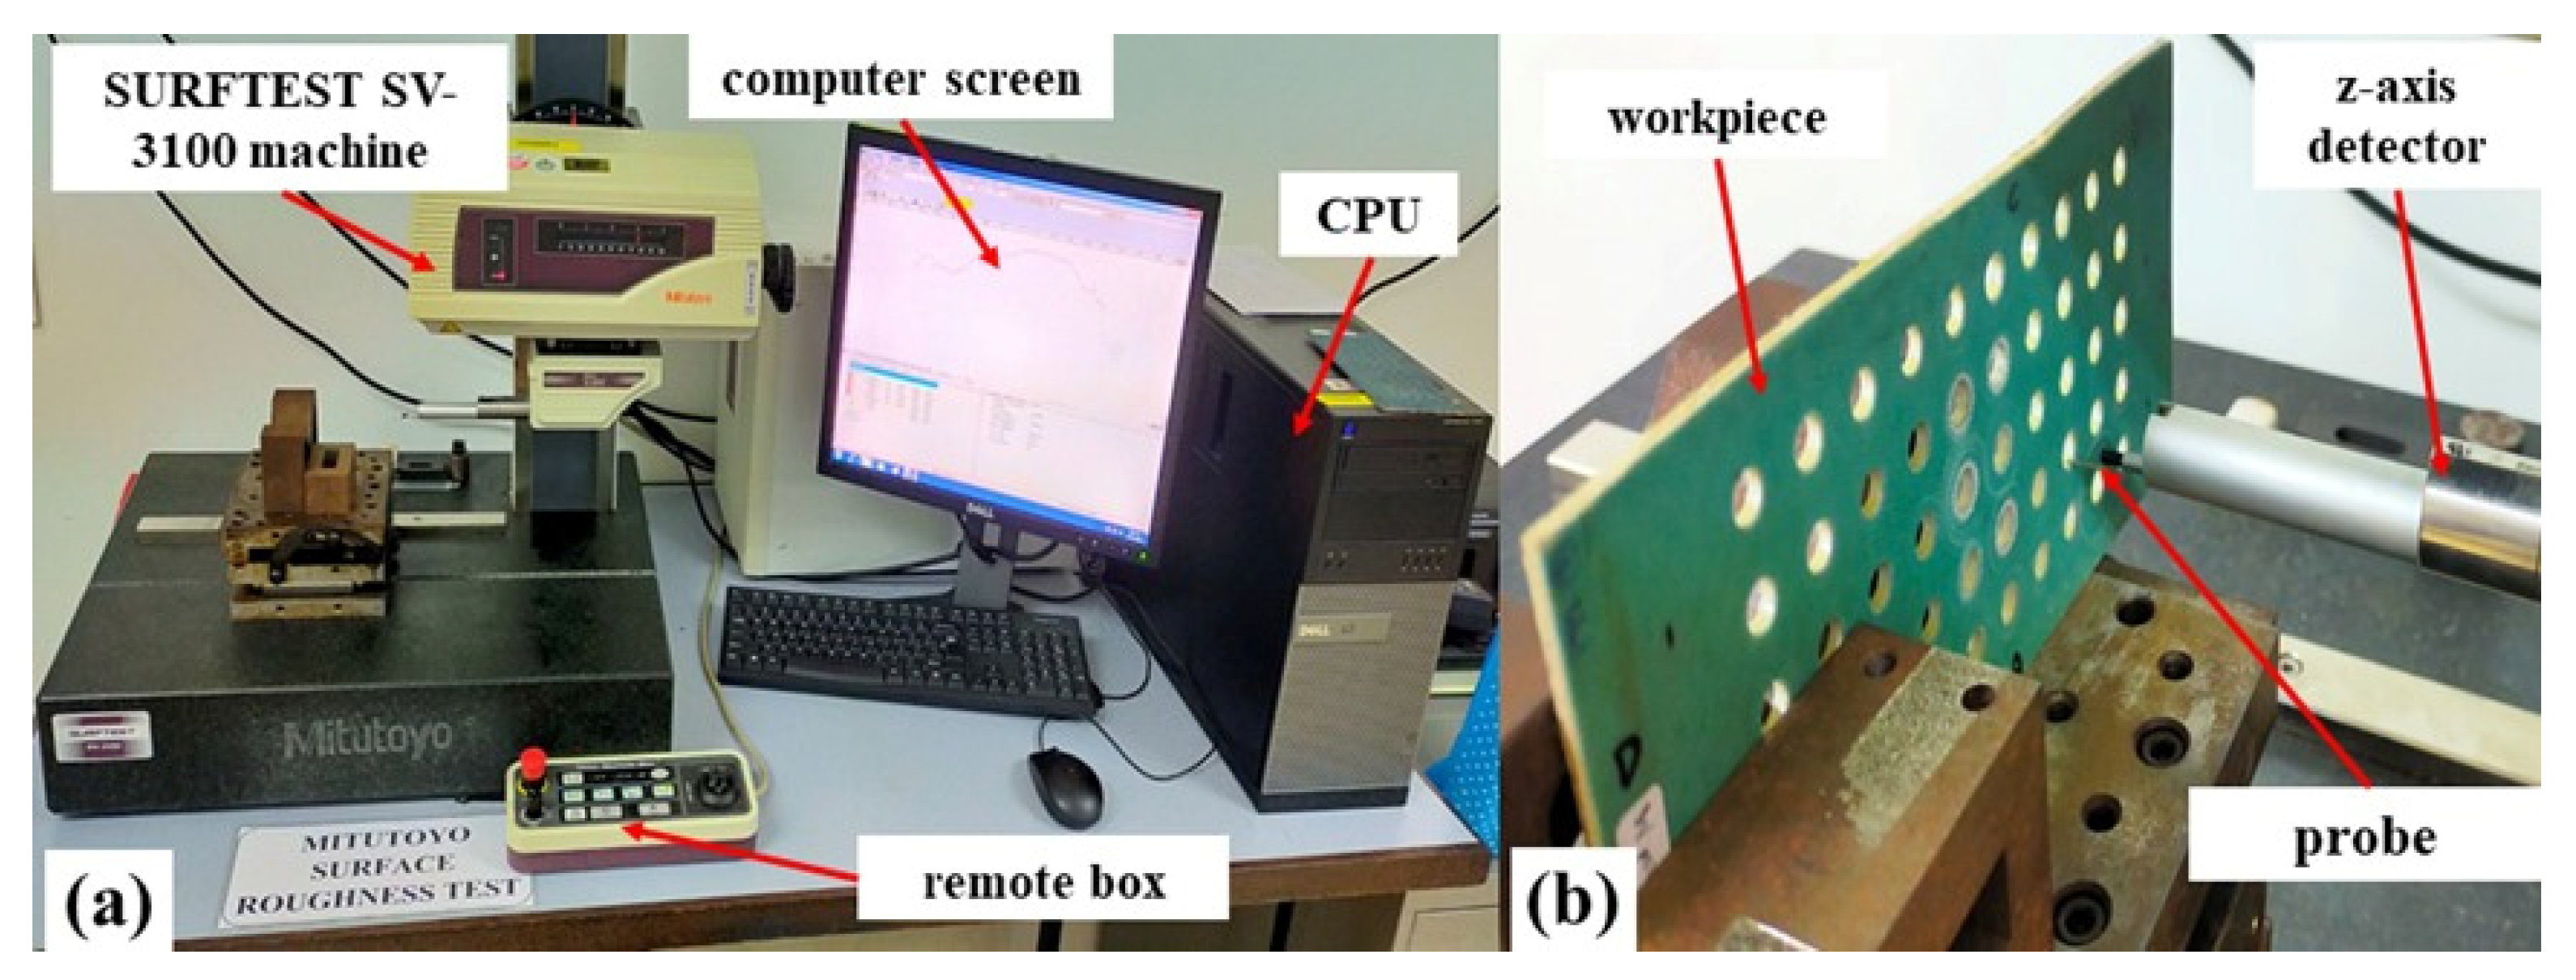
Surface roughness of the drilled holes was measured using a contact profilometer (SURFTEST SV-3100) manufactured by Mitutoyo Corporation in Kawasaki, Japan. The device uses a stylus probe that moves across the hole surface to record the height of peaks and valleys. All measurements were processed using the FORMTRACEPAK software for Windows (Version 5.009), a MiCAT-associated software manufactured by Mitutoyo Corporation and compatible with New C/SV series instruments, copyrighted © 1996–2009 Mitutoyo, with an internal file version of 3.1.1.90 for visualization and roughness parameter calculations. Figure 7 shows the measurement setup.
The average surface roughness (Ra) was used to evaluate the hole finish. Ra represents the average deviation of the surface profile from the mean line, where higher values indicate rougher surfaces and lower values indicate smoother finishes.
For each hole, the average Ra was calculated from the four measured points on the AFRP and Al7075-T6 panels separately. The overall average Ra for each sample condition was then determined by averaging the Ra values of all 100 drilled holes.

3. Results and Discussion

3.1. SEM Observation of Surface of the Tool

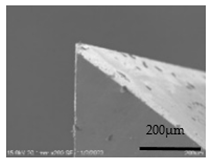
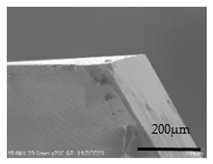
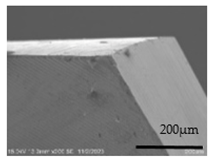
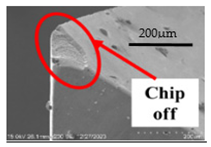
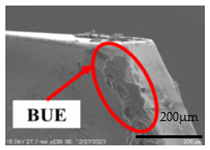
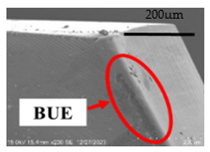
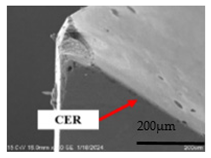
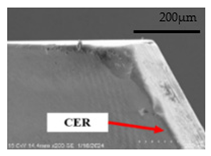
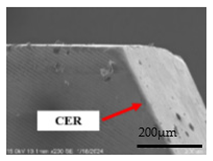
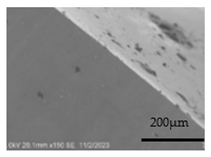
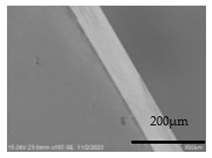
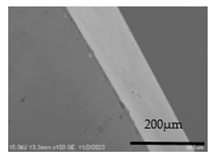
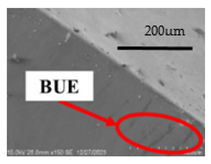
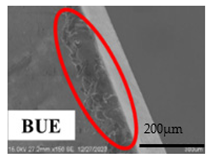
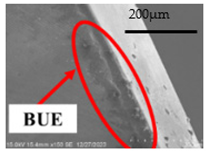
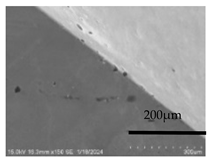
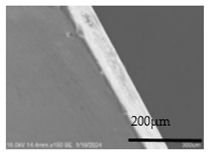
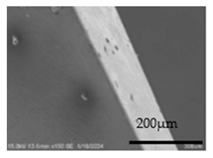
Table 2 provides a comparison of SEM images for three customized drills, illustrating the magnified surfaces of the margin at 200× magnification and cutting lips at 150× magnification for a fresh drill, after completing 100 drilled holes and after cleaning, respectively. After 100 holes was drilled, SEM analysis of the tool tip was performed to examine the presence of foreign materials on the tool surface. It was noted that specific regions showed considerable aluminum adhesion after drilling AFRP/Al7075-T6 stacked material but is removed after cleaning. Following cleaning, it is evident that abrasive wear caused by drilling AFRP has led to formation of cutting-edge radius (CER) at the cutting lips. Additionally, the w-point drill exhibited chipping issues during the drilling process. In this research, it is hypothesized that build-up edge (BUE) occurred during the initial 50 holes, as an increase in the drill bit’s weight was observed after drilling 50 holes. However, the exact occurrence of BUE formation remains uncertain, as no intermediate inspections were carried out before reaching 50 holes.
Research by Bañon et al. [13] and Fernandez-Vidal et al. [14] indicate that tool wear during the drilling of stacked materials differs significantly from drilling each material separately. The primary wear mechanisms identified are abrasion from composite fibers [15] and adhesion issues caused by the aluminum layer [16]. Abrasive wear predominates due to the high hardness of composite fibers, which leads to micro-blasting on the cutting lips. In contrast, adhesive wear results from material transfer between the drill bit and work piece, driven by intense friction and pressure during drilling. Aluminum contributes to built-up edge (BUE) formation, promoting adhesive wear, especially under sub-optimal cutting conditions. The presence of an aluminum (Al) layer on the drill bit surface corresponds to observations by Zitoune et al. [17], who reported that aluminum layers tend to form on the cutting lips and rake face of drills due to build-up edge (BUE) and build-up layer (BUL) formation, stemming from adhesion wear during drilling. Furthermore, as metallic chips travel through the drill flute, they contribute to BUL and BUE formation by getting trapped in the flutes and melting at the cutting lips. Ćulum et al. [18] highlighted that BUE develops progressively as the tool interacts with the aluminum layer, influenced by factors such as friction, rising temperatures, and material adhesion. Therefore, more frequent inspections would be necessary to pinpoint the exact hole number where BUE first emerges. In addition, Hassan et al. [12] observed that aluminum chips tend to accumulate on the rake face at elevated drilling temperatures. The adhesion of small amounts of aluminum to the margins and cutting lips is linked to lower spindle speeds. Operating at reduced spindle speeds and feed rates increases friction between the tool and work piece, prolonging contact time during hole creation. As a result, higher temperatures facilitate a reaction between aluminum and cobalt, leading to micro-welding on the cutting edge. Additionally, the fibers in the composite laminate contribute to abrasive wear on the drill bit, causing the cutting-edge radius (CER) formation.
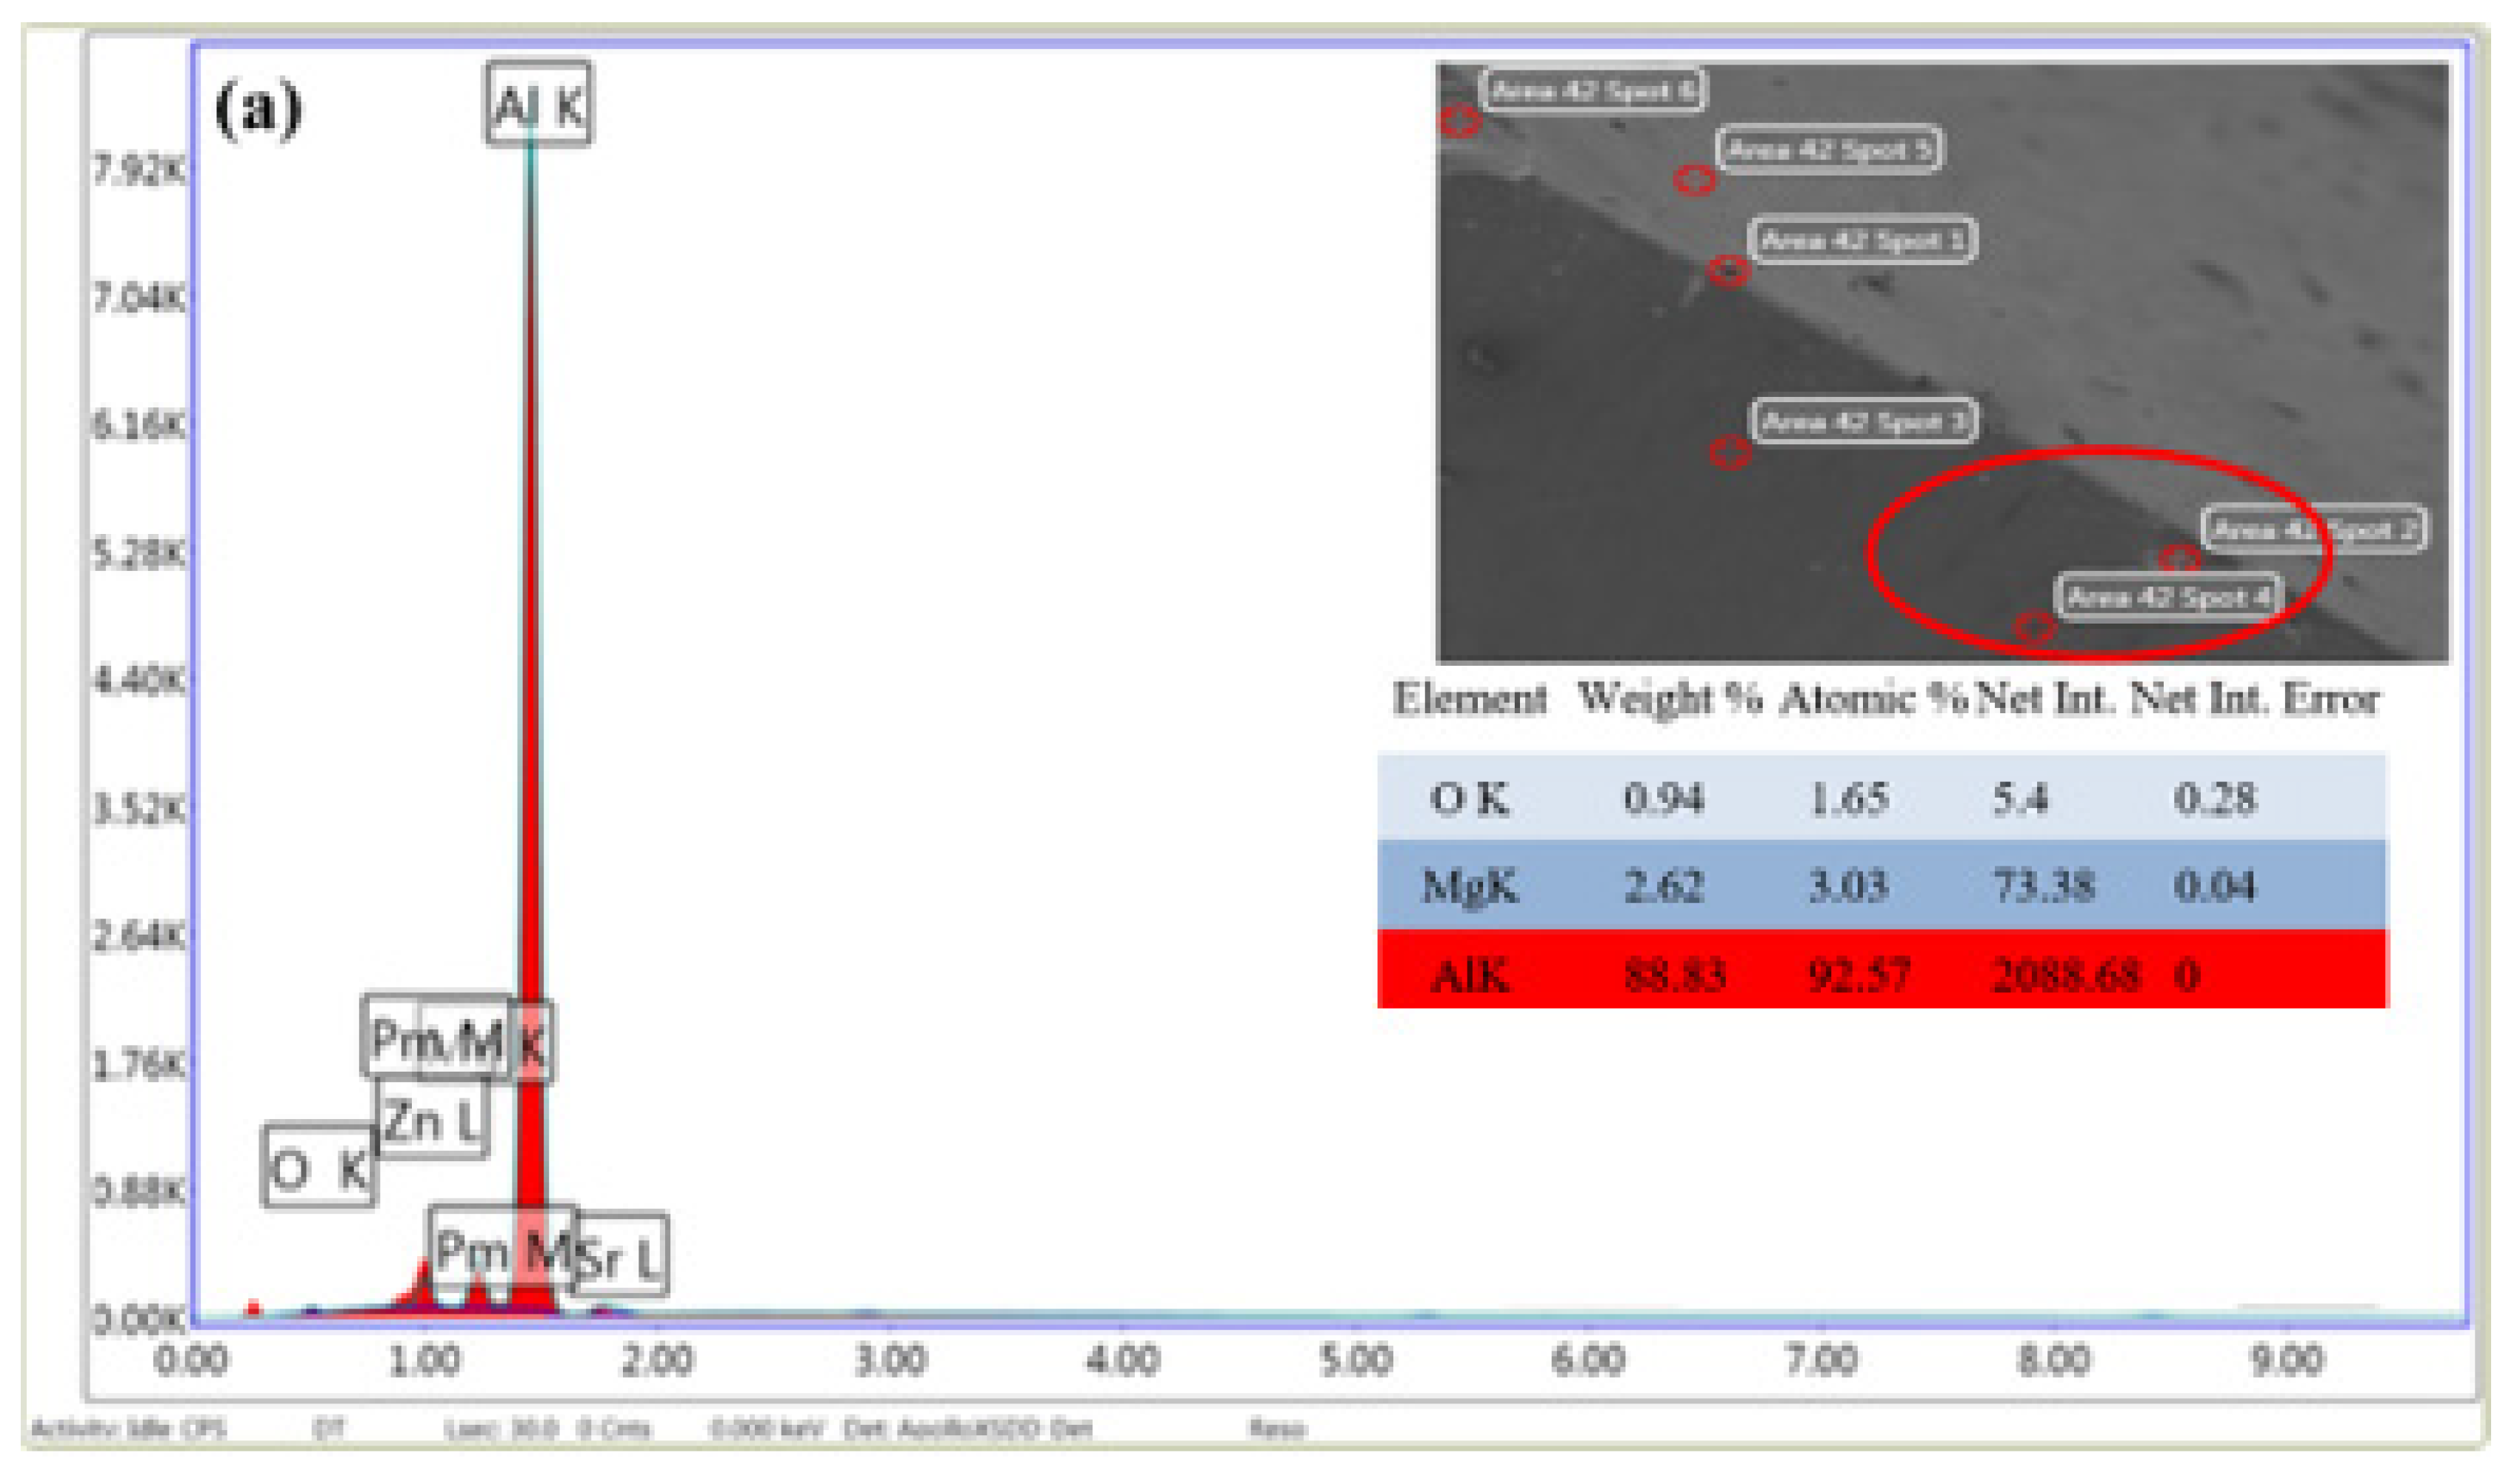
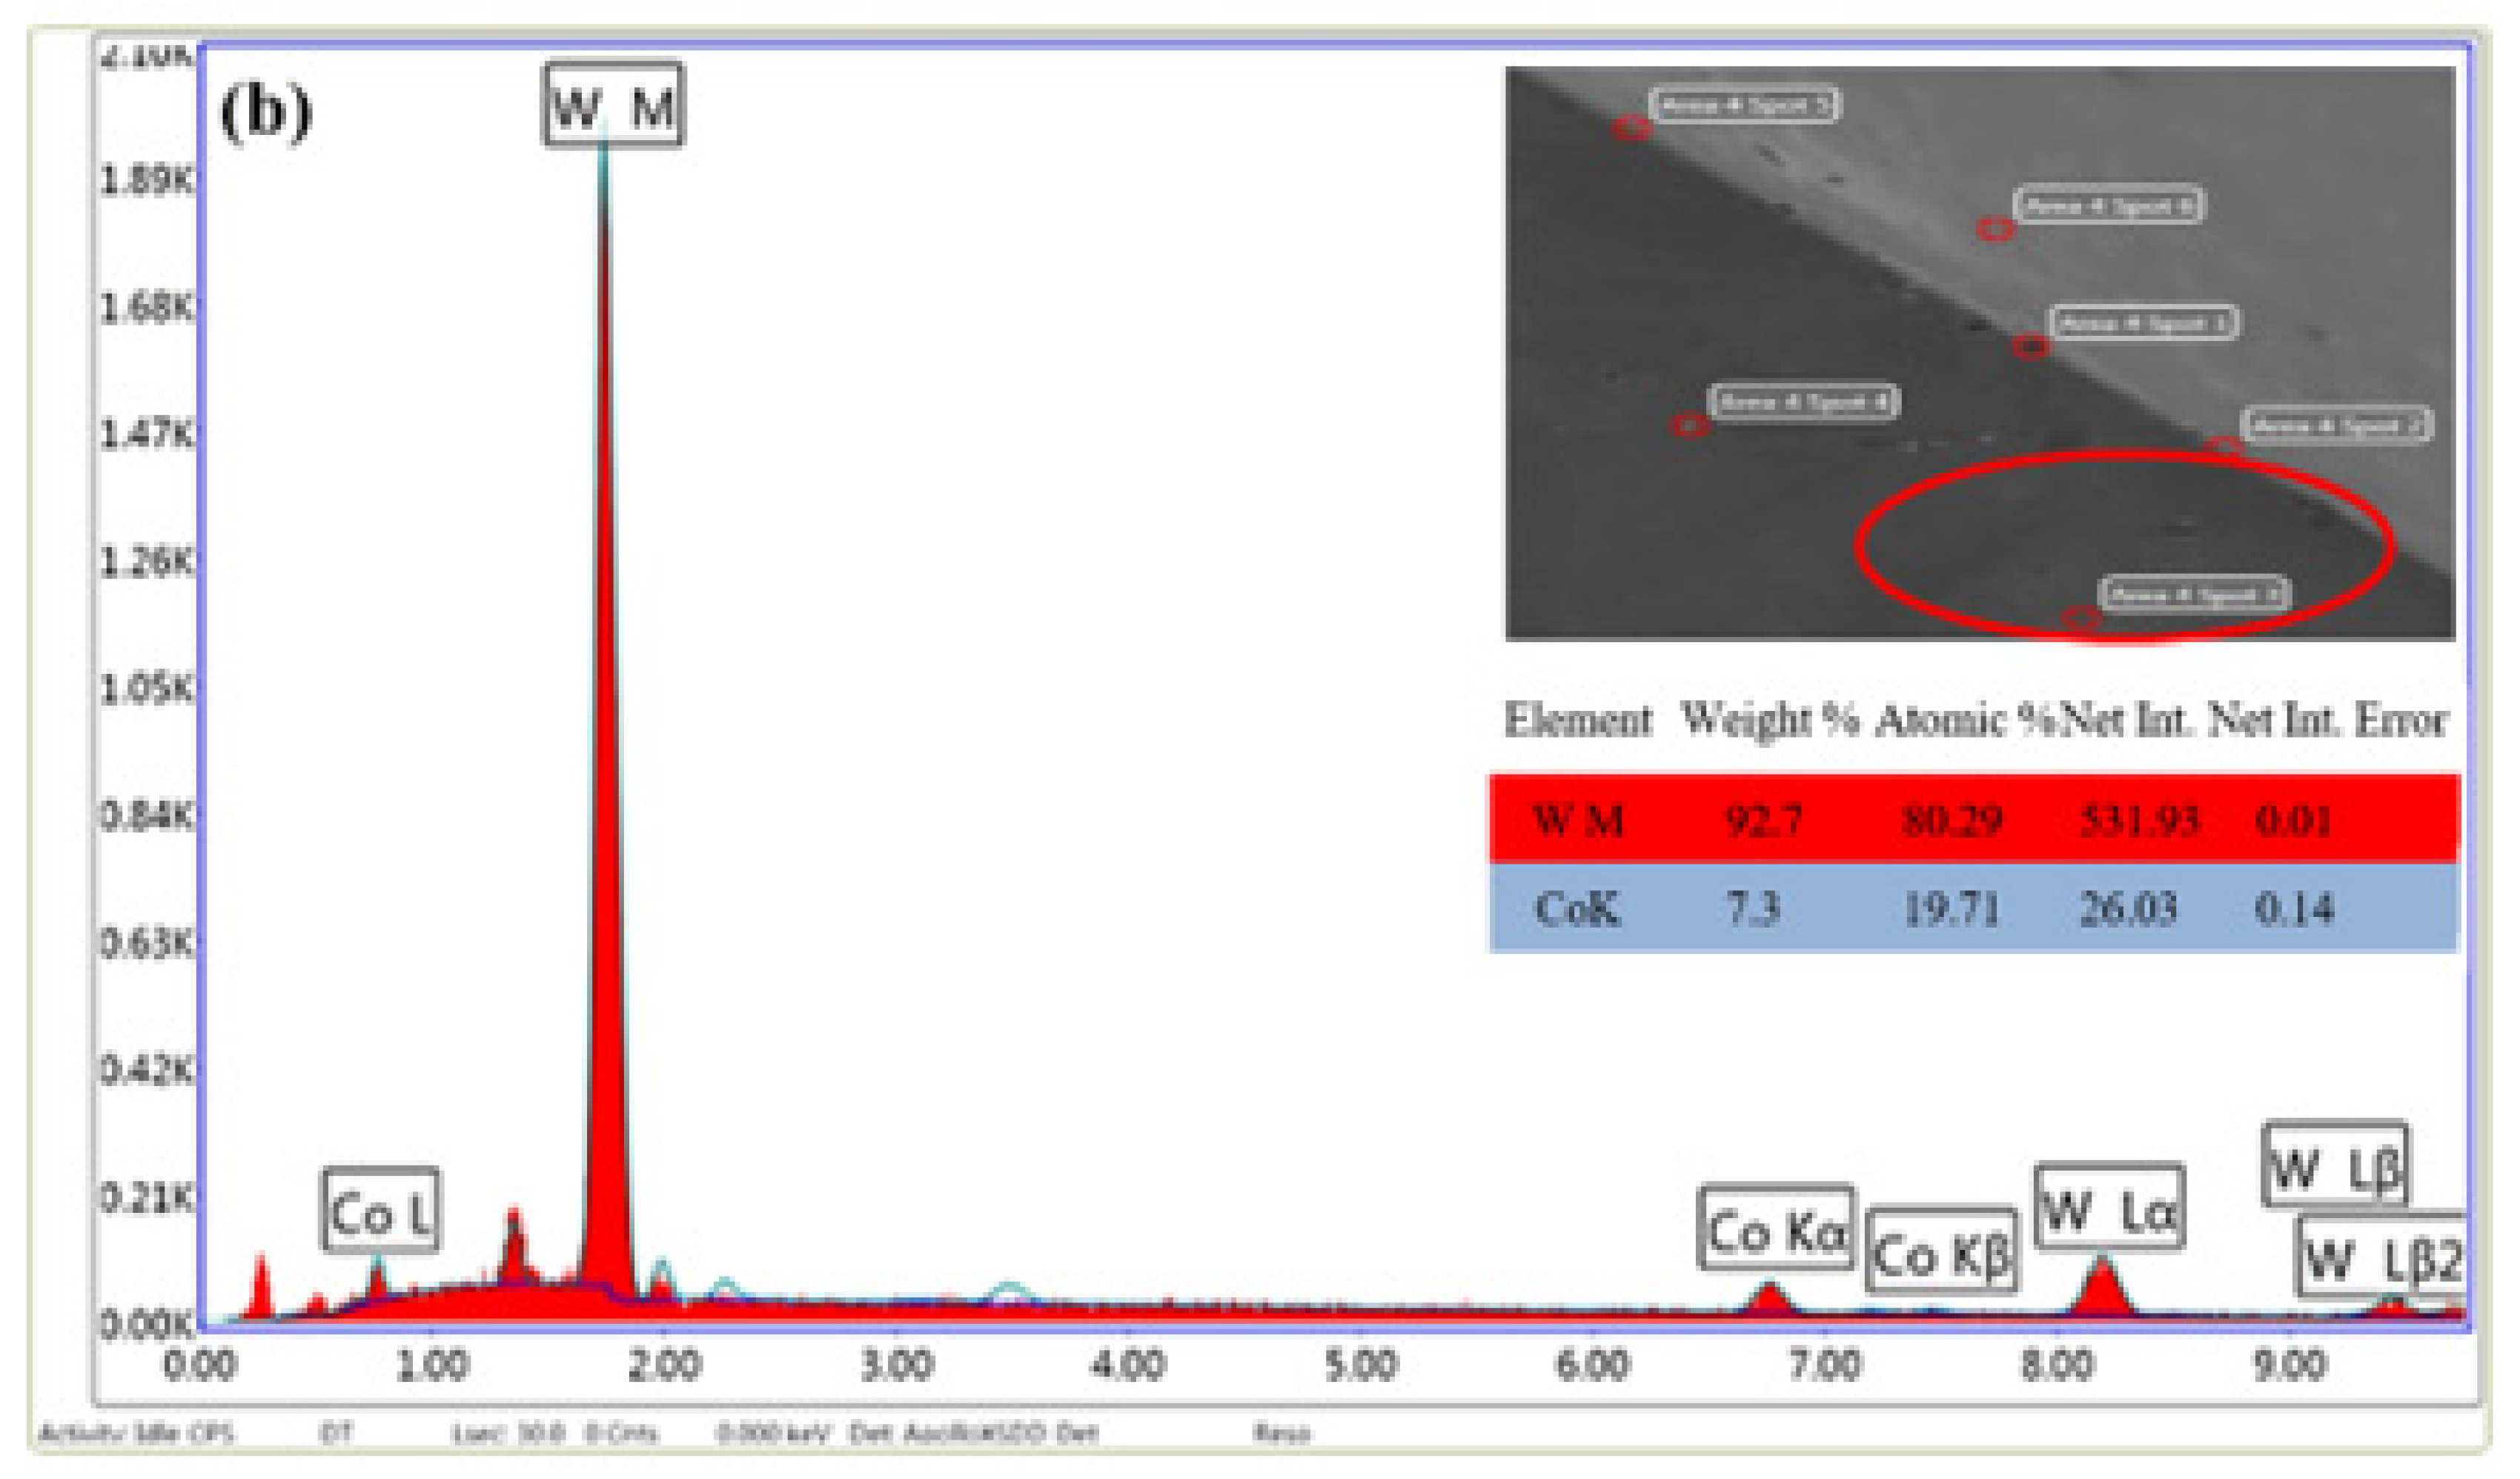
From the analysis of the images, aluminum (Al) was identified on the cutting lip surfaces before cleaning, while the original tungsten (W) element became visible after removing the adhered material. This data is specifically shown by the red color rows in Figure 8. Figure 8a illustrates the cutting lip surface of the w-point drill before cleaning, highlighting the circled region, where aluminum accounted for 88.83%, confirming the presence of an aluminum layer on the surface. Following the removal of the build-up edge (BUE) or build-up layer (BUL), as depicted in Figure 8b, the aluminum was no longer detected, and tungsten (W) and cobalt (Co) were revealed at 92.70% and 7.30%, respectively. This confirms that the aluminum had been effectively cleared from the surface.
Furthermore, as shown in Table 3, the tapered web and burnishing drills, before cleaning, shows approximately 92.89% and 91.65% aluminium, respectively. After cleaning, the primary material of the drill bit, tungsten (W) element was identified, with recorded values of 61.29% and 60.44% for the tapered web and burnishing drills, respectively.

3.2. Percentage of Adhesion Layer (PAL)

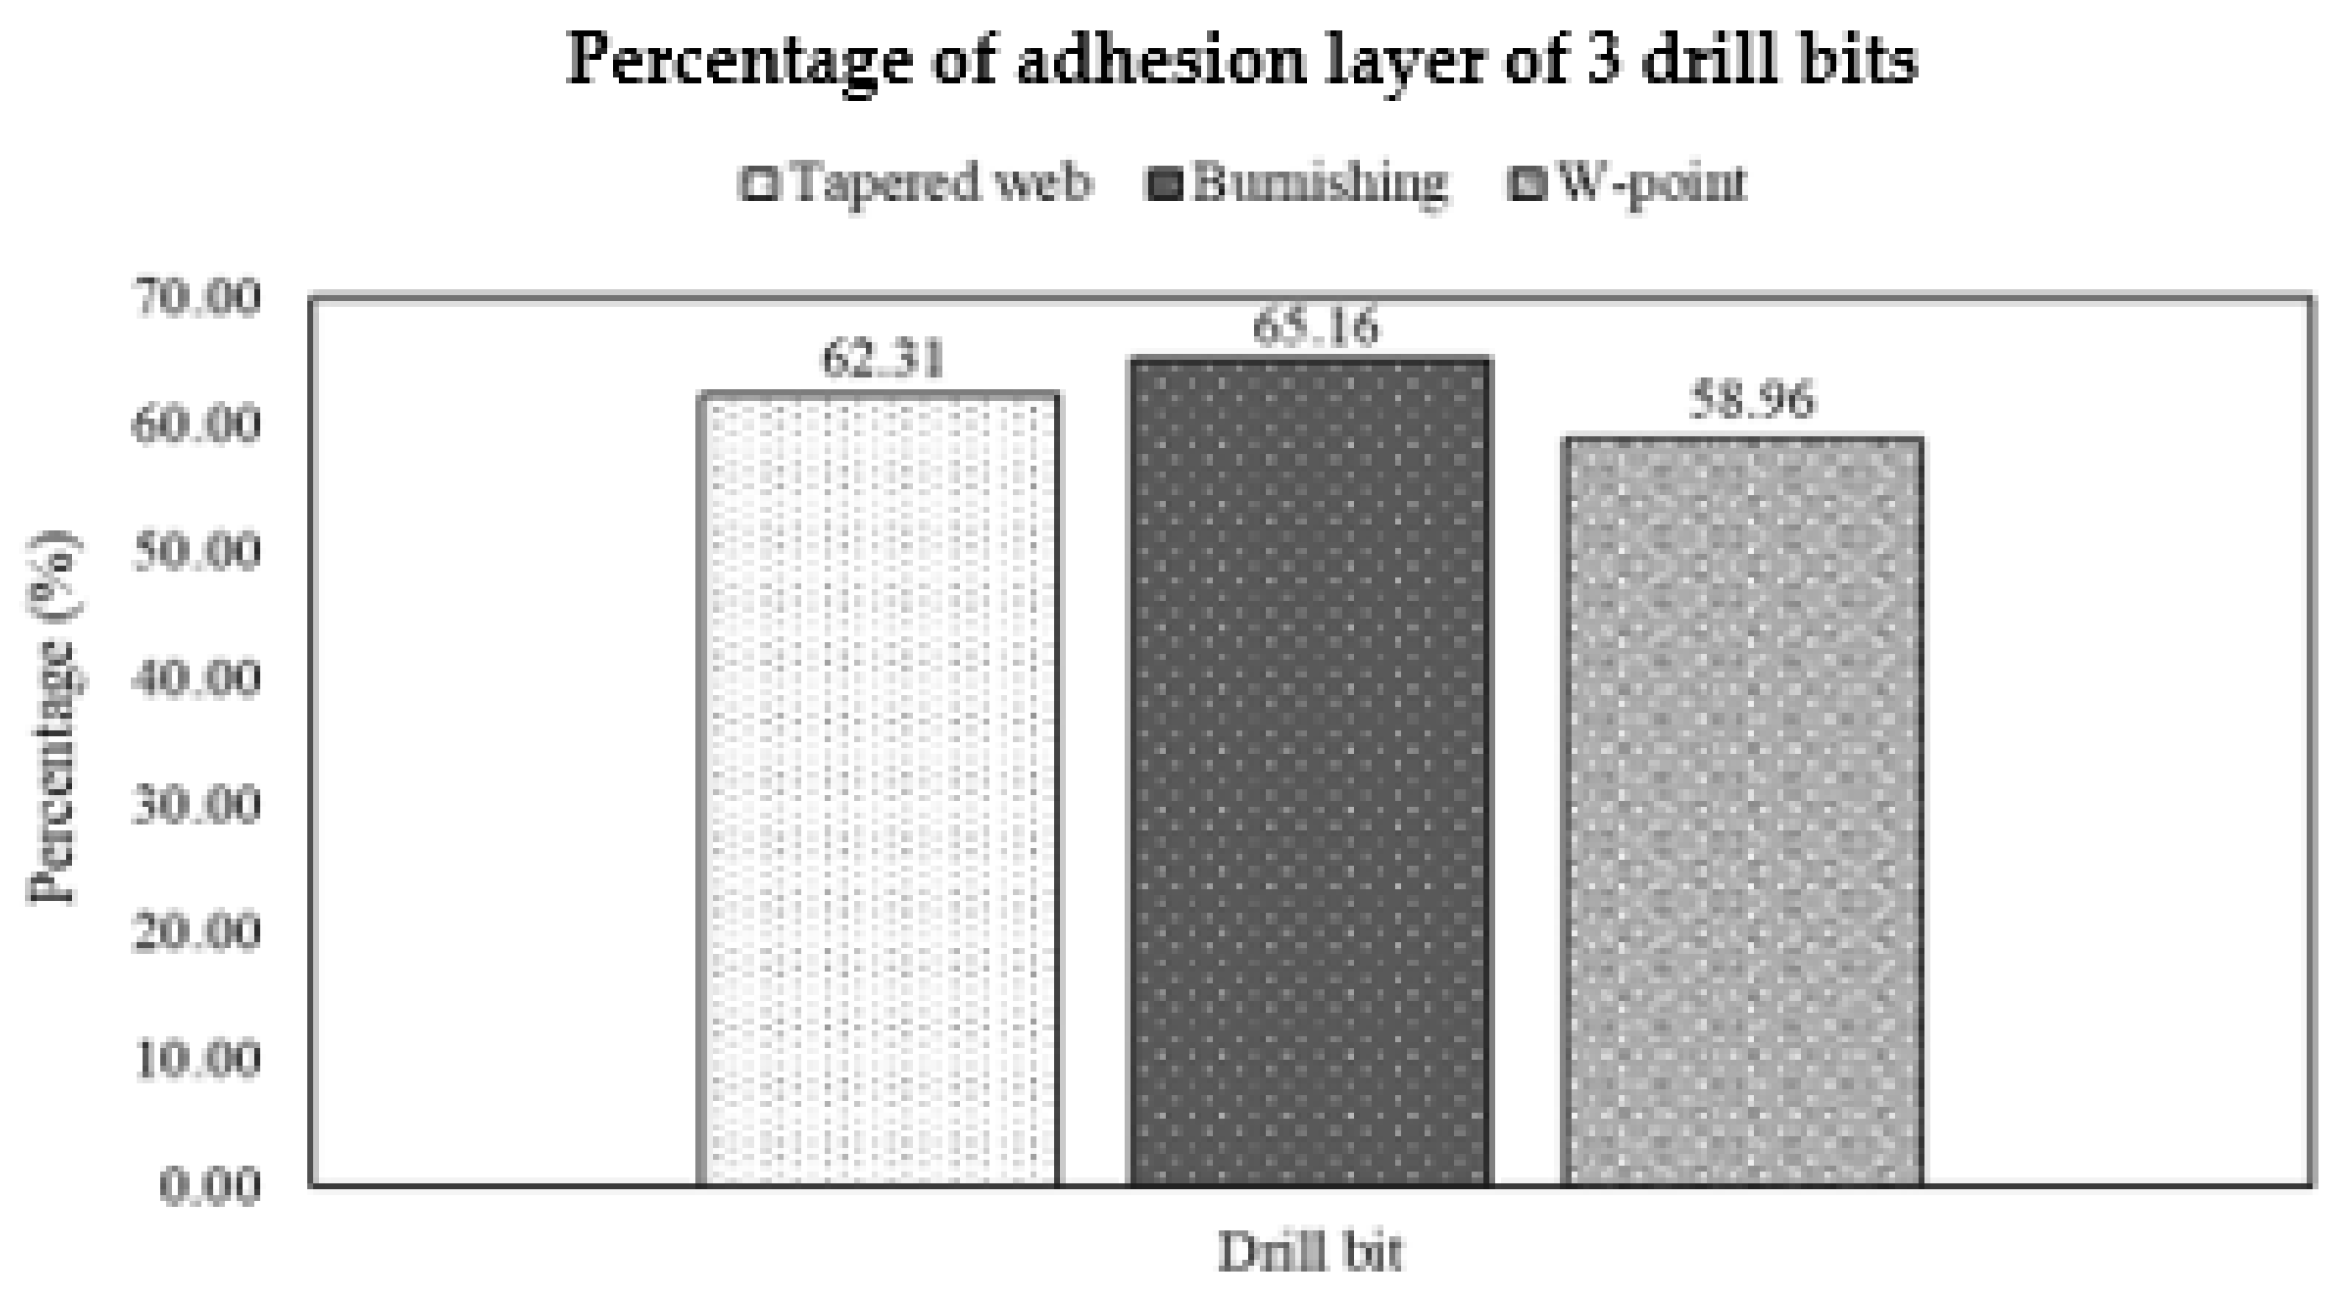
As illustrated in Figure 9, the w-point drill bit exhibited the smallest percentage of adhesion layer, measuring 58.96%, followed by the tapered web at 62.31% and the burnishing drill at 65.16%. These results indicate that the w-point drill bit offers greater durability by showing less wear and tear. The lower percentage of adhesion layer (PAL) for the w-point drill suggests a longer operational lifespan and enhanced drilled holes quality. A lower PAL indicates that the drill’s cutting edges retain their sharpness and geometry for a longer duration. In essence, reduced adhesion minimizes rubbing and built-up edge (BUE) formation, thereby lowering thermal and mechanical stress on the cutting edges. This, in turn, prevents coating delamination and micro-abrasion, preserving the coating’s protective integrity [19]. As a result, the tool wears more uniformly, avoiding premature chipping or edge rounding. Consequently, the w-point drill with lower PAL exhibits slower wear progression and a longer operational lifespan leading to better surface finishes and more precise hole dimensions.

3.3. Surface Roughness Measurement

Table 4 shows a clear distinction in surface roughness behaviour between AFRP and Al7075-T6 when drilled using the three customized drill geometries. For AFRP, the w-point drill produces the lowest surface roughness of 2.0220 µm, followed by the burnishing drill at 2.7710 µm, while the twist drill records the highest roughness value of 3.0202 µm. The better performance of the w-point drill in AFRP is attributed to its split point configuration which generates lower thrust force and promotes progressive fiber shearing, thereby reducing fiber pull out and matrix smearing along the hole wall. In contrast, the twist drill is optimized for metallic cutting and produces continuous aramid fiber chips with a high tendency to clog the flutes. This chip accumulation increases rubbing and shearing interactions between the packed debris and the hole surface, resulting in higher friction and poorer surface quality in AFRP [17].
For Al7075-T6, the trend is reversed. The twist drill produces the lowest surface roughness at 0.2759 µm, ahead of the w-point drill at 0.4037 µm and the burnishing drill at 0.5130 µm. This is because the twist drill geometry provides stable plastic shearing, efficient chip evacuation, and reduced built up edge formation, all of which are ideal for ductile aluminium alloys. The w-point drill does not provide the same shearing stability in metals, and the burnishing drill introduces additional friction and heat that can degrade the surface finish. These results indicate that the w-point drill demonstrates superior performance for AFRP, whereas the tapered web drill is most effective for Al7075-T6. It can be noted that, all three drill bits withstand the allowable metal part’s surface roughness of 1.6 µm and CFRP part’s surface roughness of 3.2 µm [20] in the aerospace industry.

3.4. Chips and Dust Formation

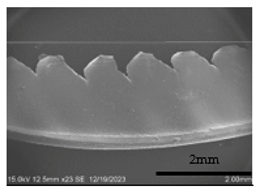
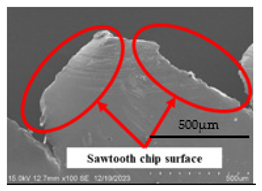
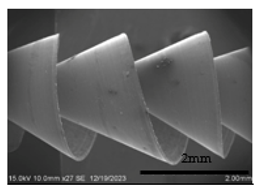
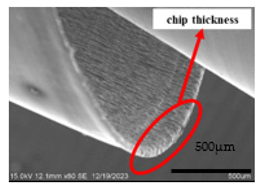
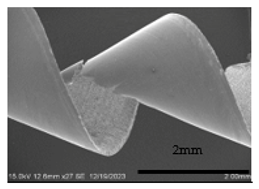
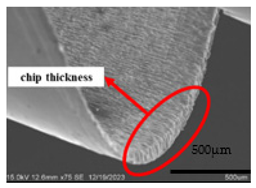
Analysis of SEM images highlighted unique features of aluminum chips produced by different drill bits, as detailed in Table 5. Chips from the w-point drill bit were characterized by elongated strips. In contrast, chips generated by the tapered web drill bit exhibited compact, spiral shapes, while those from the burnishing drill bit formed conical structures. The burnishing drill bit produced noticeably thicker chips compared to the tapered web drill bit, resulting in greater surface contact within the drilled holes and, consequently, rougher surface finishes. Conversely, the w-point drill bit produced chips with an irregular strip-like structure, yet the surface roughness of the aluminum holes was still better than that achieved with the burnishing drill bit. This indicates that, although chip morphology impacts surface quality, additional factors, such as the sharpness and arrangement of the drill bit teeth, also play a critical role. Spiral cone-shaped chips facilitate efficient ejection, improving chip removal during the drilling process. Short and tightly helix chips are generally preferred for achieving smoother surface finishes on work piece [4]. This explains why the tapered web drill bit yielded the lowest surface roughness for aluminum holes. They also observed that thicker chips contribute to reduced surface quality, and that decreasing feed rate while increasing spindle speed minimizes chip thickness. This finding aligns with the experimental results, which showed the optimal parameters for tapered web drills surpassed those for burnishing drills. As a result, the thicker chips produced by burnishing drills corresponded to a decline in surface finish quality for aluminum holes.
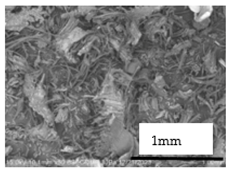
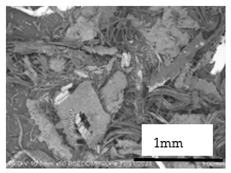
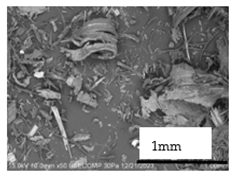
Research by Hassan et al. [12] on drilling CFRP/Aluminum stack materials emphasizes the importance of generating small, fine dust particles for achieving high-quality holes. Consequently, studying dust formation is essential to understand its impact on hole surface roughness [21]. As shown in Table 6, the w-point drill bit generates very fine dust particles, which may account for its ability to produce the smoothest surface finish among the three types. Meanwhile, image analysis indicates that the AFRP dust produced by the tapered web drill bit is larger compared to that generated by other drill bits. This larger dust size likely contributes to the rougher surface finish observed in AFRP panels drilled with this bit. In contrast, the burnishing drill bit produces dust particles of medium size, leading to a surface roughness that is intermediate between the other drill types. Further studies by Xu et al. [22] and Wang et al. [23] emphasize the influence of point angle on the size of carbon dust particles. A smaller point angle generally results in finer dust particles during composite drilling [24]. Furthermore, the finer the dust chip the drill bit can create, the better the hole surface roughness that may be attained [25,26]. As the w-point drill bit has the smallest point angle of the bits evaluated, this characteristic likely explains its superior performance in enhancing surface roughness in AFRP composites.

4. Conclusions

Based on the experimental investigation conducted on the drilling of AFRP/Al7075-T6 stacked materials using three customized drill geometries, the following conclusions can be drawn:
  • SEM analysis confirmed that all customized drill bits exhibited aluminum adhesion on the cutting lips after drilling operations. Subsequent cleaning removed the adhered layer and revealed the original tungsten and cobalt elements. The abrasive nature of AFRP fibers caused noticeable chipping and the formation of cutting-edge radius (CER), particularly evident in the w-point drill, indicating progressive tool wear.
  • The w-point drill recorded the lowest percentage of adhesion layer (PAL) at 58.96%, followed by the tapered web and burnishing drills. This result indicates that the w-point geometry offers the highest wear resistance and durability among the three designs, making it more suitable for extended drilling of hybrid composite–metal stacks.
  • The surface roughness results demonstrated that the w-point drill produced the best surface finish in AFRP, whereas the tapered web drill achieved superior results for Al7075-T6. All measured roughness values remained within the aerospace industry’s allowable limits, confirming the capability of the customized drill bits to maintain acceptable hole quality standards.
  • The chip and dust morphology observations revealed that the w-point drill generated finer dust particles and smaller, irregular chips, contributing to improved surface finish and efficient chip evacuation. The smaller point angle of the w-point drill enhanced its cutting performance and minimized heat accumulation, establishing it as the most effective geometry for drilling AFRP/Al7075-T6 stacked materials.
Future work should focus on a comprehensive evaluation of hole quality parameters, including dimensional accuracy, circularity, cylindricity, and delamination factors at both entry and exit interfaces. These parameters may be statistically correlated with tool wear and adhesion data using process capability studies (Cp, Cpk) and Six-Pack analysis to quantitatively assess consistency, reproducibility, and overall process stability. In addition, advanced 3D surface characterization and cross-sectional microscopy could be employed to examine subsurface damage, fiber pull-out, and matrix smearing at microstructural levels. Investigating cutting temperature and thrust force evolution using real-time sensors would also help establish predictive wear models for different drill geometries. Further optimization can be achieved by applying multi-objective statistical tools such as Design of Experiments (DOE) or Response Surface Methodology (RSM) to balance tool life, surface integrity, and drilling efficiency. Additionally, applying coatings will also help to improve the surface quality of the workpiece and wear reduction in the tool. Introduction of lubricants can also be tested to decide its influence in this regard.

Author Contributions

Conceptualization, C.T.X. and M.H.H.; methodology, C.T.X.; validation, M.H.H. and G.F.; formal analysis, C.T.X., G.F. and J.J.M.; writing—review and editing, J.J.M.; supervision, M.H.H. and G.F.; project administration, M.H.H. and G.F.; funding acquisition, M.H.H. and G.F. All authors have read and agreed to the published version of the manuscript.

Funding

The authors are grateful for the financial support provided by the Ministry of Higher Education Malaysia for Fundamental Research Grant Scheme with Project Code: FRGS/1/2022/TK10/USM/03/5. In addition, the authors greatly appreciate the School of Mechanical Engineering, USM’s facility support.

Institutional Review Board Statement

Not applicable.

Data Availability Statement

The original contributions presented in this study are included in the article. Further inquiries can be directed at the corresponding authors.

Acknowledgments

The authors acknowledge the use of ChatGPT-5 to assist in improving the clarity, grammar, and overall coherence of the English text during manuscript preparation. The authors have thoroughly reviewed and edited the content generated by the tool and take full responsibility for the integrity and accuracy of the final manuscript.

Conflicts of Interest

The authors declare no conflicts of interest.

Abbreviations

The following abbreviations are used in this manuscript:
AFRPAramid Fiber Reinforced Plastic
Al7075-T6Aluminum alloy
BDBurnishing Drill bit
BUEBuild Up Edge
BULBuild Up Layer
CADComputer-Aided Drawing
CoCobalt
CERCutting Edge Radius
CFRPCarbon Fiber Reinforced Plastic
CNCComputer Numeric Control
EDXEnergy Dispersive X-ray
MgMagnesium
PALPercentage of Adhesion Layer
SEMScanning Electron Microscopy
TWTapered-Web drill bit
WCTungsten Carbide
WPw-point drill bit
ZnZinc

References

  1. Meshreki, M.; Damir, A.; Sadek, A.; Attia, M.H. Investigation of Drilling of CFRP-Aluminum Stacks Under Different Cooling Modes. In Proceedings of the ASME 2016 International Mechanical Engineering Congress and Exposition. Volume 2: Advanced Manufacturing, Phoenix, AZ, USA, 11–17 November 2016. [Google Scholar] [CrossRef]
  2. Xu, J.; Ji, M.; Chen, M.; Ren, F. Investigation of minimum quantity lubrication effects in drilling CFRP/Ti6Al4V stacks. Mater. Manuf. Process. 2019, 34, 1401–1410. [Google Scholar] [CrossRef]
  3. Geier, N.; Davim, J.P.; Szalay, T. Advanced cutting tools and technologies for drilling carbon fibre reinforced polymer (CFRP) composites: A review. Compos. Part A Appl. Sci. Manuf. 2019, 125, 105552. [Google Scholar] [CrossRef]
  4. SenthilKumar, M.; Prabukarthi, A.; Krishnaraj, V. Study on Tool Wear and Chip Formation During Drilling Carbon Fiber Reinforced Polymer (CFRP)/Titanium Alloy (Ti6Al4V) Stacks. Procedia Eng. 2013, 64, 582–592. [Google Scholar] [CrossRef]
  5. Fernández-Pérez, J.; Cantero, J.L.; Díaz-Álvarez, J.; Miguelez, M.H. Hybrid Composite-Metal Stack Drilling with Different Minimum Quantity Lubrication Levels. Materials 2019, 12, 448. [Google Scholar] [CrossRef]
  6. Bahçe, E.; Özdemir, B. Investigation of the burr formation during the drilling of free-form surfaces in al 7075 alloy. J. Mater. Res. Technol. 2019, 8, 4198–4208. [Google Scholar] [CrossRef]
  7. Kilickap, E. Modeling and optimization of burr height in drilling of Al-7075 using Taguchi method and response surface methodology. Int. J. Adv. Manuf. Technol. 2010, 49, 911–923. [Google Scholar] [CrossRef]
  8. Bakkal, M.; Shih, A.J.; McSpadden, S.B.; Liu, C.T.; Scattergood, R.O. Light emission, chip morphology, and burr formation in drilling the bulk metallic glass. Int. J. Mach. Tools Manuf. 2005, 45, 741–752. [Google Scholar] [CrossRef]
  9. Murphy, C.; Byrne, G.; Gilchrist, M.D. The performance of coated tungsten carbide drills when machining carbon fibre-reinforced epoxy composite materials. Proc. Inst. Mech. Eng. B J. Eng. Manuf. 2002, 216, 143–152. [Google Scholar] [CrossRef]
  10. ASM International. Properties and Selection: Nonferrous Alloys and Special-Purpose Materials; ASM International: Almere, The Netherlands, 1990. [Google Scholar] [CrossRef]
  11. Xiang, C.T. Optimization of Customized Twist Drill Geometry for Single-Shot Drilling of Composite-Metal Stack. Master’s Thesis, Universiti Sains Malaysia, George Town, Malaysia, 2025. [Google Scholar]
  12. Hassan, M.H.; Abdullah, J.; Mahmud, A.S.; Supran, A. Effect of drill geometry and drilling parameters on the formation of adhesion layer in drilling composite-metal stack-up material. J. Mech. Eng. 2018, 5, 90–98. [Google Scholar]
  13. Bañon, F.; Sambruno, A.; Fernandez-Vidal, S.; Fernandez-Vidal, S.R. One-Shot Drilling Analysis of Stack CFRP/UNS A92024 Bonding by Adhesive. Materials 2019, 12, 160. [Google Scholar] [CrossRef]
  14. Fernandez-Vidal, S.R.; Fernandez-Vidal, S.; Batista, M.; Salguero, J. Tool Wear Mechanism in Cutting of Stack CFRP/UNS A97075. Materials 2018, 11, 1276. [Google Scholar] [CrossRef]
  15. Park, K.-H.; Beal, A.; Kim, D.; Kwon, P.; Lantrip, J. Tool wear in drilling of composite/titanium stacks using carbide and polycrystalline diamond tools. Wear 2011, 271, 2826–2835. [Google Scholar] [CrossRef]
  16. Park, K.-H.; Kwon, P.; Kim, D. Wear characteristic on BAM coated carbide tool in drilling of composite/titanium stack. Int. J. Prec. Eng. Manuf. 2012, 13, 1073–1076. [Google Scholar] [CrossRef]
  17. Zitoune, R.; Krishnaraj, V.; Almabouacif, B.S.; Collombet, F.; Sima, M.; Jolin, A. Influence of machining parameters and new nano-coated tool on drilling performance of CFRP/Aluminium sandwich. Compos. B Eng. 2012, 43, 1480–1488. [Google Scholar] [CrossRef]
  18. Ćulum, I.; Jozić, S.; Bajić, D.; Kalajžić, M. Sustainable Cutting Environment Evaluation for Drilling of Aluminum A380 Foam Produced by Semisolid Recycling. Appl. Sci. 2024, 14, 10382. [Google Scholar] [CrossRef]
  19. Joy Mathavan, J.; Hassan, M.H.; Xu, J.; Franz, G. Hole Quality Observation in Single-Shot Drilling of CFRP/Al7075-T6 Composite Metal Stacks Using Customized Twist Drill Design. J. Compos. Sci. 2022, 6, 378. [Google Scholar] [CrossRef]
  20. Jebaratnam, J.M.; Hassan, M.H. Comprehensive review of drilling strategies for CFRP/Ti stacks in aircraft manufacturing. Mach. Sci. Technol. 2025, 29, 334–438. [Google Scholar] [CrossRef]
  21. Akif Doğan, M.; Yazman, Ş.; Gemi, L.; Yıldız, M.; Yapıcı, A. A Review on Drilling of FML Stacks with Conventional and Unconventional Processing Methods under Different Conditions. Compos. Struct. 2022, 297, 115913. [Google Scholar] [CrossRef]
  22. Xu, J.; An, Q.; Chen, M. A comparative evaluation of polycrystalline diamond drills in drilling high-strength T800S/250F CFRP. Compos. Struct. 2014, 117, 71–82. [Google Scholar] [CrossRef]
  23. Wang, X.; Kwon, P.Y.; Sturtevant, C.; Kim, D.; Lantrip, J. Tool wear of coated drills in drilling CFRP. J. Manuf. Process. 2013, 15, 127–135. [Google Scholar] [CrossRef]
  24. Hassan, M.H.; Jamaluddin, A.; Franz, G. Multi-Objective Optimization in Single-Shot Drilling of CFRP/Al Stacks Using Customized Twist Drill. Materials 2022, 15, 1981. [Google Scholar] [CrossRef]
  25. Ramírez Alcalá, C.; Torres Pineda, F.; Horn, M. CFRP and aluminum stacks drilled in one drilling step in 25 microns of tolerance. In Proceedings of the 16th European Conference on Composite Materials, ECCM, Seville, Spain, 22–26 June 2014; pp. 22–26. [Google Scholar]
  26. Jebaratnam, J.M. Application of drill bit coatings for fiber/metal stack drilling in aircraft manufacturing: A comprehensive review. Int. J. Adv. Manuf. Technol. 2025, 36, 2987–3035. [Google Scholar] [CrossRef]
Figure 1. (a) Three customized drill bits and (b) AFRP composite and Al7075-T6 metal alloy.
Jcs 09 00658 g001
Figure 2. (a) CNC milling machine and (b) schematic of the drilling direction with CAD model of the drilled panel.
Jcs 09 00658 g002
Figure 3. (a) SEM for drill tip observation and (b) three drill bits on SEM platform.
Jcs 09 00658 g003
Figure 4. SEM image of (a) tool tip, (b) margin and (c) cutting lips of the drill bit.
Jcs 09 00658 g004
Figure 5. (a) Aluminum chips drilled by three customized drill and (b) chip samples on the platform for SEM observation.
Jcs 09 00658 g005
Figure 6. SEM images of (a) Aluminum chips and (b) AFRP dust.
Jcs 09 00658 g006
Figure 7. (a) Measurement system of hole surface roughness (b) Sample positioning for surface roughness test.
Jcs 09 00658 g007
Figure 8. Elemental composition of the surface of w-point drill (a) before cleaning and (b) after cleaning.
Jcs 09 00658 g008aJcs 09 00658 g008b
Figure 9. Percentage addition layer (PAL) of three customized drill bits.
Jcs 09 00658 g009
Table 1. Drill geometries for three distinct drill bits.
Drill Bit TypesHelix Angle (°)Primary Clearance Angle (°)Chisel Edge Angle (°)Point Angle (°)
w-point (WP)30153590/40/−40
Tapered web (TW)20645130
Burnishing (BD)10830135
Table 2. Observation of customized tools’ margin and cutting lips.
Drill TypesWPTWBD
At margin (200×)Fresh drillJcs 09 00658 i001Jcs 09 00658 i002Jcs 09 00658 i003
After drilling 100 holesJcs 09 00658 i004Jcs 09 00658 i005Jcs 09 00658 i006
After cleaningJcs 09 00658 i007Jcs 09 00658 i008Jcs 09 00658 i009
At cutting lips (150×)Fresh drillJcs 09 00658 i010Jcs 09 00658 i011Jcs 09 00658 i012
After drilling 100 holesJcs 09 00658 i013Jcs 09 00658 i014Jcs 09 00658 i015
After cleaningJcs 09 00658 i016Jcs 09 00658 i017Jcs 09 00658 i018
Table 3. Element composition of the surface of the customized drill bits.
Drill TypesWPTWBD
Aluminum (Before cleaning)88.83%92.89%91.65%
Tungsten (After cleaning)92.70%61.29%60.44%
Table 4. Average surface roughness of drilled holes for three customized drill bits (µm).
Drill TypesAFRPAl7075-T6
WP2.02200.4037
TW3.02020.2759
BD2.77100.5130
Table 5. Aluminum chip types and chip surface for three customized drill bits.
Drill TypesChip TypesChip Surface
WPJcs 09 00658 i019Jcs 09 00658 i020
TWJcs 09 00658 i021Jcs 09 00658 i022
BDJcs 09 00658 i023Jcs 09 00658 i024
Table 6. AFRP dusts for three customized drill bits.
Drill TypesWPTWBD
DustJcs 09 00658 i025Jcs 09 00658 i026Jcs 09 00658 i027
Disclaimer/Publisher’s Note: The statements, opinions and data contained in all publications are solely those of the individual author(s) and contributor(s) and not of MDPI and/or the editor(s). MDPI and/or the editor(s) disclaim responsibility for any injury to people or property resulting from any ideas, methods, instructions or products referred to in the content.