Cracking Failure Analysis of Drill Pipe Joint with Hardbanding
Abstract
1. Introduction
2. Data Verification
3. Materials and Experimental Methods
4. Results
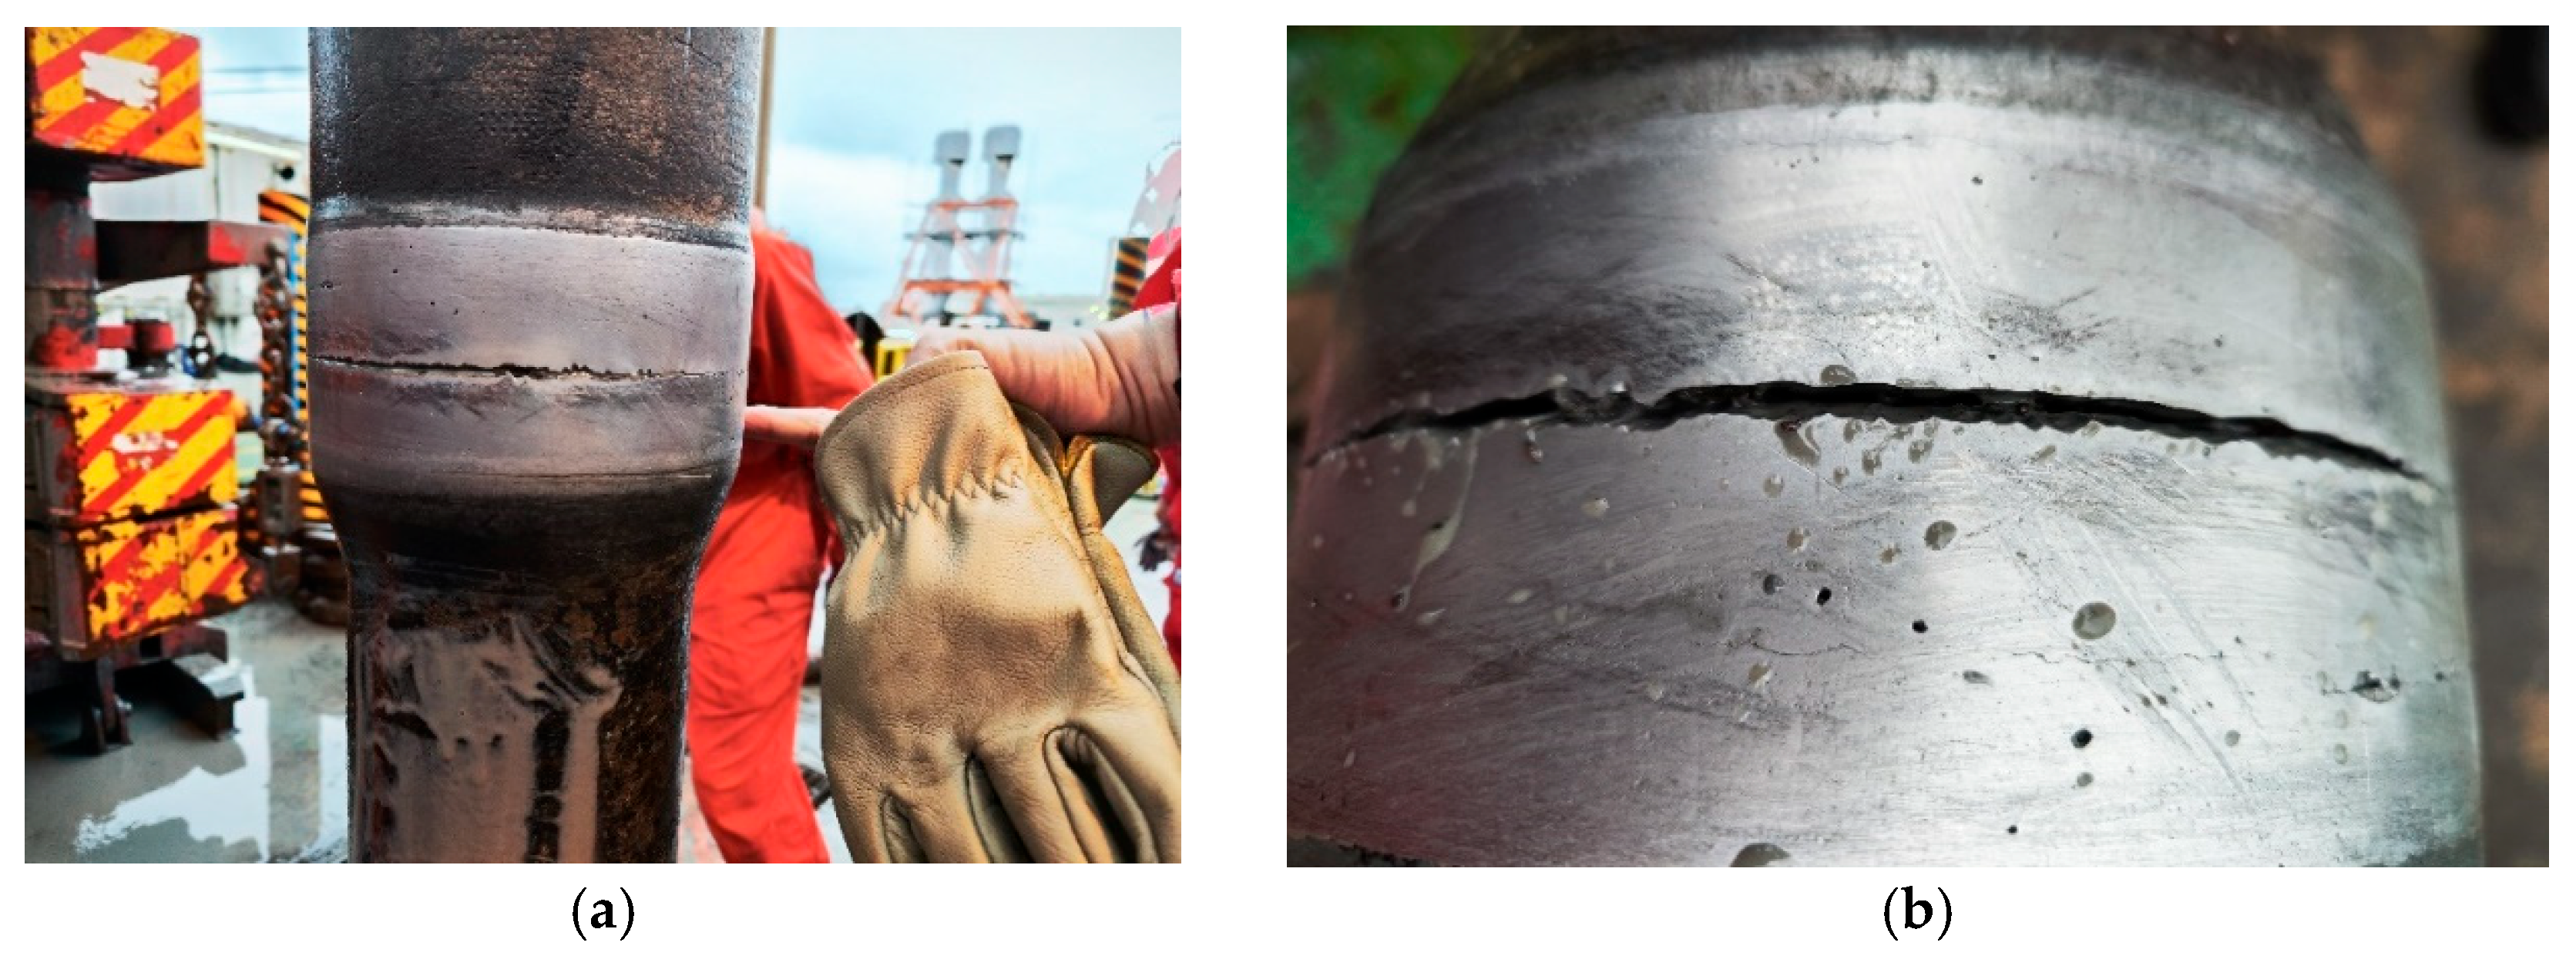
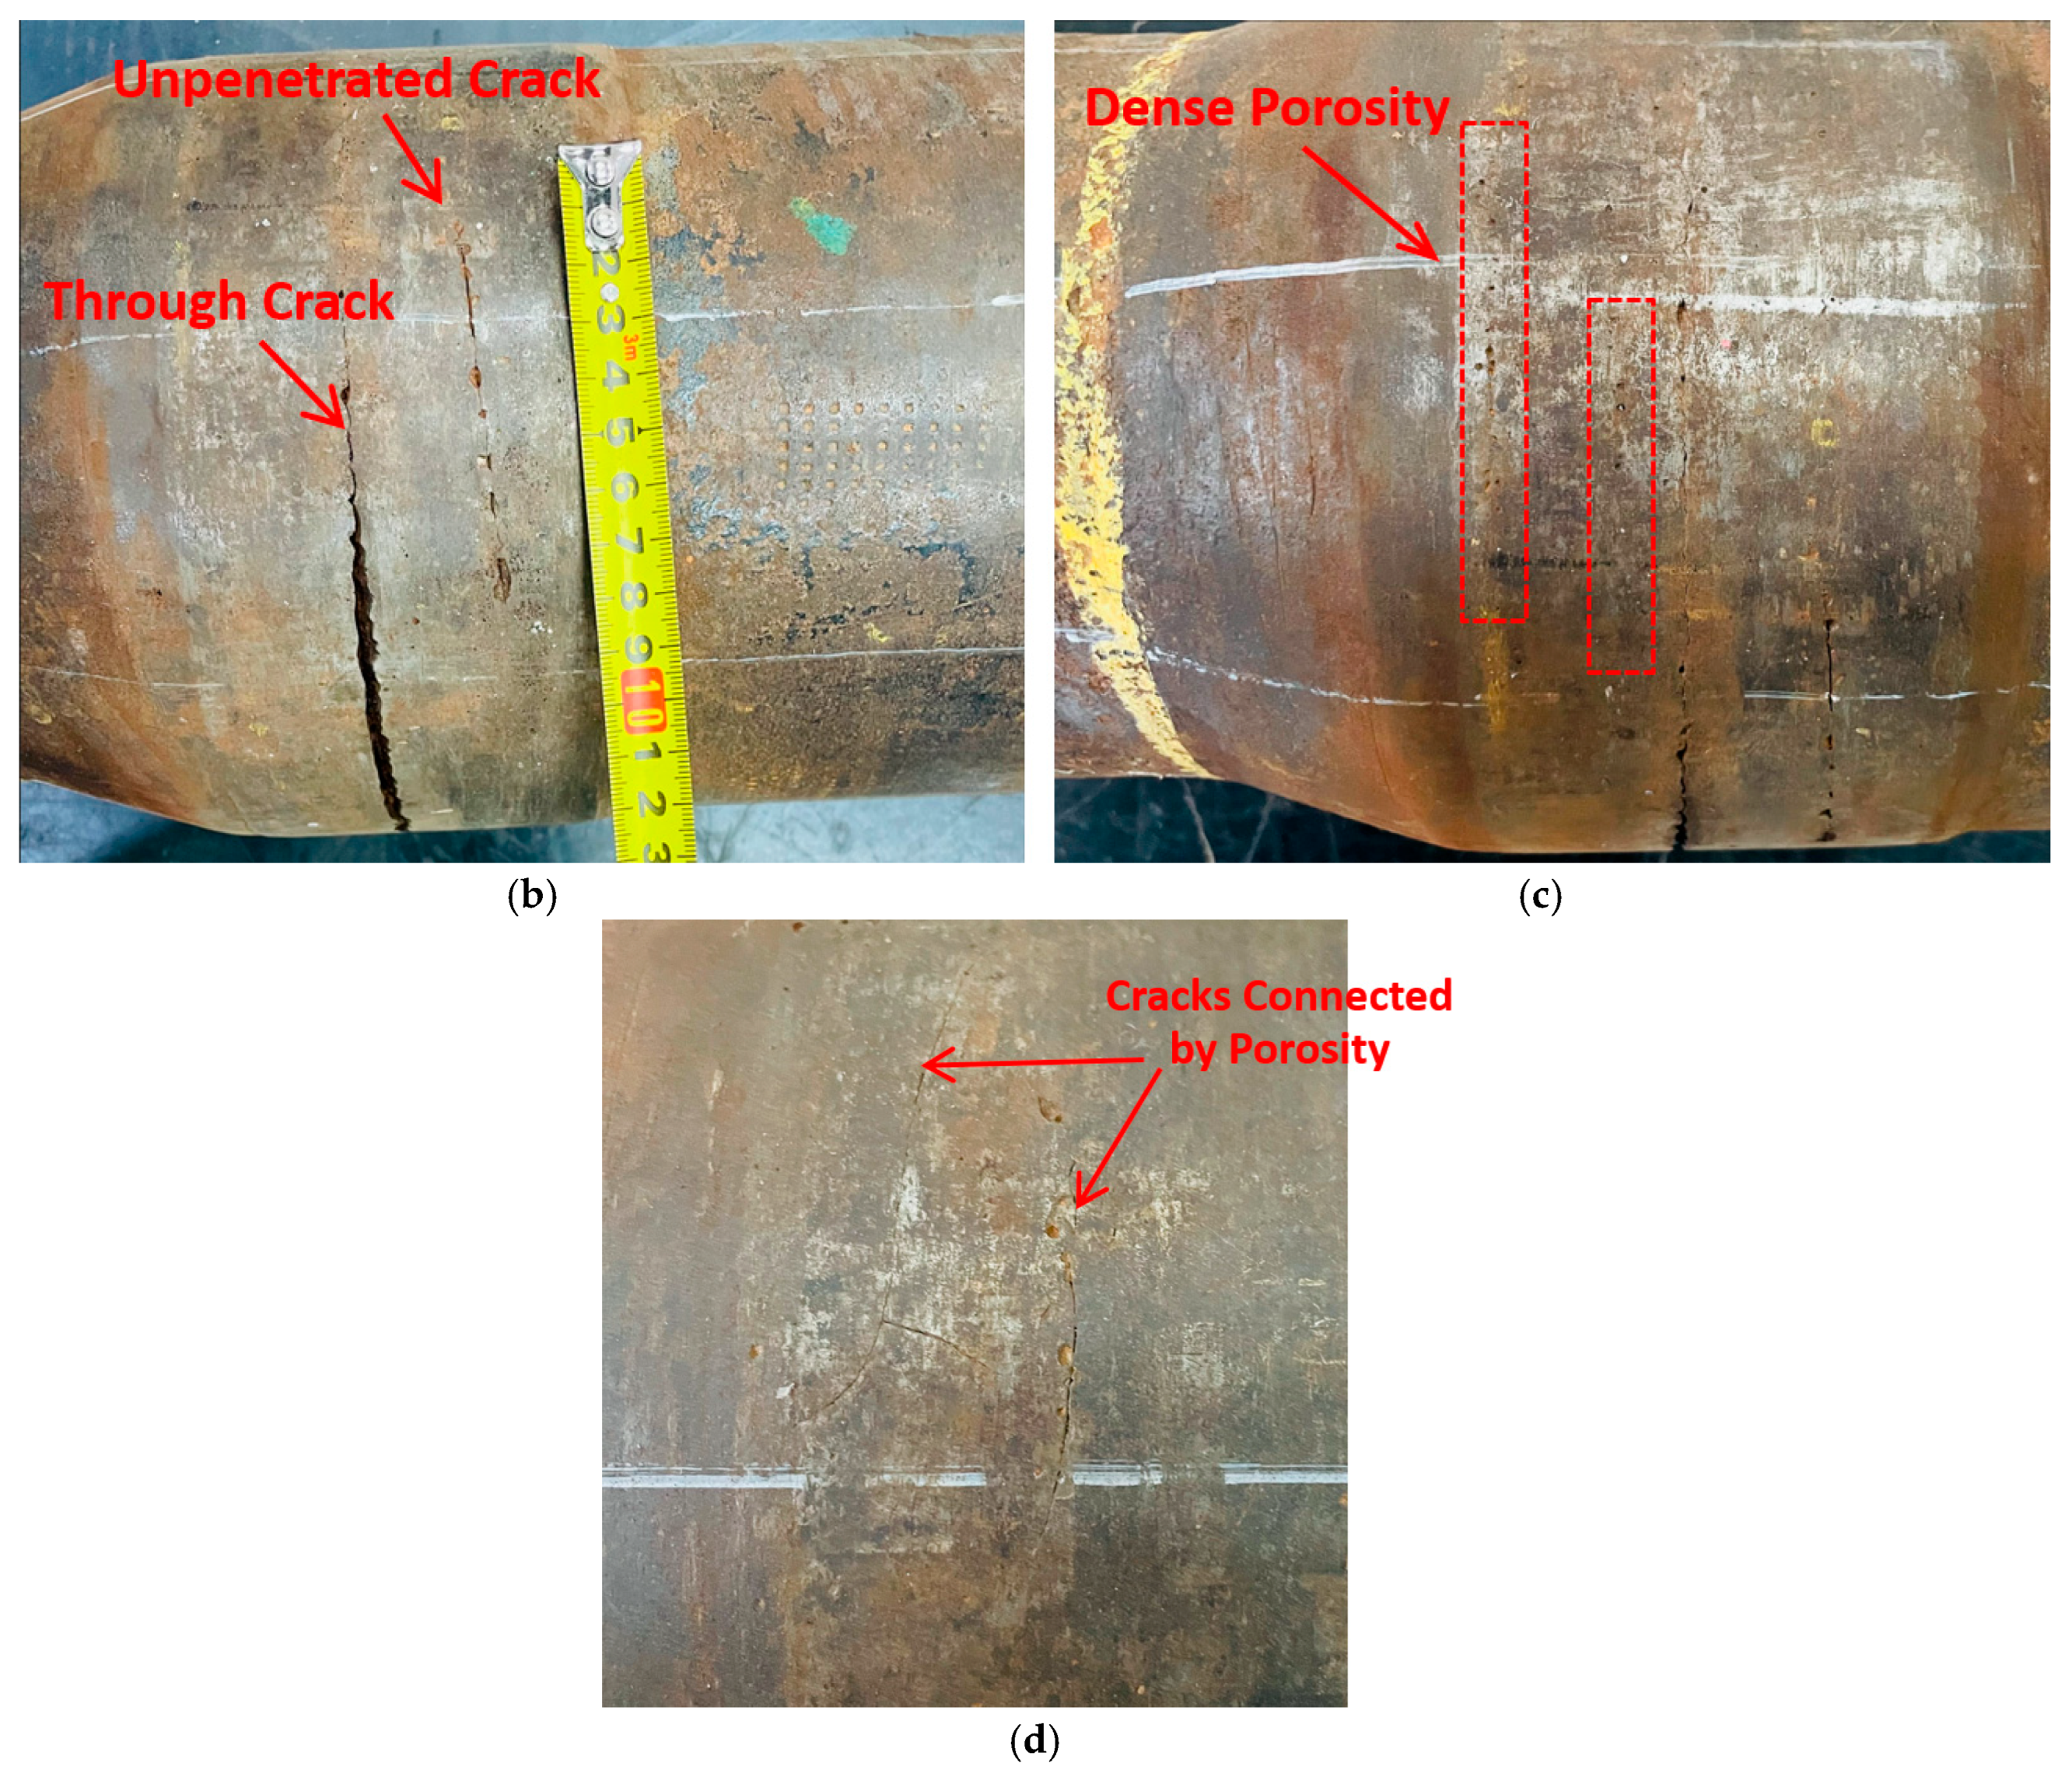
4.1. Macroscopic Observation
4.2. Mechanical Performance Tests
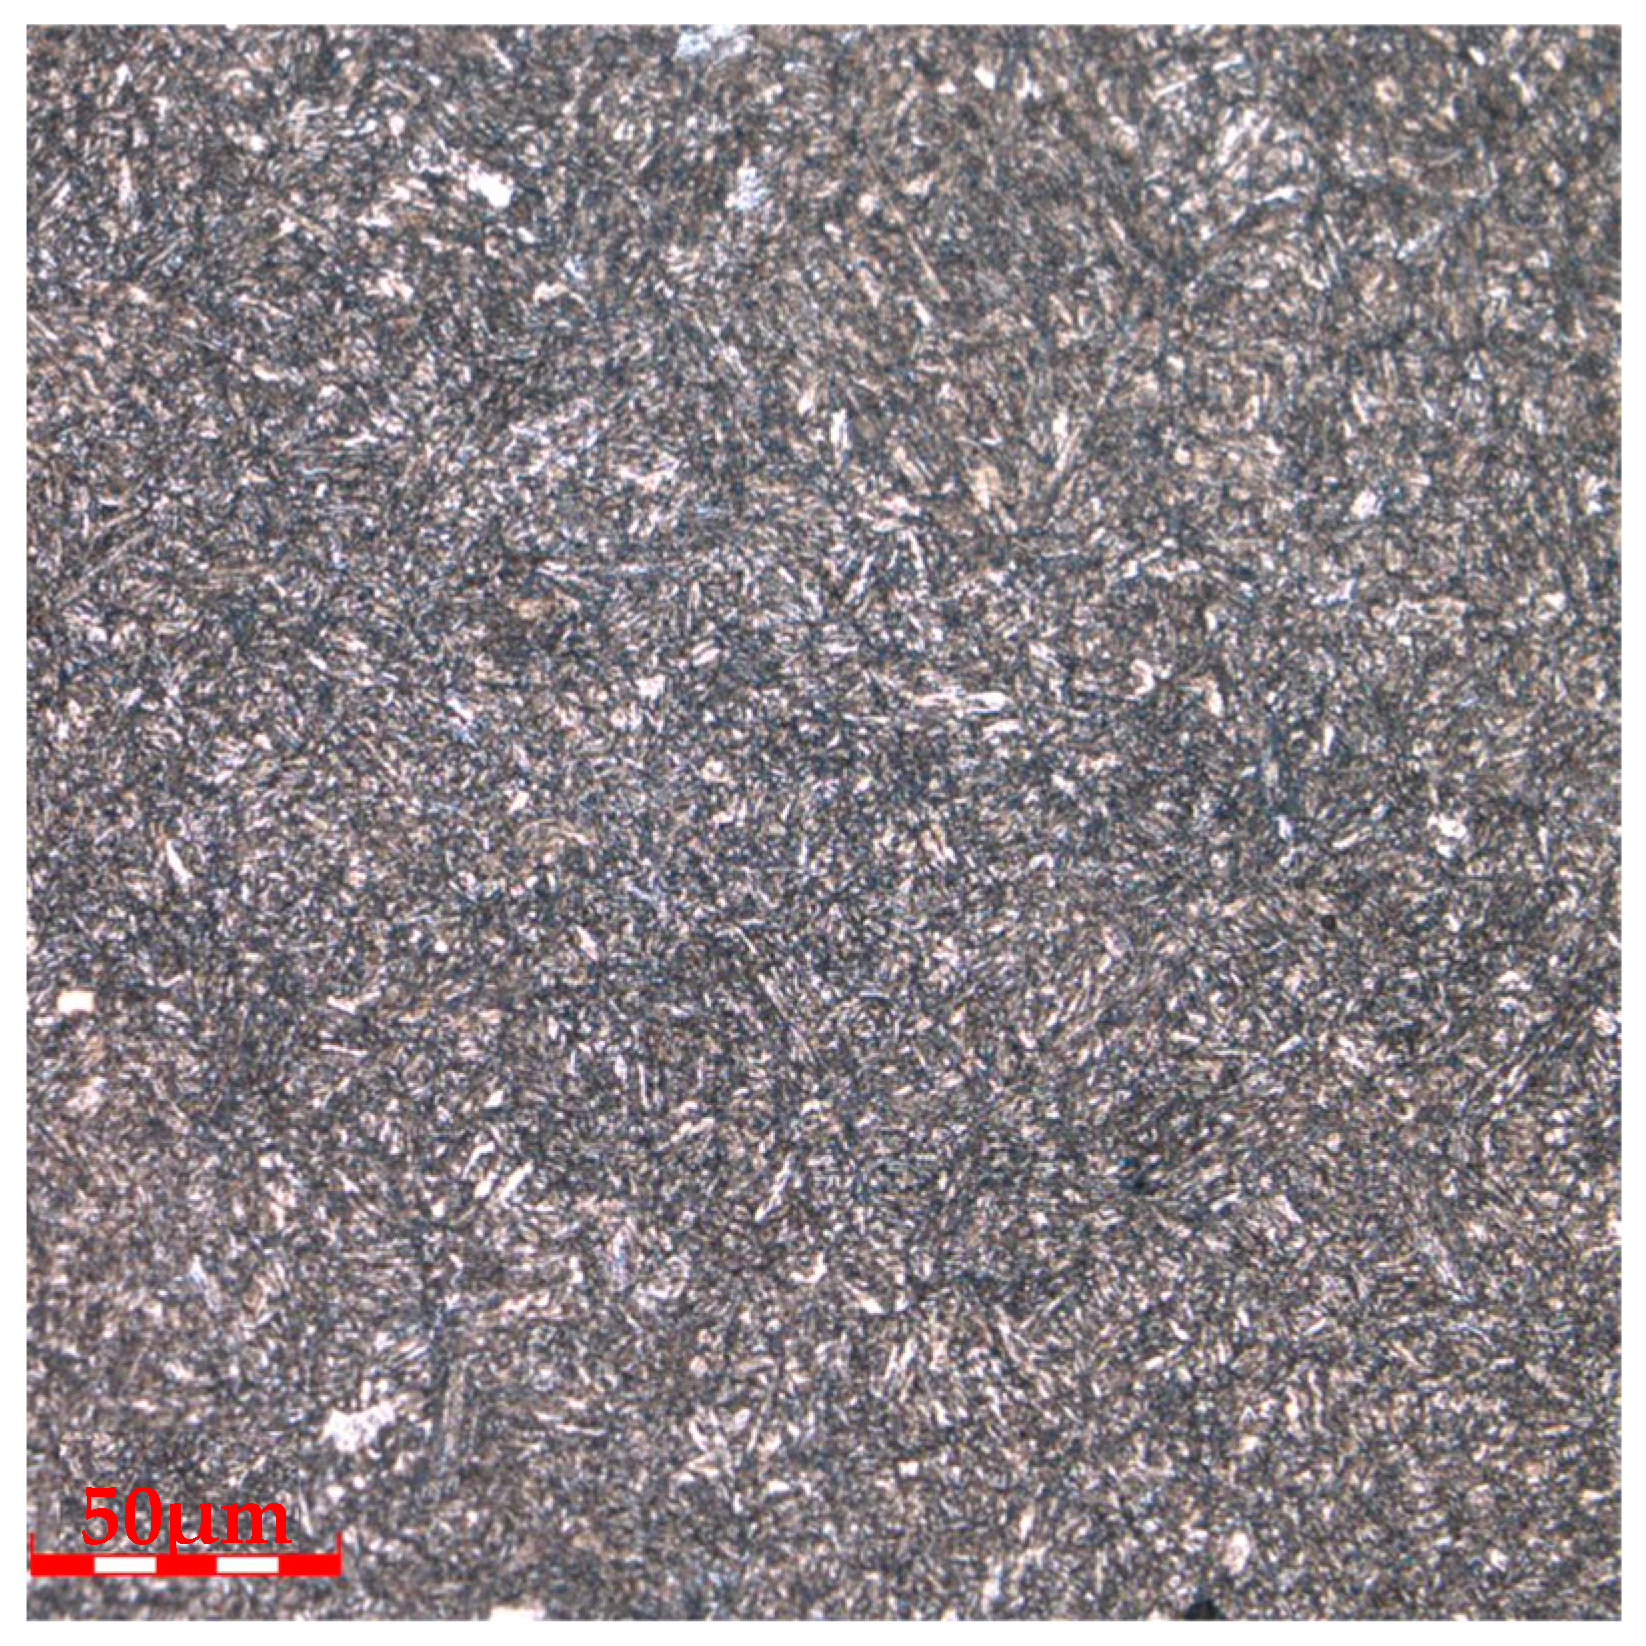
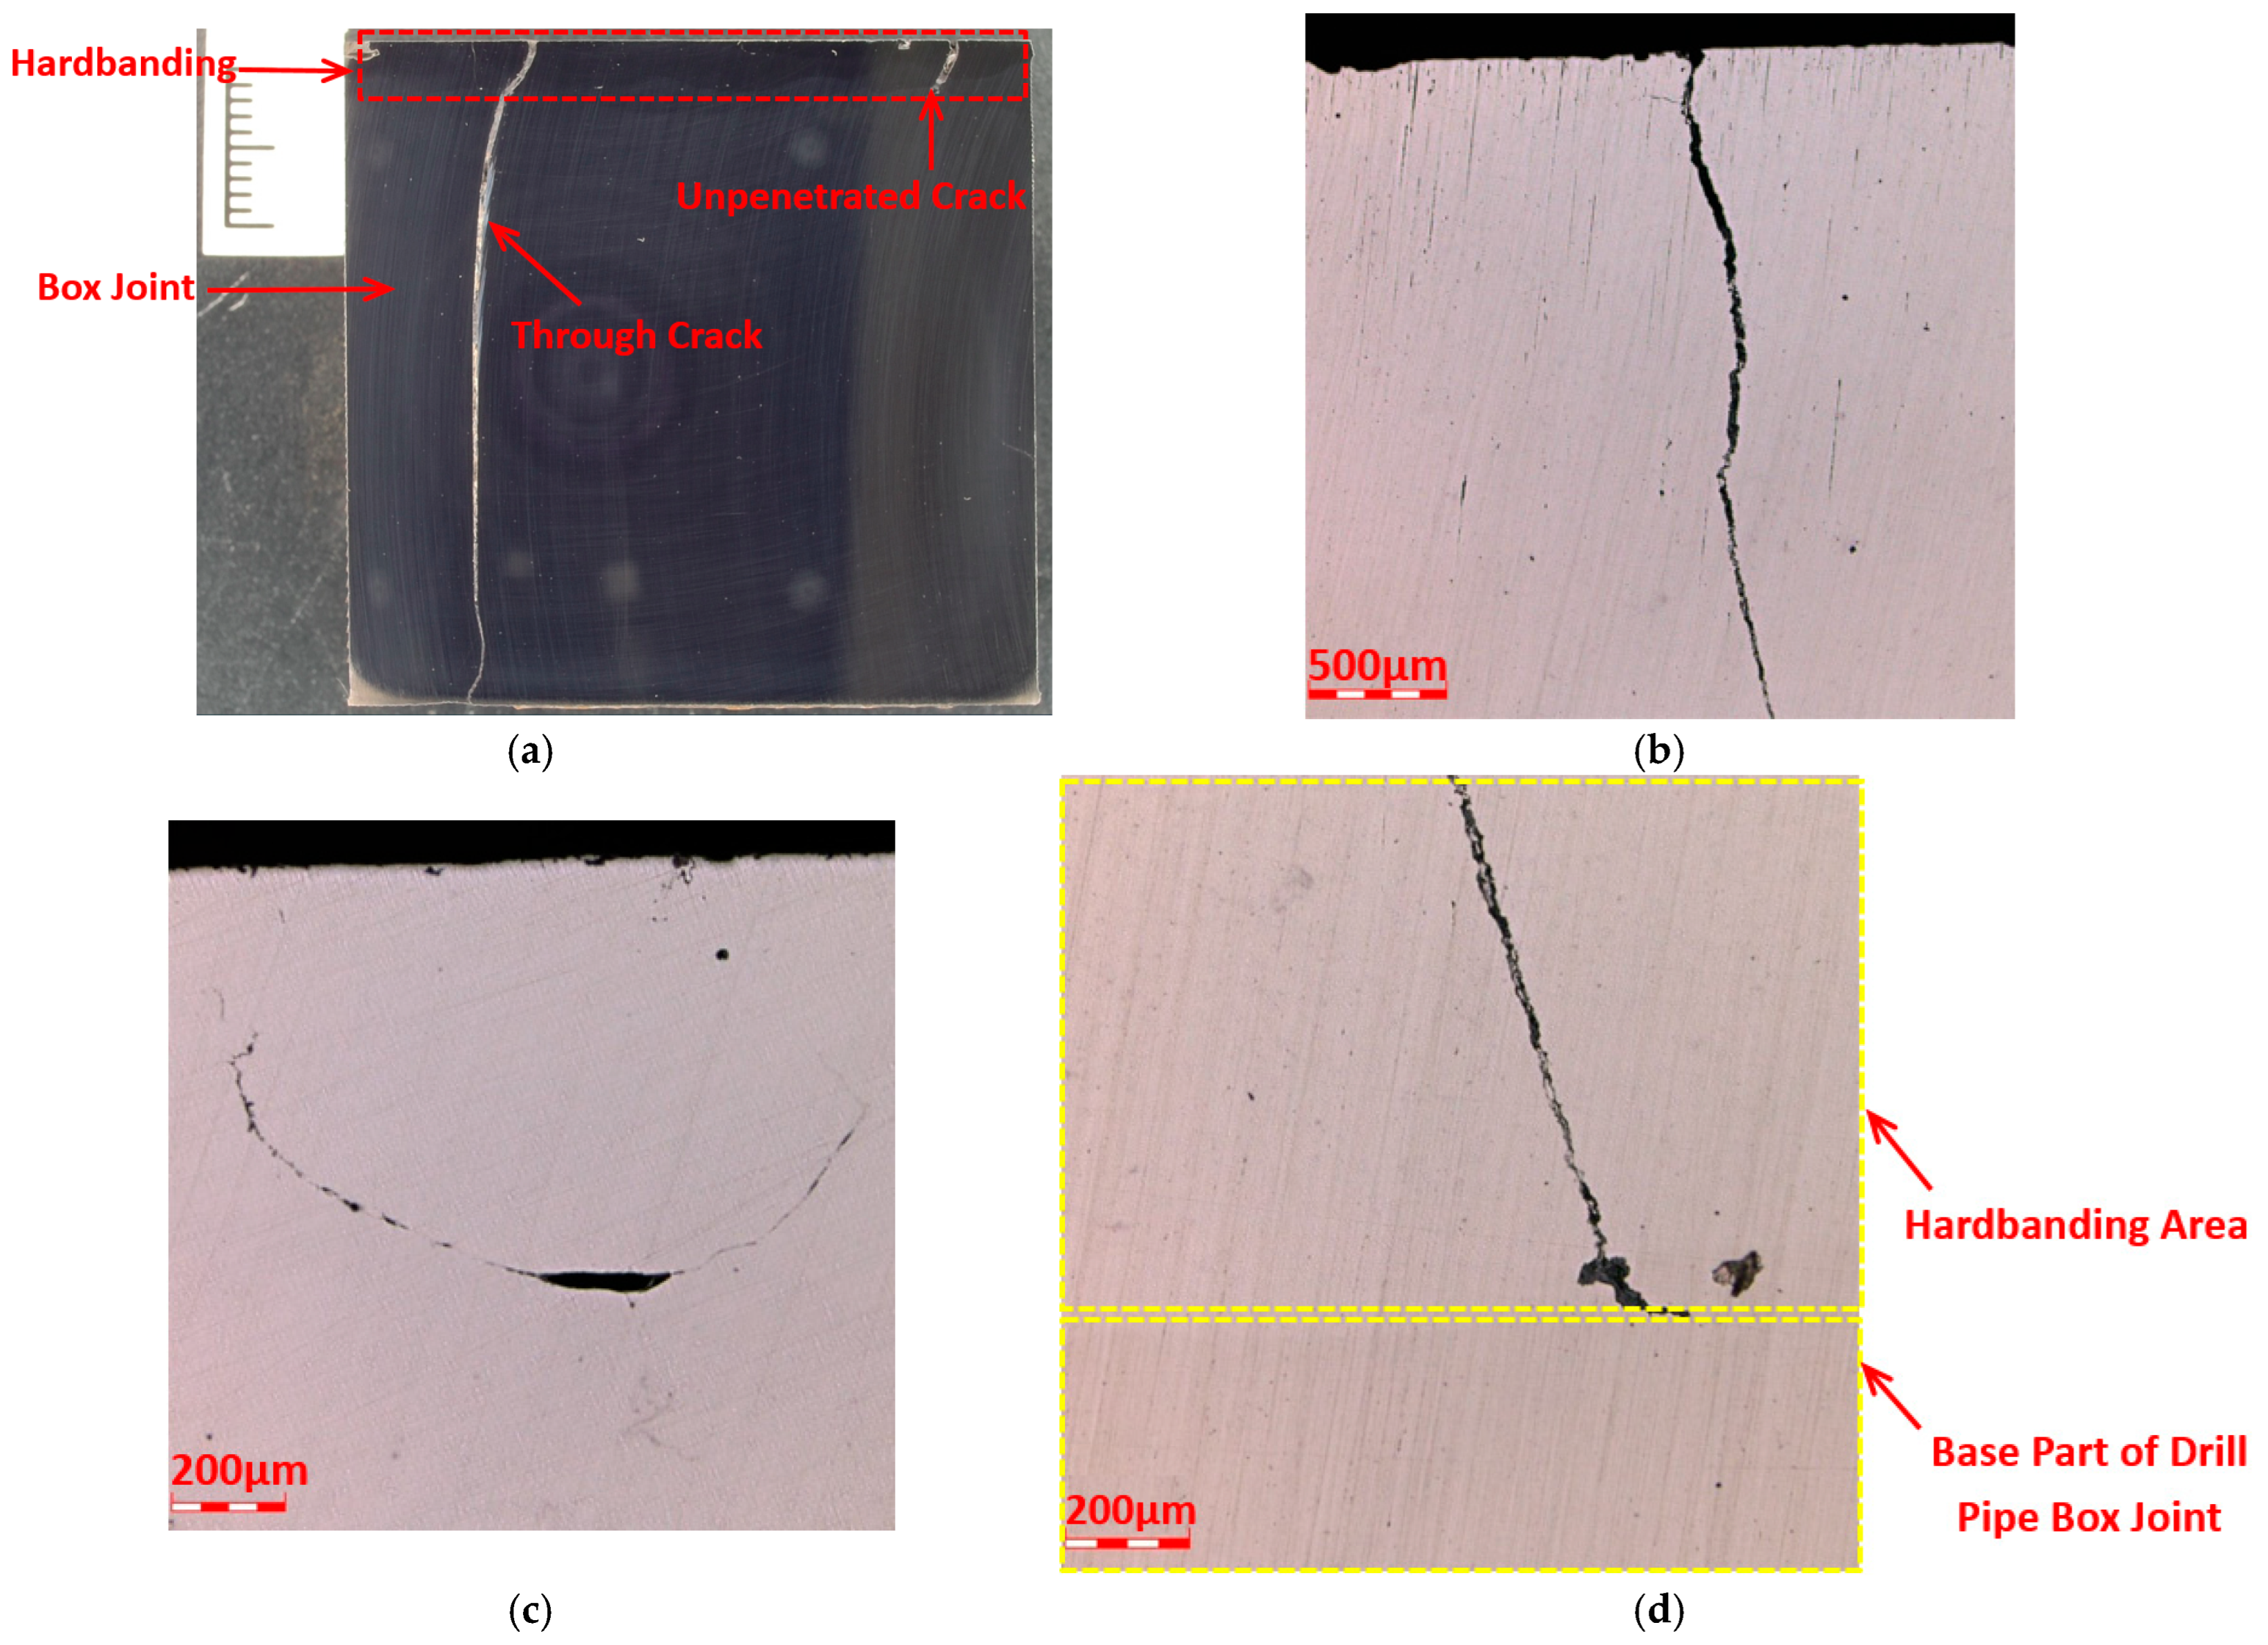
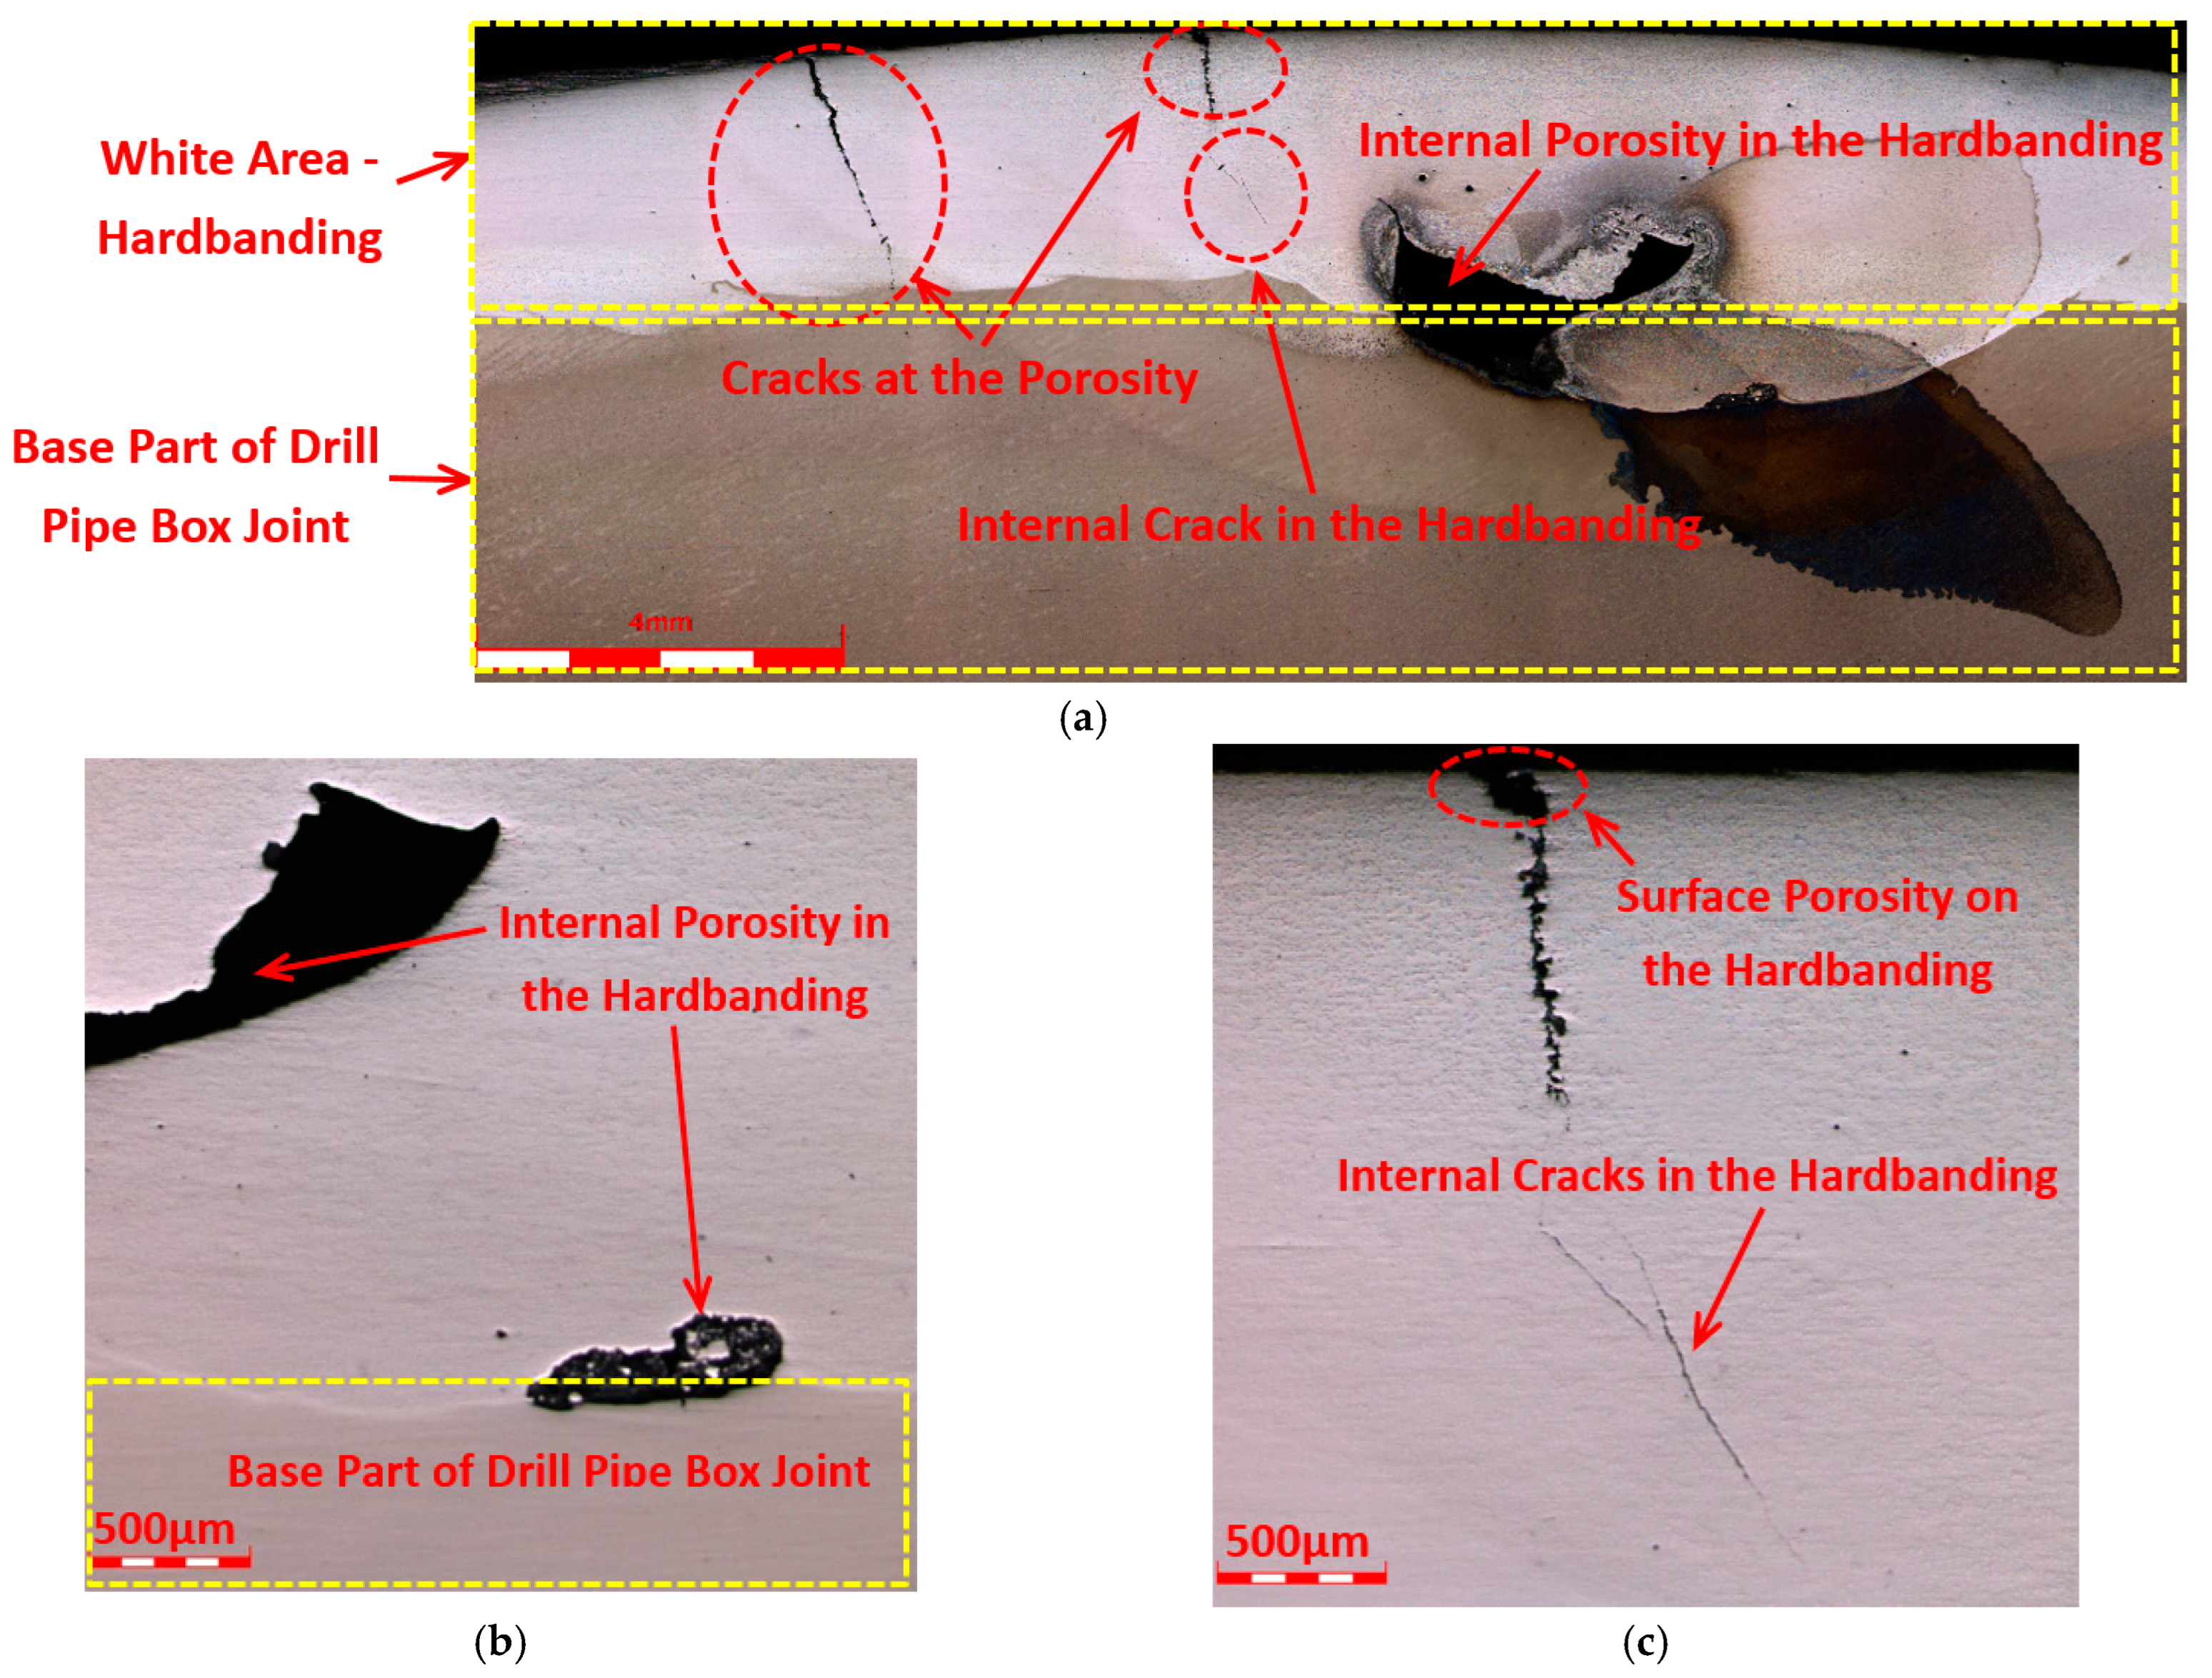
4.3. Metallographic Analysis of Three Locations
4.4. Micro-Vickers Hardness Test for the Full Wall Thickness of Drill Pipe Joint
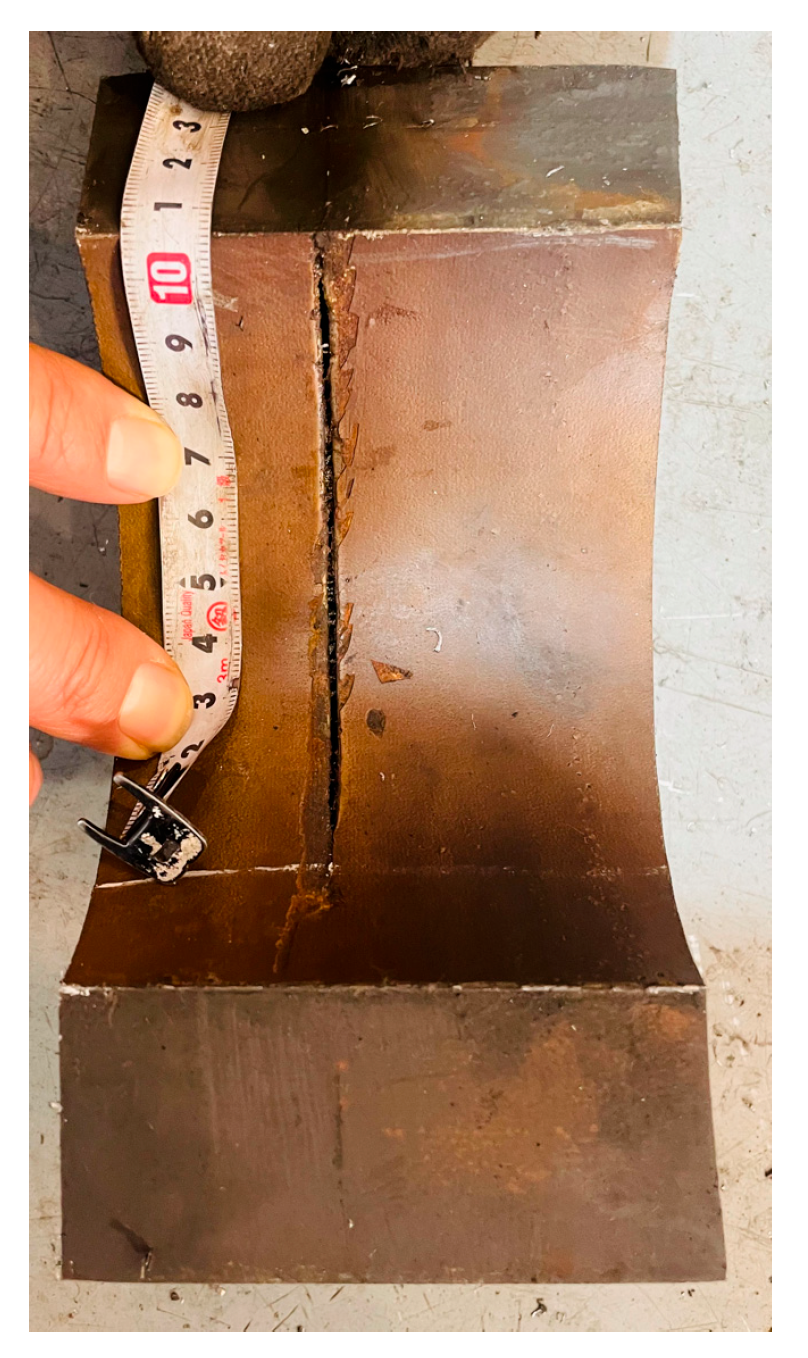
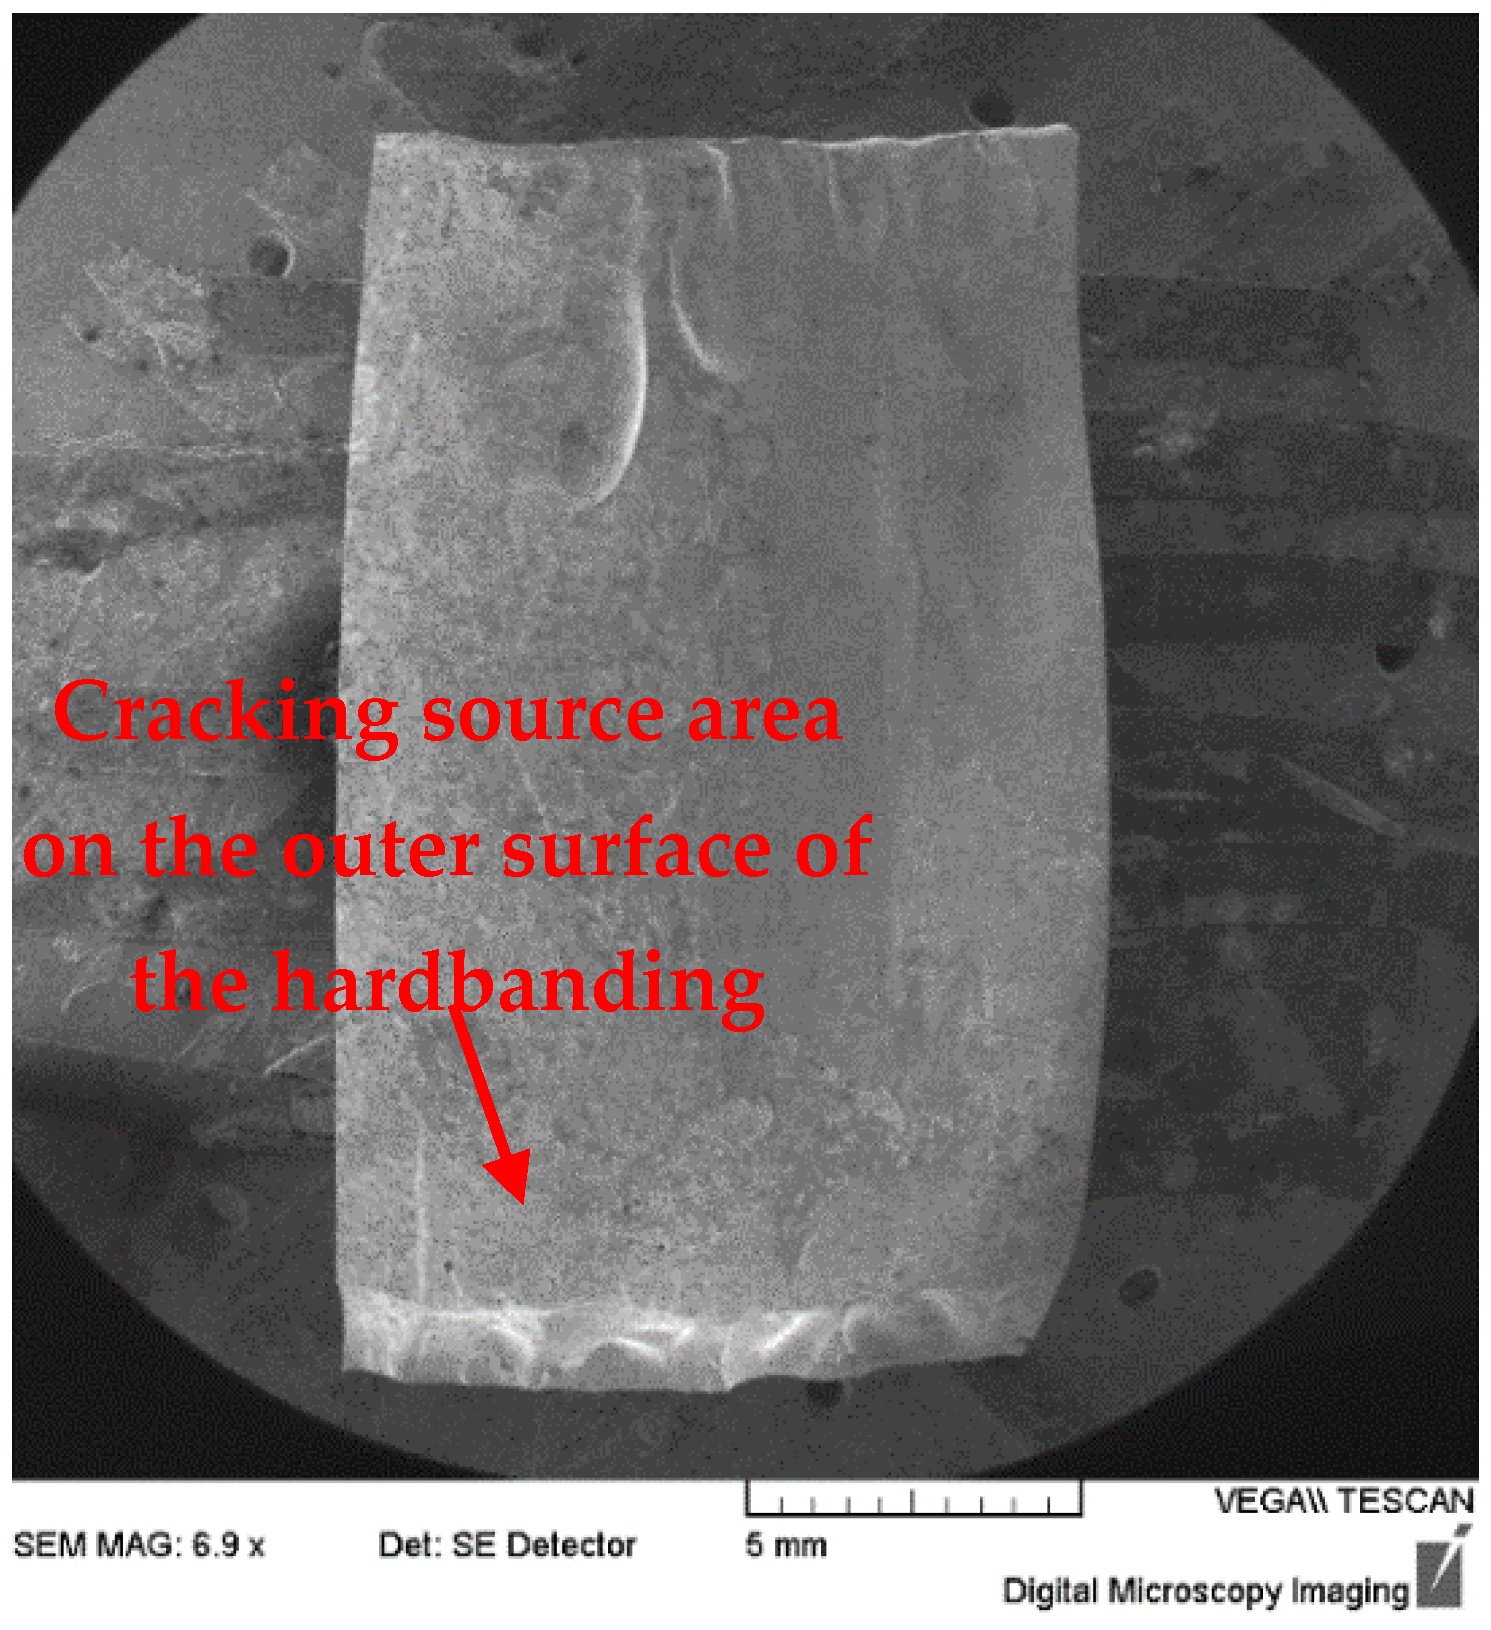
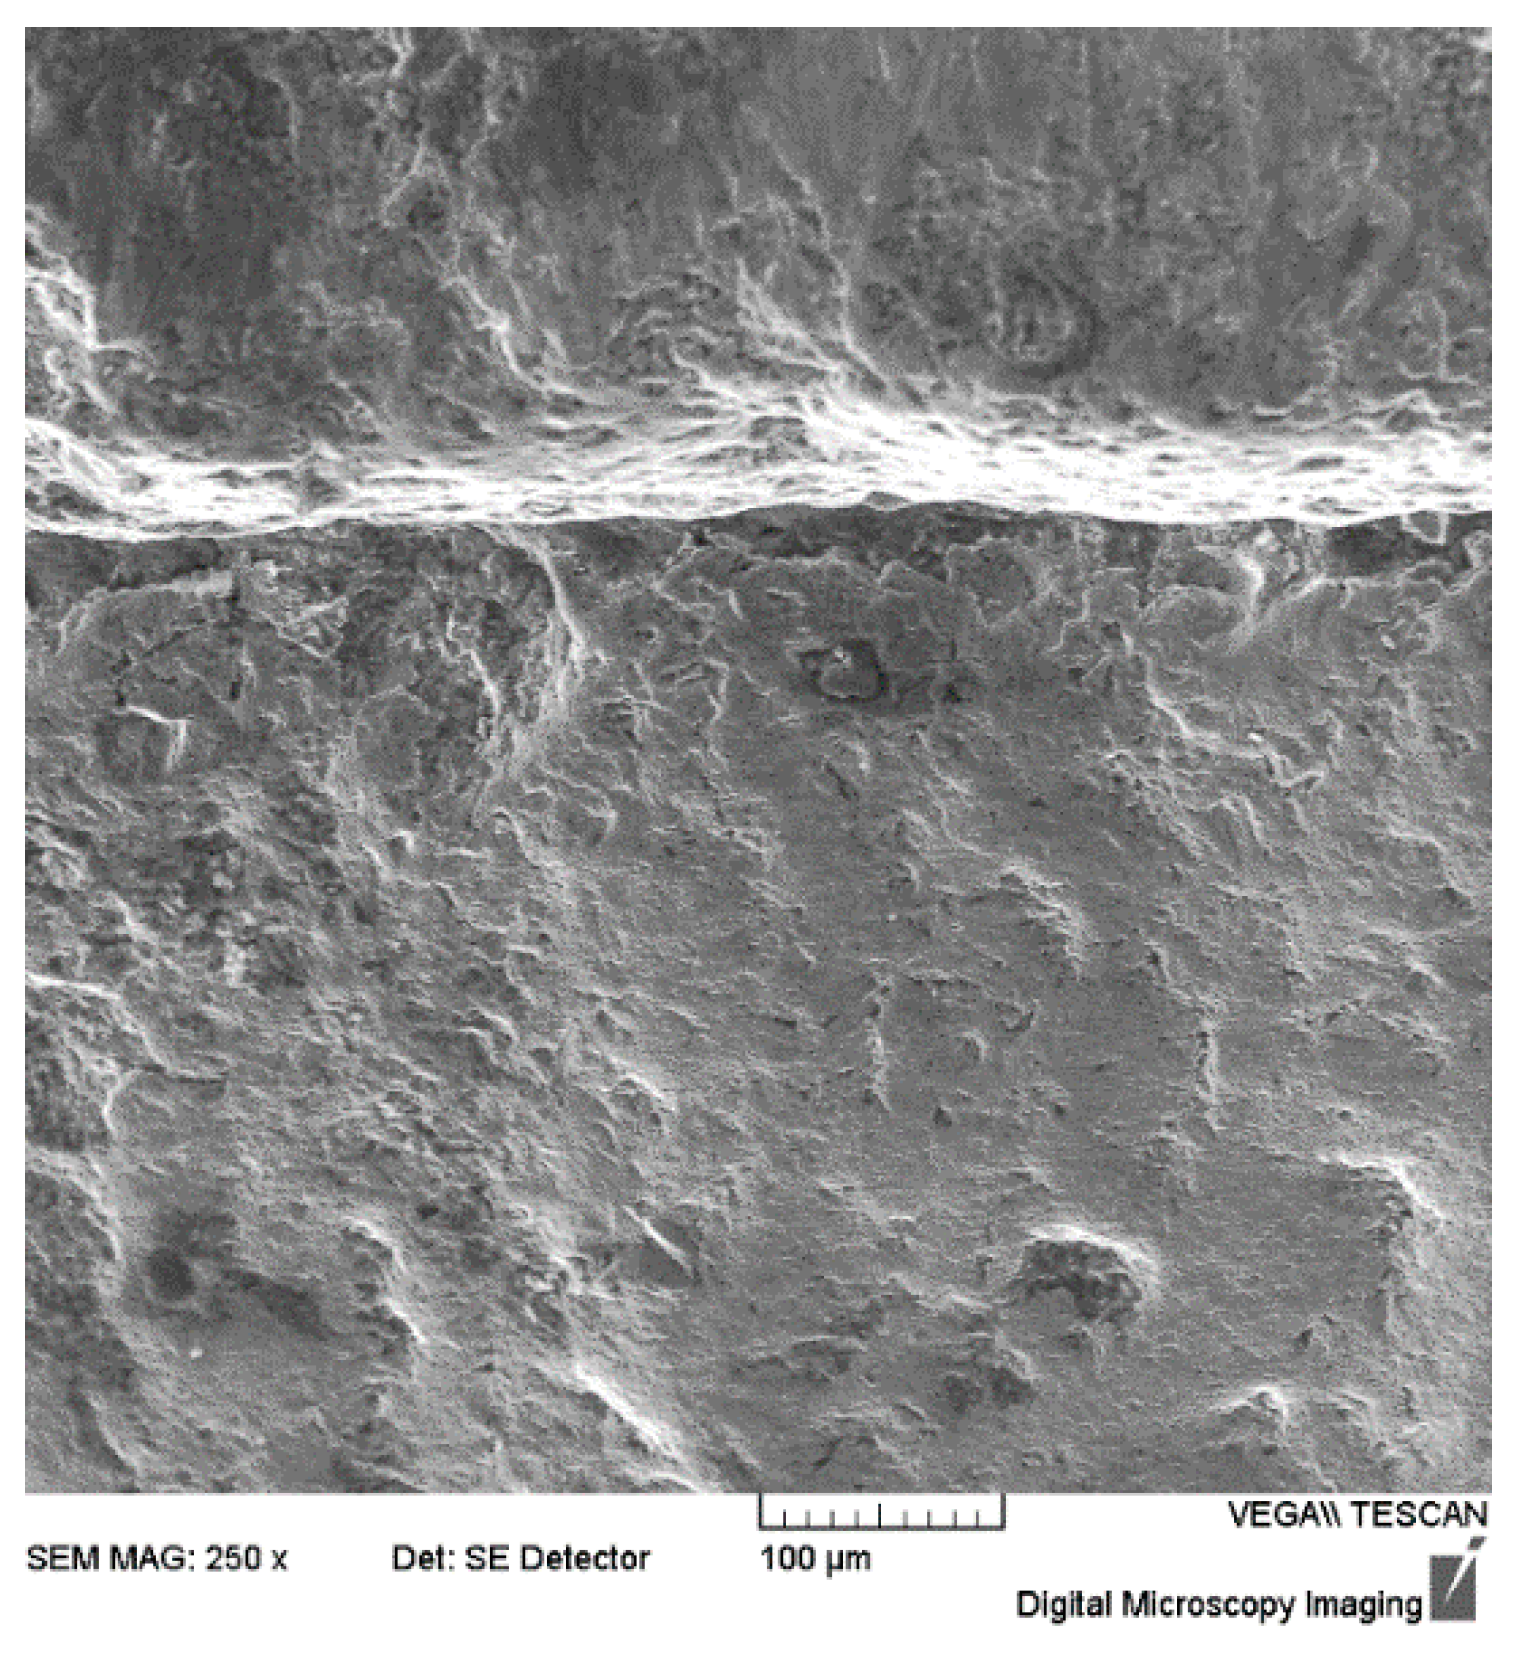
4.5. Fracture Analysis of Through Crack
4.6. Line Scanning Analysis of Hardbanding Area
5. Analysis and Discussion
5.1. Material Factor of Drill Pipe
5.2. Welding Quality of the Hardbanding
5.3. The Wellbore Environment
5.4. Causes and Mechanism of Drill Pipe Joint Cracking
6. Conclusions and Suggestions
Author Contributions
Funding
Data Availability Statement
Acknowledgments
Conflicts of Interest
References
- Zhu, X.; Wang, X.; Liu, Y.; Luo, Y.; Zhang, H.; Li, B.; Mao, D. Effect of cuttings particle content on the tribological behavior of Fe/DLC at casing and drill pipe joints: A molecular dynamics study. J. Mol. Liq. 2024, 396, 124006. [Google Scholar] [CrossRef]
- Truhan, J.; Menon, R.; LeClaire, F.; Wallin, J.; Qu, J.; Blau, P. The friction and wear of various hard-face claddings for deep-hole drilling. Wear 2007, 263, 234–239. [Google Scholar] [CrossRef]
- Xue, T.; Wang, Y.; Zhang, K.; Sun, L. Role of binder phase on properties and holding ability of WC based diamond hardbanding matrix. Int. J. Refract. Met. Hard Mater. 2025, 131, 107184. [Google Scholar] [CrossRef]
- Zhang, K.; Wang, D.; Wang, Z.; Li, Y.; Zhou, Q.; Liu, B.; Wang, Z. Effect of Ni content and maceration metal on the microstructure and properties of WC based diamond composites. Int. J. Refract. Met. Hard Mater. 2020, 88, 105196. [Google Scholar] [CrossRef]
- Zhang, K.; Wang, D.; Wang, Z.; Guo, Y. Material properties and tool performance of PCD reinforced WC matrix composites for hardbanding applications. Int. J. Refract. Met. Hard Mater. 2015, 51, 146–152. [Google Scholar] [CrossRef]
- Zhao, X.; Li, J.; Duan, L.; Tan, S.; Fang, X. Effect of Fe-based pre-alloyed powder on the microstructure and holding strength of impregnated diamond bit matrix. Int. J. Refract. Met. Hard Mater. 2019, 79, 115–122. [Google Scholar] [CrossRef]
- Wen, S.; Du, Y.; Liu, Y.; Tan, J.; Long, J.; Lou, M.; Chang, K.; Qiu, L.; Tan, Z.; Yin, L.; et al. Manipulation of the thermal conductivity for two-phase WC-Ni composites through a microstructure-based model along with key experiments. J. Mater. Res. Technol. 2023, 22, 895–912. [Google Scholar] [CrossRef]
- Dai, W.; Yue, B.; Chang, S.; Bai, H.; Liu, B. Mechanical properties and microstructural characteristics of WC-bronze-based impregnated diamond composite reinforced by nano-NbC. Tribol. Int. 2022, 174, 107777. [Google Scholar] [CrossRef]
- Belnap, D.; Griffo, A. Homogeneous and structured PCD/WC-Co materials for drilling. Diam. Relat. Mater. 2004, 13, 1914–1922. [Google Scholar] [CrossRef]
- Liu, Y.; Wang, L.; Liu, T.; Zhang, H.; Zhu, X. Probing the tribological behaviors of diamond-like carbon film in water-based drilling fluid environment by varying normal loads. Diam. Relat. Mater. 2022, 130, 109552. [Google Scholar] [CrossRef]
- Aboua, K.A.M.; Umehara, N.; Kousaka, H.; Deng, X.; Tasdemir, H.A.; Mabuchi, Y.; Higuchi, T.; Kawaguchi, M. Effect of carbon diffusion on friction and wear properties of diamond-like carbon in boundary base oil lubrication. Tribol. Int. 2017, 113, 389–398. [Google Scholar] [CrossRef]
- Tahir, A.; Li, G.-R.; Liu, M.-J.; Yang, G.-J.; Li, C.-X.; Wang, Y.-Y.; Li, C.-J. Improving WC-Co coating adhesive strength on rough substrate: Finite element modeling and experiment. J. Mater. Sci. Technol. 2020, 37, 1–8. [Google Scholar] [CrossRef]
- Fernández, M.; García, A.; Cuetos, J.; González, R.; Noriega, A.; Cadenas, M. Effect of actual WC content on the reciprocating wear of a laser cladding NiCrBSi alloy reinforced with WC. Wear 2015, 324–325, 80–89. [Google Scholar] [CrossRef]
- Zhao, S.; Li, C.; Davoodi, D.; Soltani, H.M.; Tayebi, M. Tribological behavior of PDC-cutter including cemented carbide and polycrystalline diamond composites produced by HPHT for drilling applications. Int. J. Refract. Met. Hard Mater. 2024, 123, 106756. [Google Scholar] [CrossRef]
- Rong, H.; Peng, Z.; Hu, Y.; Wang, C.; Yue, W.; Fu, Z.; Lin, X. Dependence of wear behaviors of hardmetal YG8B on coarse abrasive types and their slurry concentrations. Wear 2011, 271, 1156–1165. [Google Scholar] [CrossRef]
- Fedorova, L.; Fedorov, S.; Ivanova, Y.; Voronina, M.; Fomina, L.; Morozov, A. Improving drill pipe durability by wear-resistant surfacing. Mater. Today Proc. 2020, 30, 398–403. [Google Scholar] [CrossRef]
- Huang, Z.; Yin, Z.; Wu, W. Experimental research on improving the wear resistance and anti-friction properties of drill pipe joints. Ind. Lubr. Tribol. 2021, 73, 1198–1208. [Google Scholar] [CrossRef]
- Liu, J.; Yang, S.; Xia, W.; Jiang, X.; Gui, C. Microstructure and wear resistance performance of Cu–Ni–Mn alloy based hardfacing coatings reinforced by WC particles. J. Alloy Compd. 2016, 654, 63–70. [Google Scholar] [CrossRef]
- Murthy, G.; Das, G.; Das, S.K.; Parveen, N.; Singh, S. Hardbanding failure in a heavy weight drill pipe. Eng. Fail. Anal. 2011, 18, 1395–1402. [Google Scholar] [CrossRef]
- ASTM A751-21; Standard Test Methods and Practices for Chemical Analysis of Steel Products. ASTM International: West Conshohocken, PA, USA, 2021.
- ASTM A370-24; Standard Test Methods and Definitions for Mechanical Testing of Steel Products. ASTM International: West Conshohocken, PA, USA, 2024.
- ASTM E10-18; Standard Test Method for Brinell Hardness of Metallic Materials. ASTM International: West Conshohocken, PA, USA, 2018.
- ASTM E18-22; Standard Test Methods for Rockwell Hardness of Metallic Materials. ASTM International: West Conshohocken, PA, USA, 2022.
- ASTM E3-11 (2017); Standard Guide for Preparation of Metallographic Specimens. ASTM International: West Conshohocken, PA, USA, 2017.
- ASTM E45-18a; Standard Test Methods for Determining the Inclusion Content of Steel. ASTM International: West Conshohocken, PA, USA, 2018.
- ASTM E112-24; Standard Test Methods for Determining Average Grain Size. ASTM International: West Conshohocken, PA, USA, 2024.
- GB/T 34474.1-2017; Determination of Banded Structure of Steel-Part 1: Micrographic Method Using Standards Diagrams. China Standards Press: Beijing, China, 2017.







| Element | C | Si | Mn | P | S | Cr | Mo | Ni | Nb | V | Ti | Cu | B | Al |
|---|---|---|---|---|---|---|---|---|---|---|---|---|---|---|
| Content | 0.33 | 0.27 | 0.92 | 0.011 | 0.0035 | 1.12 | 0.29 | 0.038 | 0.014 | 0.0061 | 0.0095 | 0.047 | <0.0001 | 0.021 |
| Requirements of Quality Documentation Package | / | / | / | ≤ 0.015 | ≤ 0.020 | / | / | / | / | / | / | / | / | / |
| Sample | Yield Strength/MPa (0.2% Plastic Extension) | Tensile Strength /MPa | Elongation /% | Reduction of Area/% | |
|---|---|---|---|---|---|
| Orientation | Nominal Diameter × Gauge Length /mm | ||||
| Longitudinal | Φ12.7 × 50 | 954 | 1043 | 17 | 63 |
| Requirements of Quality Documentation Package | 830~1034 | ≥970 | ≥13 | ≥35 | |
| Sample | Temperature/°C | Impact Energy/J | ||||
|---|---|---|---|---|---|---|
| Orientation | Specifications/mm (V-Notch) | Single Value | Average Value | |||
| Longitudinal | 10 × 10 × 55 | −20 | 95 | 95 | 93 | 94 |
| Requirements of Quality Documentation Package | −20 | ≥47 | ≥54 | |||
| Item | Hardness (HBW10/3000) | ||
|---|---|---|---|
| Hardness Value | 341 | 314 | 311 |
| Requirements of Quality Documentation Package | 285~341 | ||
| Sample | Hardness Test (HRC) | ||||||||||||
|---|---|---|---|---|---|---|---|---|---|---|---|---|---|
| Quadrant I | Quadrant II | Quadrant III | Quadrant IV | ||||||||||
| Box Joint | Outer Surface | 31.5 | 31.8 | 31.2 | 30.7 | 30.9 | 30.5 | 32.1 | 32.4 | 31.6 | 32.5 | 32.4 | 32.5 |
| Centre | 32.4 | 33.1 | 32.8 | 31.2 | 31.5 | 32.0 | 31.7 | 32.1 | 32.1 | 31.7 | 31.9 | 31.8 | |
| Inner Surface | 33.8 | 34.2 | 33.8 | 32.0 | 32.5 | 32.1 | 30.9 | 31.3 | 31.8 | 31.9 | 32.3 | 32.2 | |
| Item | Non-Metallic Inclusions | Microstructure | ASTM Grain Size | |||||||
|---|---|---|---|---|---|---|---|---|---|---|
| A | B | C | D | |||||||
| Thin | Thick | Thin | Thick | Thin | Thick | Thin | Thick | |||
| Analysis Results | 0.5 | 0.5 | 1.0 | 0 | 0 | 0 | 0.5 | 0 | Tempered Sortenite (Figure 7) | 9.0 |
| Indentation Position | Hardbanding Area | Heat-Affected Zone | Base of the Box Joint | |||||||
|---|---|---|---|---|---|---|---|---|---|---|
| 1 | 2 | 3 | 4 | 5 | 6 | 7 | 8 | 9 | 10 | |
| Hardness Value | 712 | 634 | 585 | 464 | 327 | 264 | 270 | 268 | 275 | 274 |
Disclaimer/Publisher’s Note: The statements, opinions and data contained in all publications are solely those of the individual author(s) and contributor(s) and not of MDPI and/or the editor(s). MDPI and/or the editor(s) disclaim responsibility for any injury to people or property resulting from any ideas, methods, instructions or products referred to in the content. |
© 2025 by the authors. Licensee MDPI, Basel, Switzerland. This article is an open access article distributed under the terms and conditions of the Creative Commons Attribution (CC BY) license.
Share and Cite
Zhao, J.; Li, D.; Cao, F.; Wang, L. Cracking Failure Analysis of Drill Pipe Joint with Hardbanding. Coatings 2026, 16, 25. https://doi.org/10.3390/coatings16010025
Zhao J, Li D, Cao F, Wang L. Cracking Failure Analysis of Drill Pipe Joint with Hardbanding. Coatings. 2026; 16(1):25. https://doi.org/10.3390/coatings16010025
Chicago/Turabian StyleZhao, Jinlan, Dejun Li, Feng Cao, and Li Wang. 2026. "Cracking Failure Analysis of Drill Pipe Joint with Hardbanding" Coatings 16, no. 1: 25. https://doi.org/10.3390/coatings16010025
APA StyleZhao, J., Li, D., Cao, F., & Wang, L. (2026). Cracking Failure Analysis of Drill Pipe Joint with Hardbanding. Coatings, 16(1), 25. https://doi.org/10.3390/coatings16010025


