Post-Corrosion Repair Thickness Measurements Using Lamb-Wave Technology: An Aviation MRO Case Study †
Abstract
1. Introduction
2. Materials and Methods
2.1. Experimental Setup
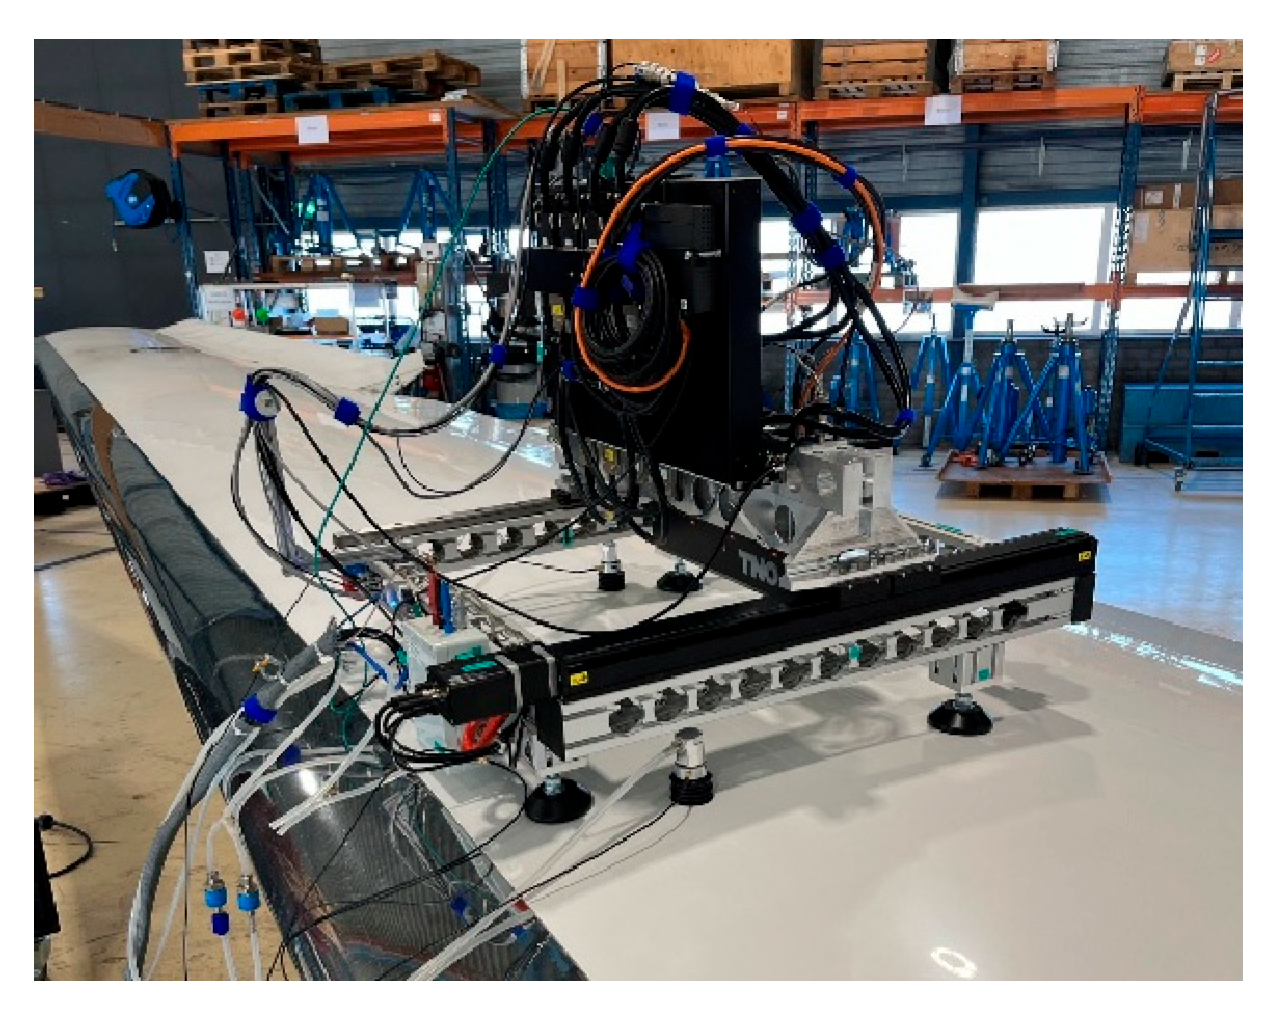
2.2. Experiments
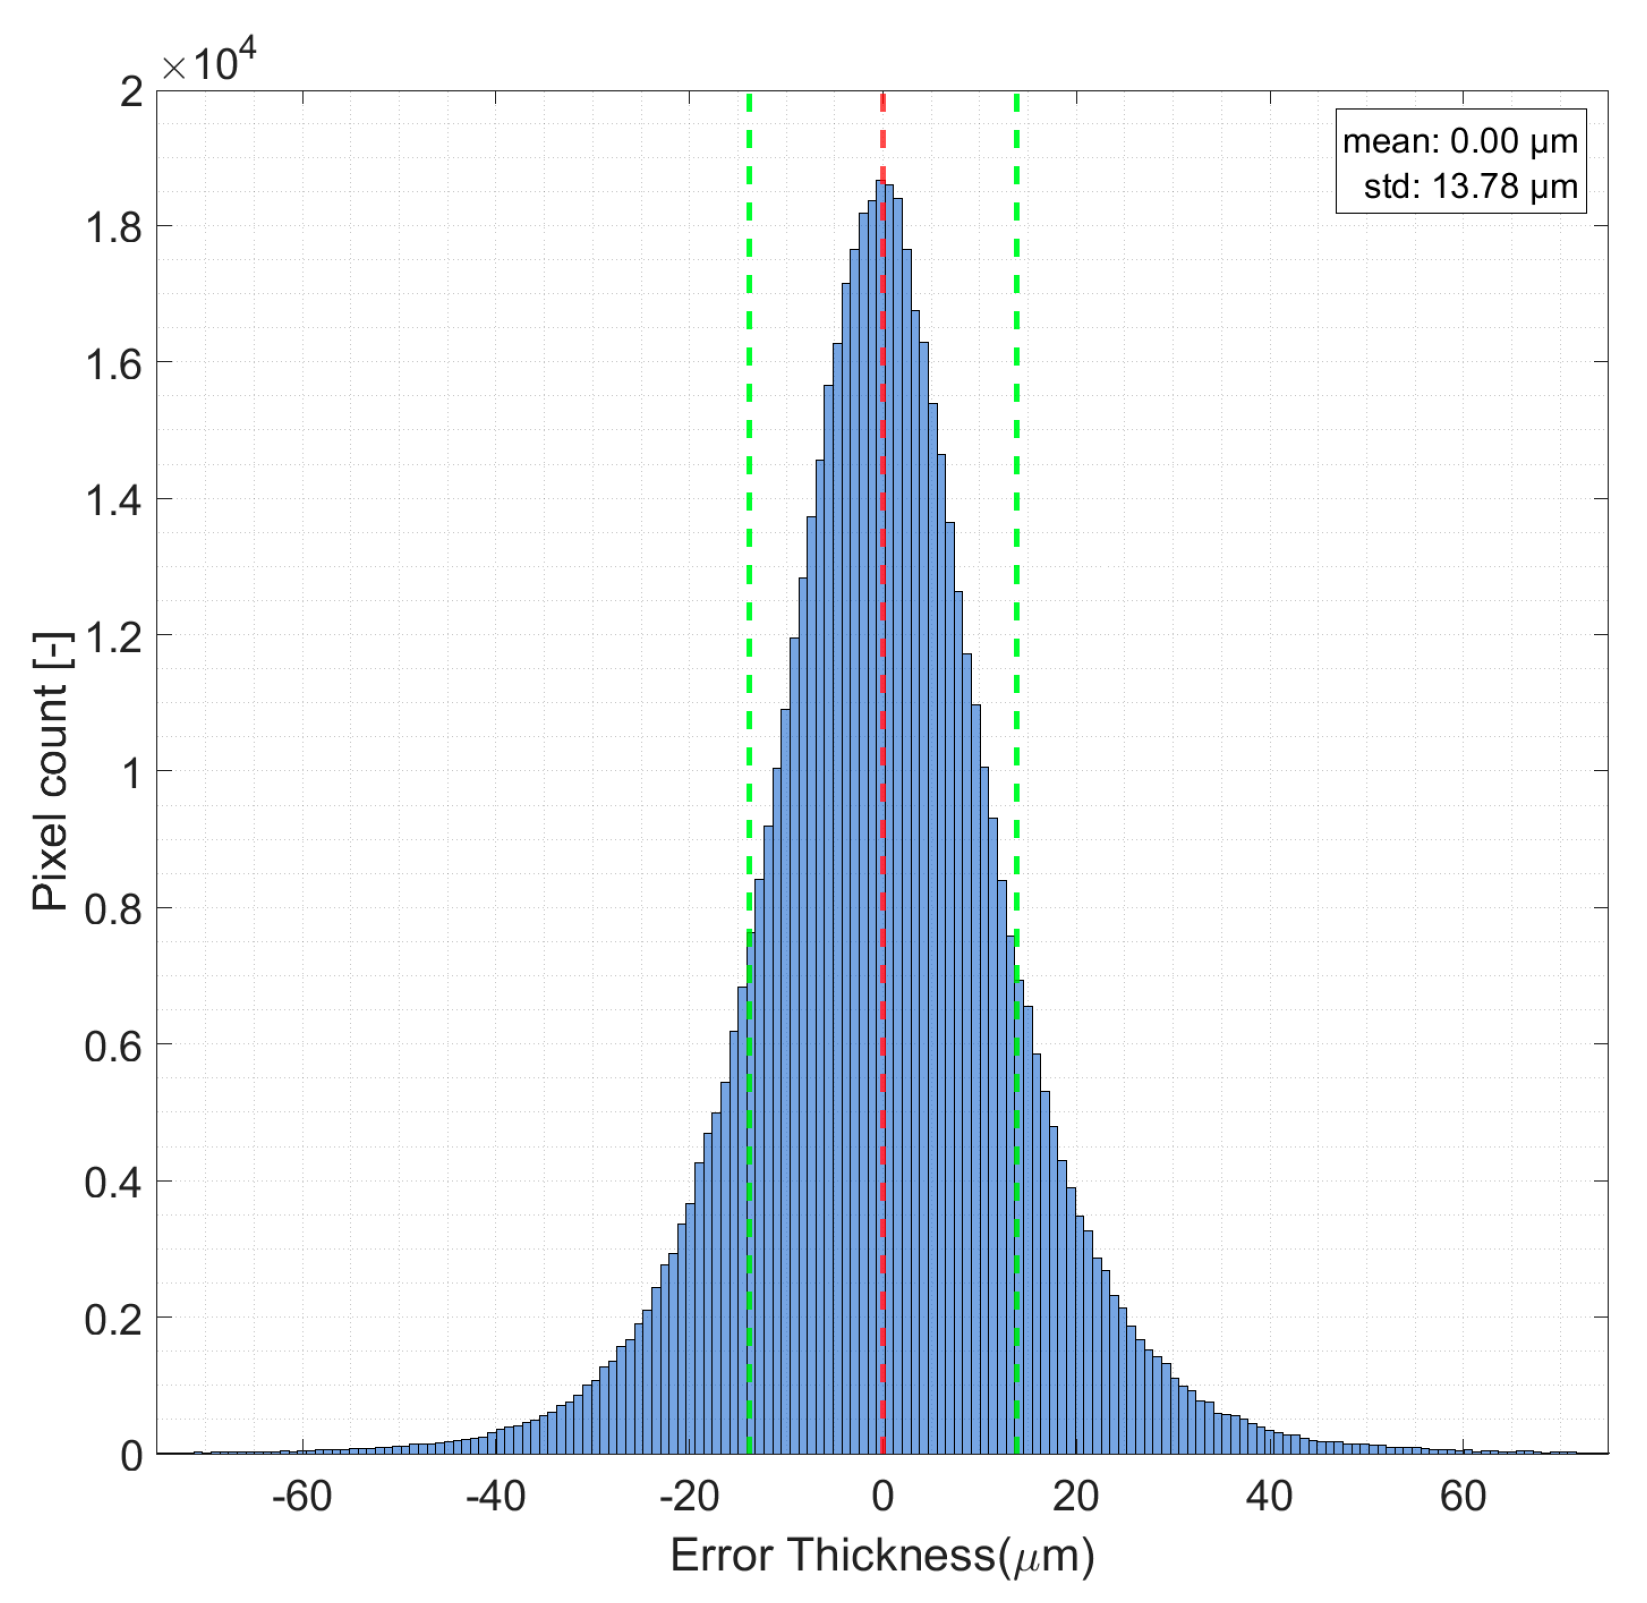
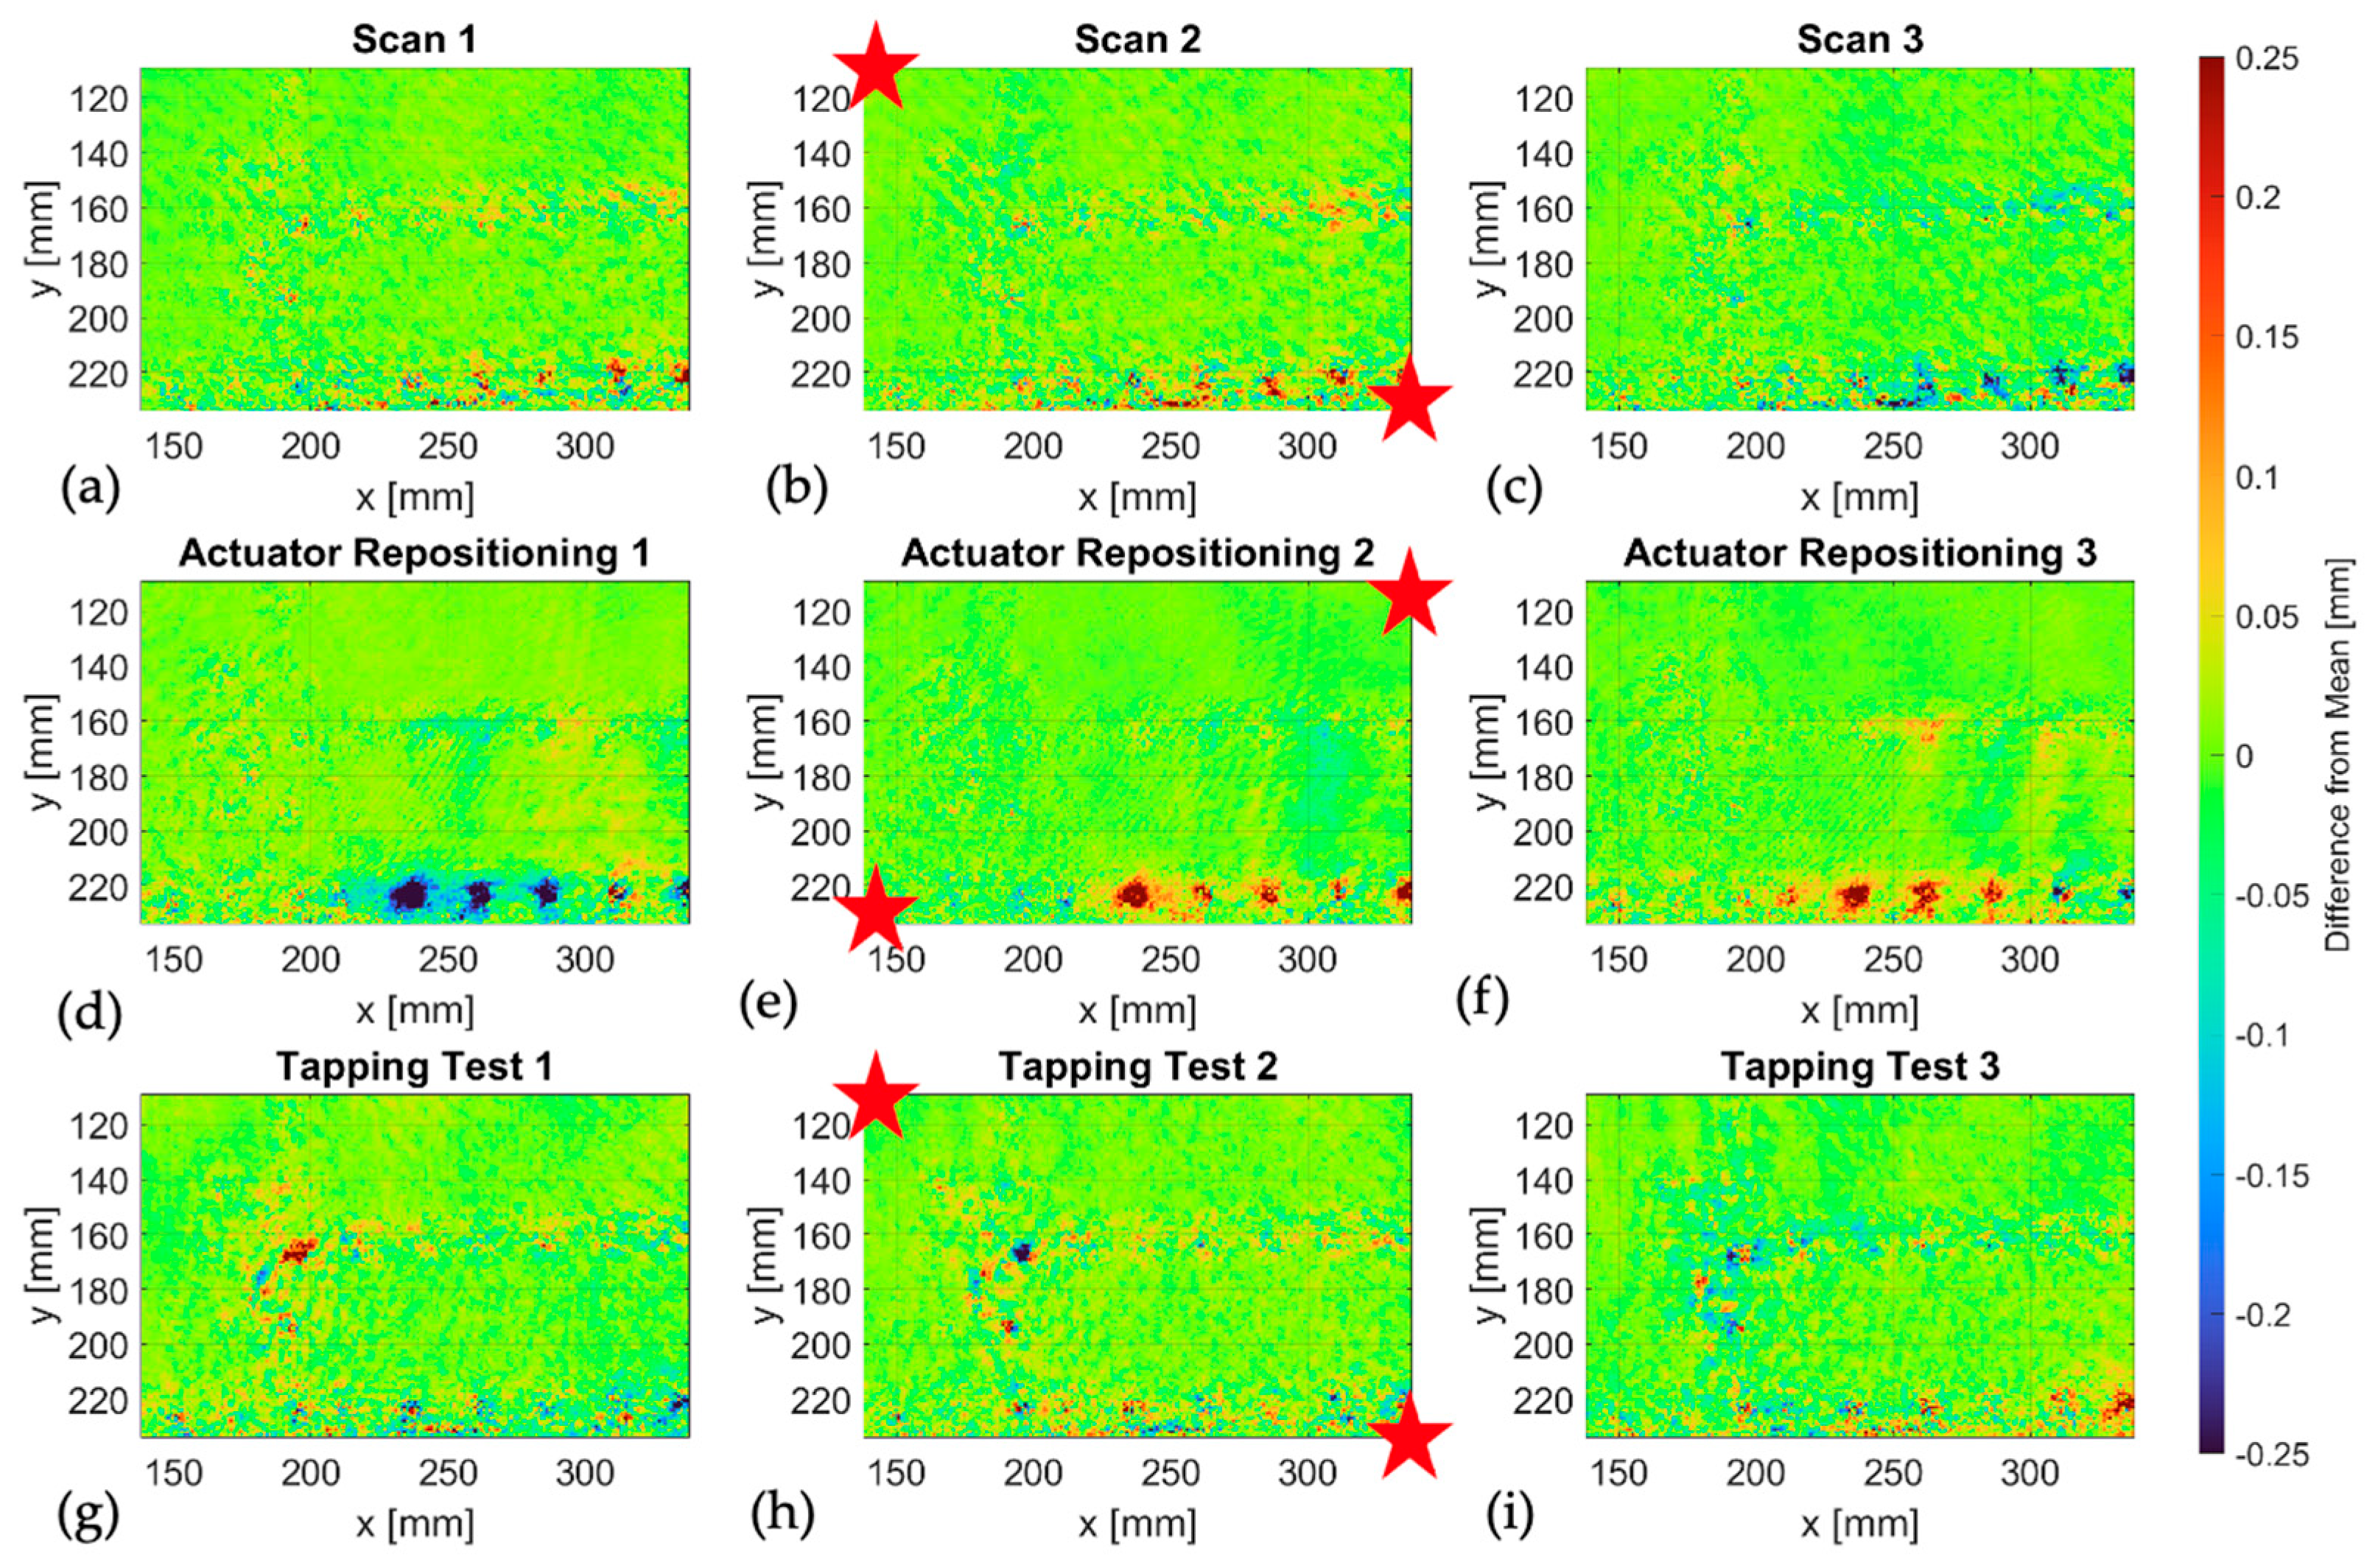
- Repeatability test: The system was placed on a visually pristine area near the wing’s root, consisting of two adjacent panels, and a series of 14 consecutive measurements was performed without interrupting or repositioning the system. The resulting thickness maps were then used to calculate the standard deviation of the thickness variations between repetitive measurements.
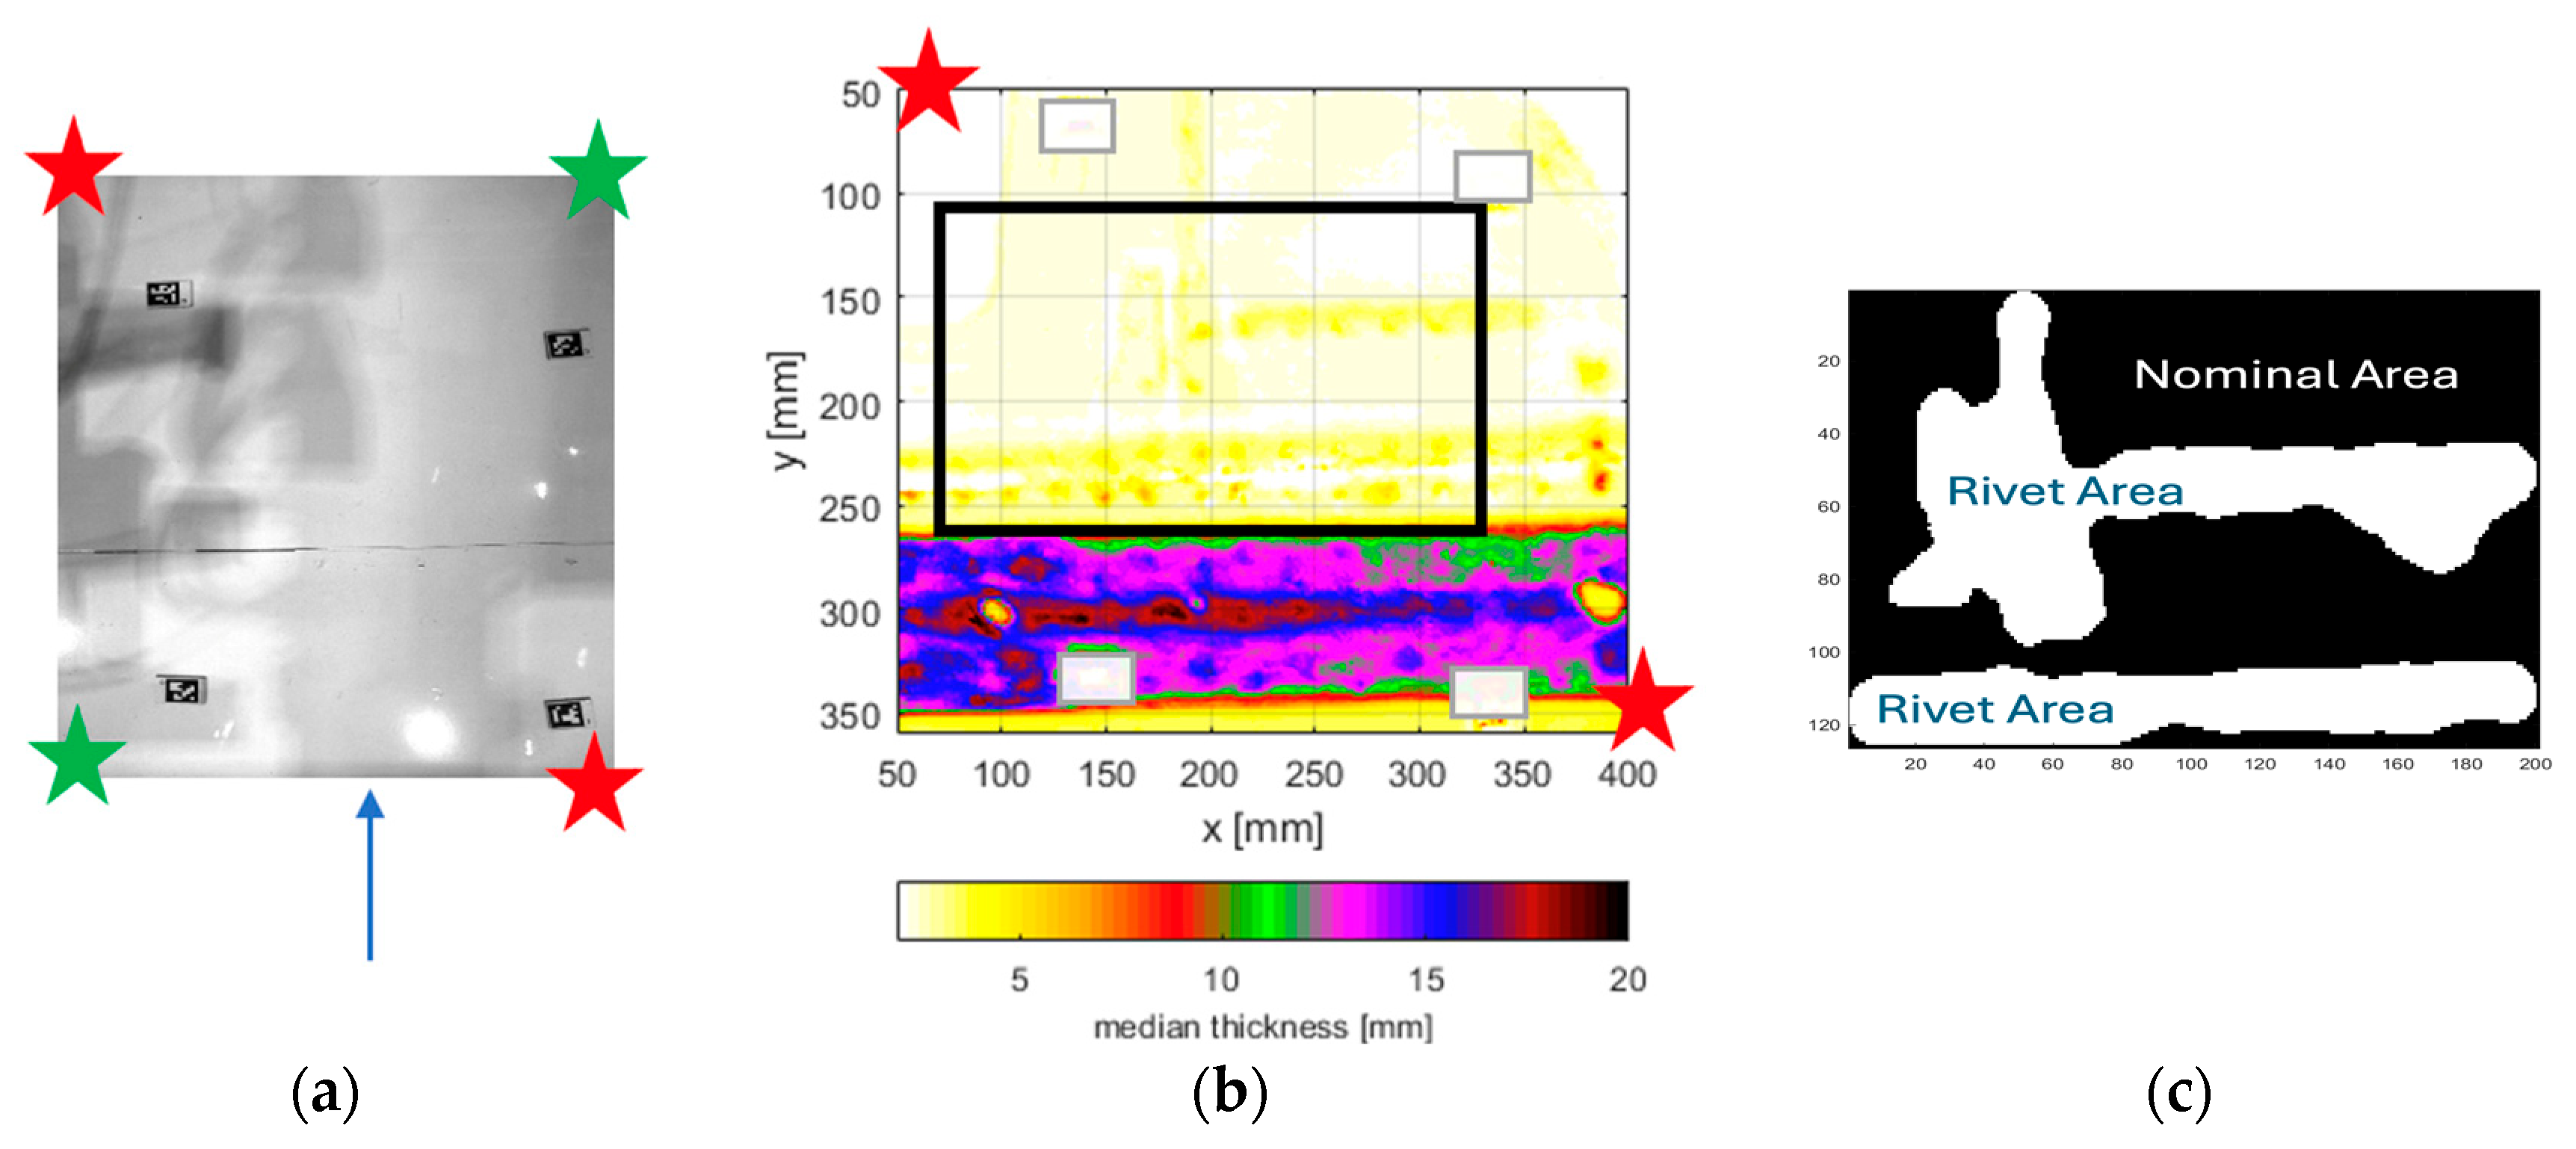
- Actuator-repositioning test: In practice, the system and actuators must be repositioned to measure different corrosion spots. To assess the influence the actuator placement has on system performance and measurement results, the actuators were relocated between measurements. The system was again placed on top of the wing, at a panel joint, with one actuator on each panel located at diagonally opposing corners of the inspection area and three measurements were performed. The actuators were then repositioned to the opposite ends of the second diagonal, and another three scans were carried out. To compare the measurements between the two actuator-placement configurations, the mean value from each dataset was calculated and then subtracted from each thickness map.
- Vibration test: The system was placed on a pristine area of the wing, away from the root, and three measurements were performed during which vibrations were manually introduced by tapping near the scanner. External vibrations were generated by sustained manual tapping at the trailing edge of the wing, producing quasi-random temporal excitation due to the inherent variability of manual input, consistent with the random nature of vibrations that occur during maintenance routines. The mean value of each dataset was then subtracted from the respective thickness map to determine whether any significant variations appeared in the measured data.
3. Results and Discussion
3.1. Preliminary Results
3.1.1. Repeatability Tests
3.1.2. Vibration and Actuator-Positioning Effects
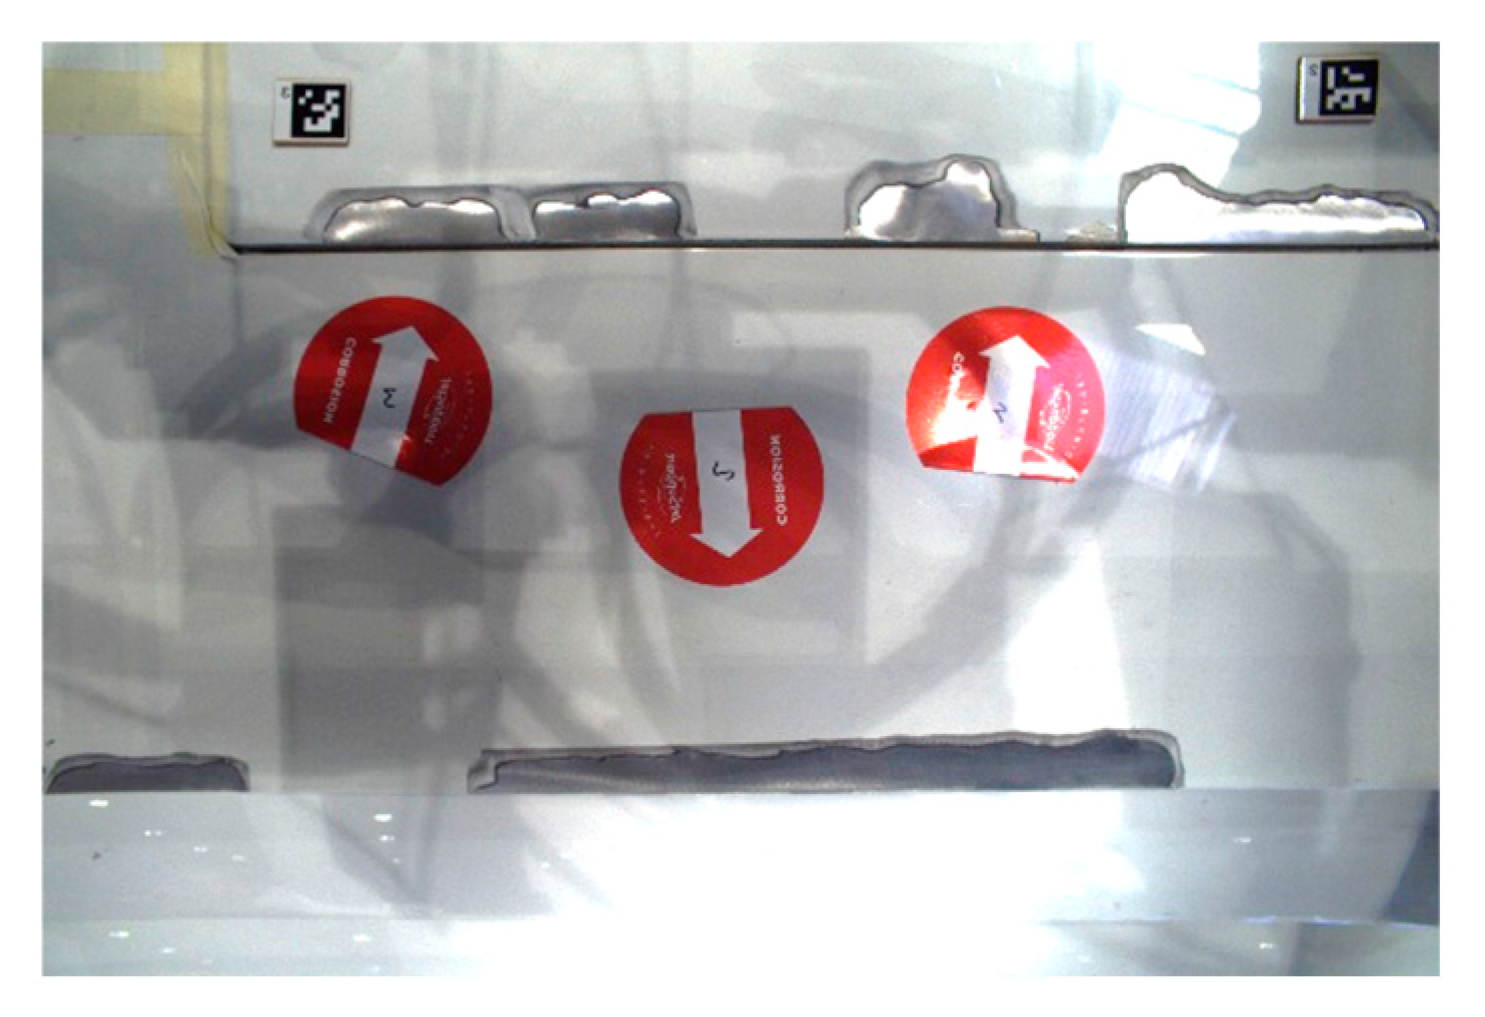
3.2. Post-Corrosion Repair Thickness Measurements
4. Conclusions and Recommendations
Author Contributions
Funding
Institutional Review Board Statement
Informed Consent Statement
Data Availability Statement
Acknowledgments
Conflicts of Interest
References
- Martinez, M.; Yanishevsky, M.; Rocha, B.; Groves, R.M.; Bellinger, N. Maintenance and Monitoring of Composite Helicopter Structures and Materials. In Structural Integrity and Durability of Advanced Composites; Beaumont, P.W.R., Soutis, C., Hodzic, A., Eds.; Woodhead Publishing Series in Composites Science and Engineering; Woodhead Publishing: Cambridge, UK, 2015; pp. 539–578. [Google Scholar] [CrossRef]
- Wang, B.; Zhong, S.; Lee, T.L.; Fancey, K.S.; Mi, J. Non-destructive testing and evaluation of composite materials/structures: A state-of-the-art review. Adv. Mech. Eng. 2020, 12, 1687814020913761. [Google Scholar] [CrossRef]
- Volker, A.; Vrolijk, J.W.; Merks-Swolfs, E.J.W.; van der Burg, D.; Heiden, M.S.; Martina, Q. Non-contact MEMS-sensor array inspection of composites and metallic parts using Lamb waves. J. Nondestruct. Eval. Diagn. Progn. Eng. Syst. 2023, 6, 041002. [Google Scholar] [CrossRef]
- Ichou, S.; Veress, A. Satisfying the needs for highly qualified engineering staff in a disruptively changing aircraft industry with special care for MRO sector. Aircr. Eng. Aerosp. Technol. 2024; in press. [Google Scholar] [CrossRef]
- Elizabeth, I.; Barshilia, H.C. A comprehensive review on corrosion detection methods for aircraft: Moving from offline methodologies to real-time monitoring combined with digital twin technology. Eng. Sci. Technol. 2025, 6, 69–98. [Google Scholar] [CrossRef]
- Federal Aviation Administration (FAA). Cessna Aircraft Company Model 300 and 400 Series Airplanes, Airworthiness Directive No. AD 2000-01-16; Amendment 39-11514; FAA: Washington, DC, USA, 2000. Available online: https://www.federalregister.gov/documents/2000/01/19/00-951/airworthiness-directives-cessna-aircraft-company-300-and-400-series-airplanes (accessed on 5 December 2025).
- Volker, A.; Stamoulis, K.; Schoemaker, C.; Apostolidis, A.; van Tongeren, D.; Poppe, R.; Bekkema, B.; Martina, Q. A Novel, Non-Contact NDT Scanner Case Study: Thickness Measurement, Debonding and Defects Detection in Metallic and Composite Parts. J. Phys. Conf. Ser. 2024, 2692, 012024. [Google Scholar] [CrossRef]
- Monette, D.L. Coating removal techniques in the aerospace industry. In Corrosion Control in the Aerospace Industry; Woodhead Publishing: Cambridge, UK, 2009; pp. 225–247. [Google Scholar]
| Area | Experiment | Mean (μm) | Standard Deviation (μm) | Max Error (μm) |
|---|---|---|---|---|
| Nominal | Repeatability | 0 | 49.6 | 804 |
| Actuator Repositioning | 0 | 65.2 | 886 | |
| Tapping Test | 0 | 53.3 | 797 | |
| Rivet | Repeatability | 0 | 21.3 | 641 |
| Actuator Repositioning | 0 | 17.1 | 296 | |
| Tapping Test | 0 | 20.4 | 588 |
Disclaimer/Publisher’s Note: The statements, opinions and data contained in all publications are solely those of the individual author(s) and contributor(s) and not of MDPI and/or the editor(s). MDPI and/or the editor(s) disclaim responsibility for any injury to people or property resulting from any ideas, methods, instructions or products referred to in the content. |
© 2025 by the authors. Licensee MDPI, Basel, Switzerland. This article is an open access article distributed under the terms and conditions of the Creative Commons Attribution (CC BY) license (https://creativecommons.org/licenses/by/4.0/).
Share and Cite
Zilidou, M.; Vrolijk, J.-W.; Poppe, R.; Velde, R.v.d.; Mout, M.; Hassefras, E.; Friesen, D.; Stamoulis, K.; Brugaletta, L.; Martina, Q. Post-Corrosion Repair Thickness Measurements Using Lamb-Wave Technology: An Aviation MRO Case Study. Eng. Proc. 2025, 119, 21. https://doi.org/10.3390/engproc2025119021
Zilidou M, Vrolijk J-W, Poppe R, Velde Rvd, Mout M, Hassefras E, Friesen D, Stamoulis K, Brugaletta L, Martina Q. Post-Corrosion Repair Thickness Measurements Using Lamb-Wave Technology: An Aviation MRO Case Study. Engineering Proceedings. 2025; 119(1):21. https://doi.org/10.3390/engproc2025119021
Chicago/Turabian StyleZilidou, Maria, Jan-Willem Vrolijk, Robert Poppe, Roel van der Velde, Marco Mout, Emiel Hassefras, Daniel Friesen, Konstantinos Stamoulis, Luca Brugaletta, and Quincy Martina. 2025. "Post-Corrosion Repair Thickness Measurements Using Lamb-Wave Technology: An Aviation MRO Case Study" Engineering Proceedings 119, no. 1: 21. https://doi.org/10.3390/engproc2025119021
APA StyleZilidou, M., Vrolijk, J.-W., Poppe, R., Velde, R. v. d., Mout, M., Hassefras, E., Friesen, D., Stamoulis, K., Brugaletta, L., & Martina, Q. (2025). Post-Corrosion Repair Thickness Measurements Using Lamb-Wave Technology: An Aviation MRO Case Study. Engineering Proceedings, 119(1), 21. https://doi.org/10.3390/engproc2025119021


