1. Introduction
The failure mechanisms of fractured rock masses are of major significance to the theory of rock mechanics, underground engineering excavations, and rock stability evaluations [
1,
2,
3,
4]. Numerical simulation methods have been found to have irreplaceable advantages in explaining the failure mechanisms of rock materials from the micro point of view. In addition, due to the fact that discrete element methods [
5,
6] have the ability to directly characterize crack propagation processes, such methods have attracted the attention and applications of various researchers in the field of crack research. The micro parameter calibrations of particle flow simulation methods are the basis of establishing complex models. Zhao Guoyan et al. [
7] studied the effect of microparameters on macro properties of parallel bonded models systematically by PFC
2D. In addition, based on PFC
2D, Huang Yanhua et al. [
8] carried out sensitivity analyses of micro-parameters and obtained a set of microscopic parameters reflecting the macroscopic mechanical behavior of intact red sandstone. In another numerical related study, based on the results of loading and unloading experiments of marble, Cong Yu et al. [
9] quantitatively analyzed the relationships between macro and micro-parameters in PFC
2D. Deng Shuxin et al. [
10] applied the design of experiments in the calibration for hard rocks with PFC3D simulation, and the sensitivity of microscopic parameters to macroscopic responses is analyzed through the Placket–Burman design.
The majority of fractures in real rock contain various types of filling. Therefore, the investigations of the micro influence mechanisms of filling fractures are considered to be valuable research fields. For numerical simulation, the internal flaws were created by deleting the selected balls with “delete” command [
11,
12]. Wang Guilin et al. [
13] studied the influence mechanism of Z-type fissures on sandstone strength and fracture behavior with PFC
2D. In addition, Wu Tianhua et al. [
14] utilized PFC
2D to investigate the interaction mechanism between a circular hole and fissures in rock under uniaxial compression. Tian Wenling et al. [
15] studied the crack evolution behavior of brittle sandstone containing two coplanar fissures under different confining pressures with PFC
2D.
However, most of the above numerical simulations were limited to two dimensions, which could not truly reflect the three-dimensional crack in the rock. Additionally, the internal filled crack has not been fully investigated. Therefore, PFC3D simulations were carried out to investigate the evolution of micro cracks in rock with a 3D internal filled elliptical crack. For building the PFC3D model, the relationships between the macro-mechanical properties and the micro-parameters were discussed firstly.
2. PFC3D Simulation
2.1. Numerical Specimen
In 1978, Adams M first studied plexiglass with internal cracks using a bonding method and studied its fracturing process. Systematic experimental study of 3D internal crack growth was conducted by Dyskin et al. [
16,
17,
18]. The brittle materials with 3D internal cracks mainly use transparent resin and rock-like materials as a matrix under uniaxial compression conditions. The initial filled cracks were introduced in transparent resin samples, usually by inserting thin discs. So, there were two different materials in the sample. The epoxy resin density ranges between 1600 and 2300 kg/m
3. The density of the numerical sample was set as 2000 kg/m
3. Due to its tiny volume and the definition of DFN in PFC
3D, the mass and density of the internal crack were not considered in the simulation.
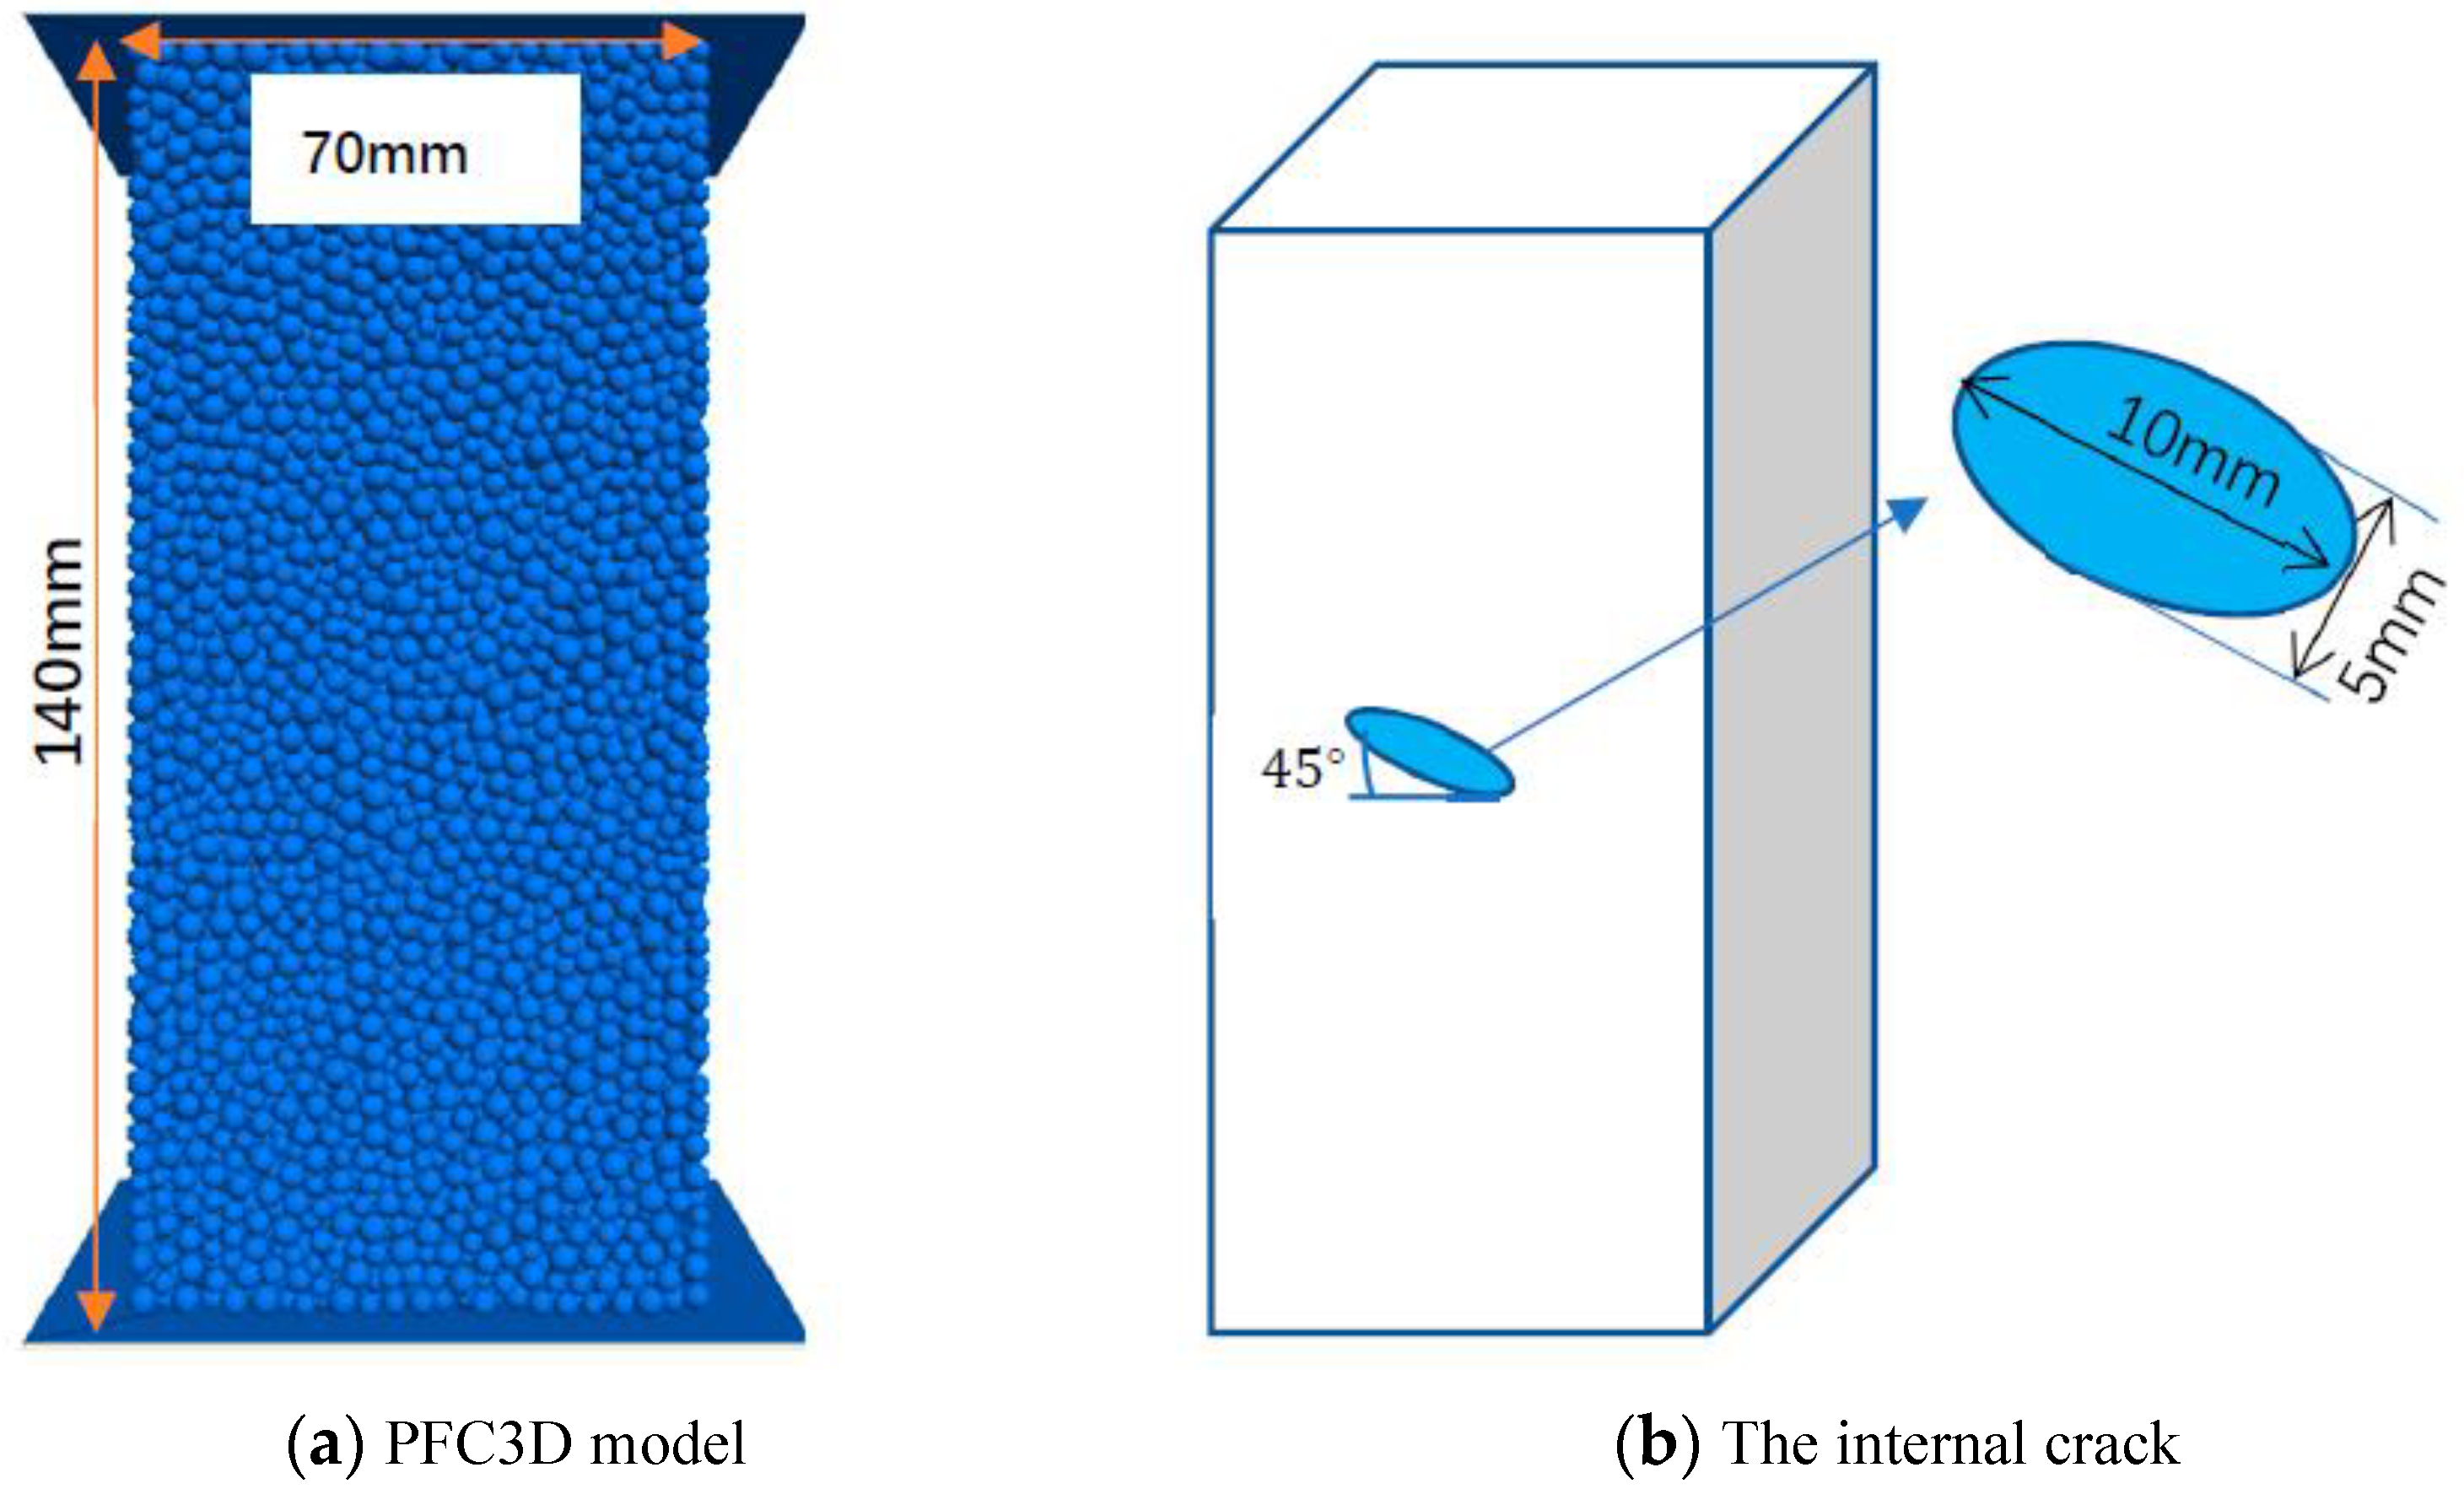
The size of the numerical model was 140 mm × 70 mm × 70 mm (
Figure 1a). The internal cracks are mainly circular, elliptical, or rectangular in the experiment. The numerical crack was elliptical with a major axis radius of 10 mm and a short axis radius of 5 mm, and its dip angle was 45° to the vertical direction (
Figure 1b). The minimum particle radius was 2 mm, with a maximum/minimum particle radius ratio of 1.5. Each numerical specimen contained 27,429 balls.
Previous related numerical studies have demonstrated that PBM (parallel bond model) can be used to simulate the mechanical behavior of the brittle rock [
19]. Therefore, PBM was selected as the model of the matrix. In PBM, there are two categories of micro-parameters: ball and bond parameters. They were set as the same value in the simulation according to the previous studies. In addition, the smooth joint model can simulate the behavior of a planar interface regardless of the local particle contact orientations along the interface, which was considered to be more consistent with the real conditions. Then, the smooth joint model was set as the micro-bond mode of the internal crack. The main micro-parameters were divided into two groups according to the matrix and the fractures. The Young’s modulus of PBM is
Ec. The ratio of normal to shear stiffness of PBM is
. The other four parameters of the matrix are frictional coefficient
µ, tensile strength
, ratio of tensile strength to cohesion
and friction angle φ. The smooth-joint model was defined by five micro-parameters: normal stiffness
kn*, ratio of normal to shear stiffness
k*, frictional coefficient
tensile strength
, and ratio of tensile strength to cohesion
.
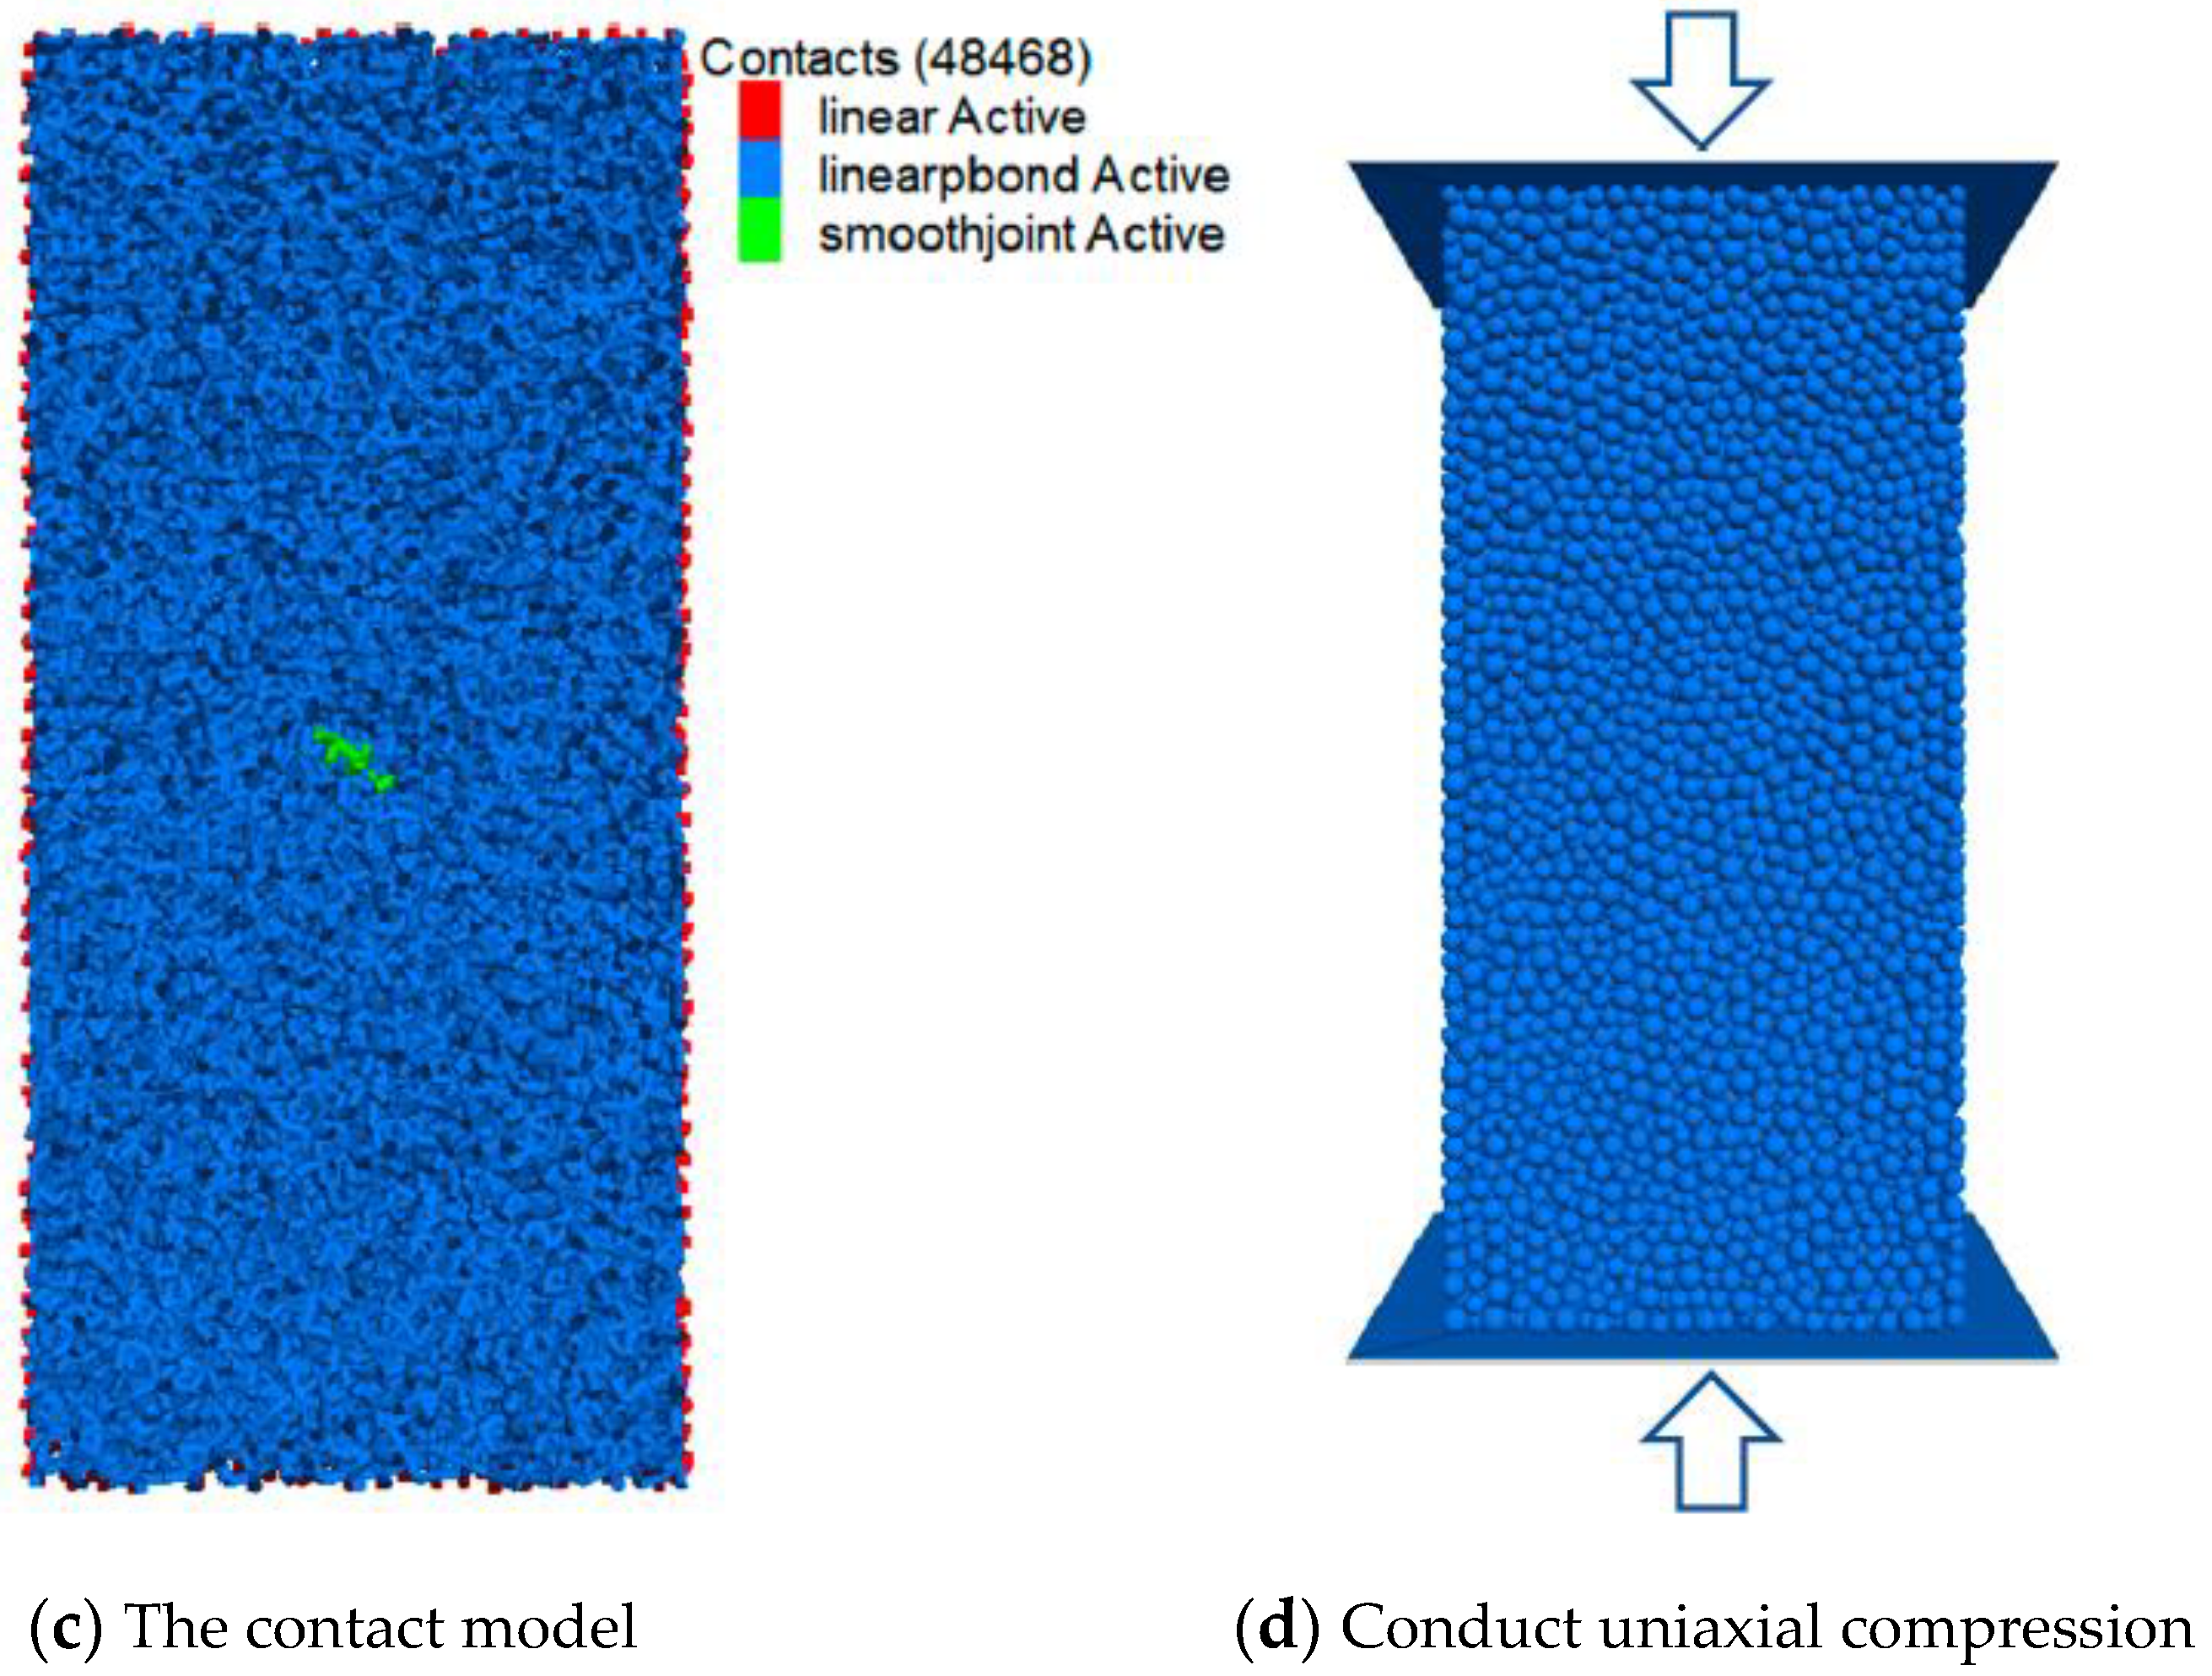
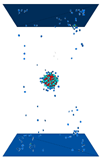
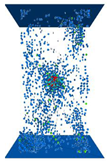
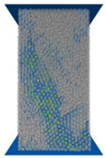
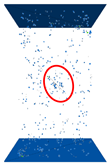
The basic steps for generating 3D internal numerical models were as follows (shown in
Figure 1): (1) set up the model and step to initial equilibrium (
Figure 1a); (2) import the STL file to create the fracture and set the parameters of PBM and smooth joint model (
Figure 1b,c); (3) conduct uniaxial compression on the specimen (
Figure 1d), in which STL is the format of the geometry file designed and exported in CAD software.
2.2. The Relationship between the Macro-Mechanical Properties and Matrix Micro-Parameters
In order to find out the relationship between macro-mechanical properties (peak axial stress , macro-elastic modulus E, and failure mode) and micro-parameters, quantitative correlations were discussed.
2.2.1. Young’s Modulus
In PFC
3D, the relationship between Young’s modulus and stiffness is as follows:
where
L is the sum of the radii of two particles in contact if it is between particles, and it is the radius of the particle if it is between particles and a wall.
is the normal stiffness, and
is the shear stiffness.
Then, the following can be obtained:
where
is normal force;
is shear force;
is the minimum radius among two contacting-particles or the radius of the ball in ball–facet contact;
is the cross-sectional area;
is the moment of inertia of the parallel bond cross-section;
is the polar moment area; and
,
are the relative normal and shear-displacement increments. It can be seen from Formulae (1)–(3) that
affects the normal and shear stiffness, then the force and moment changes accordingly.
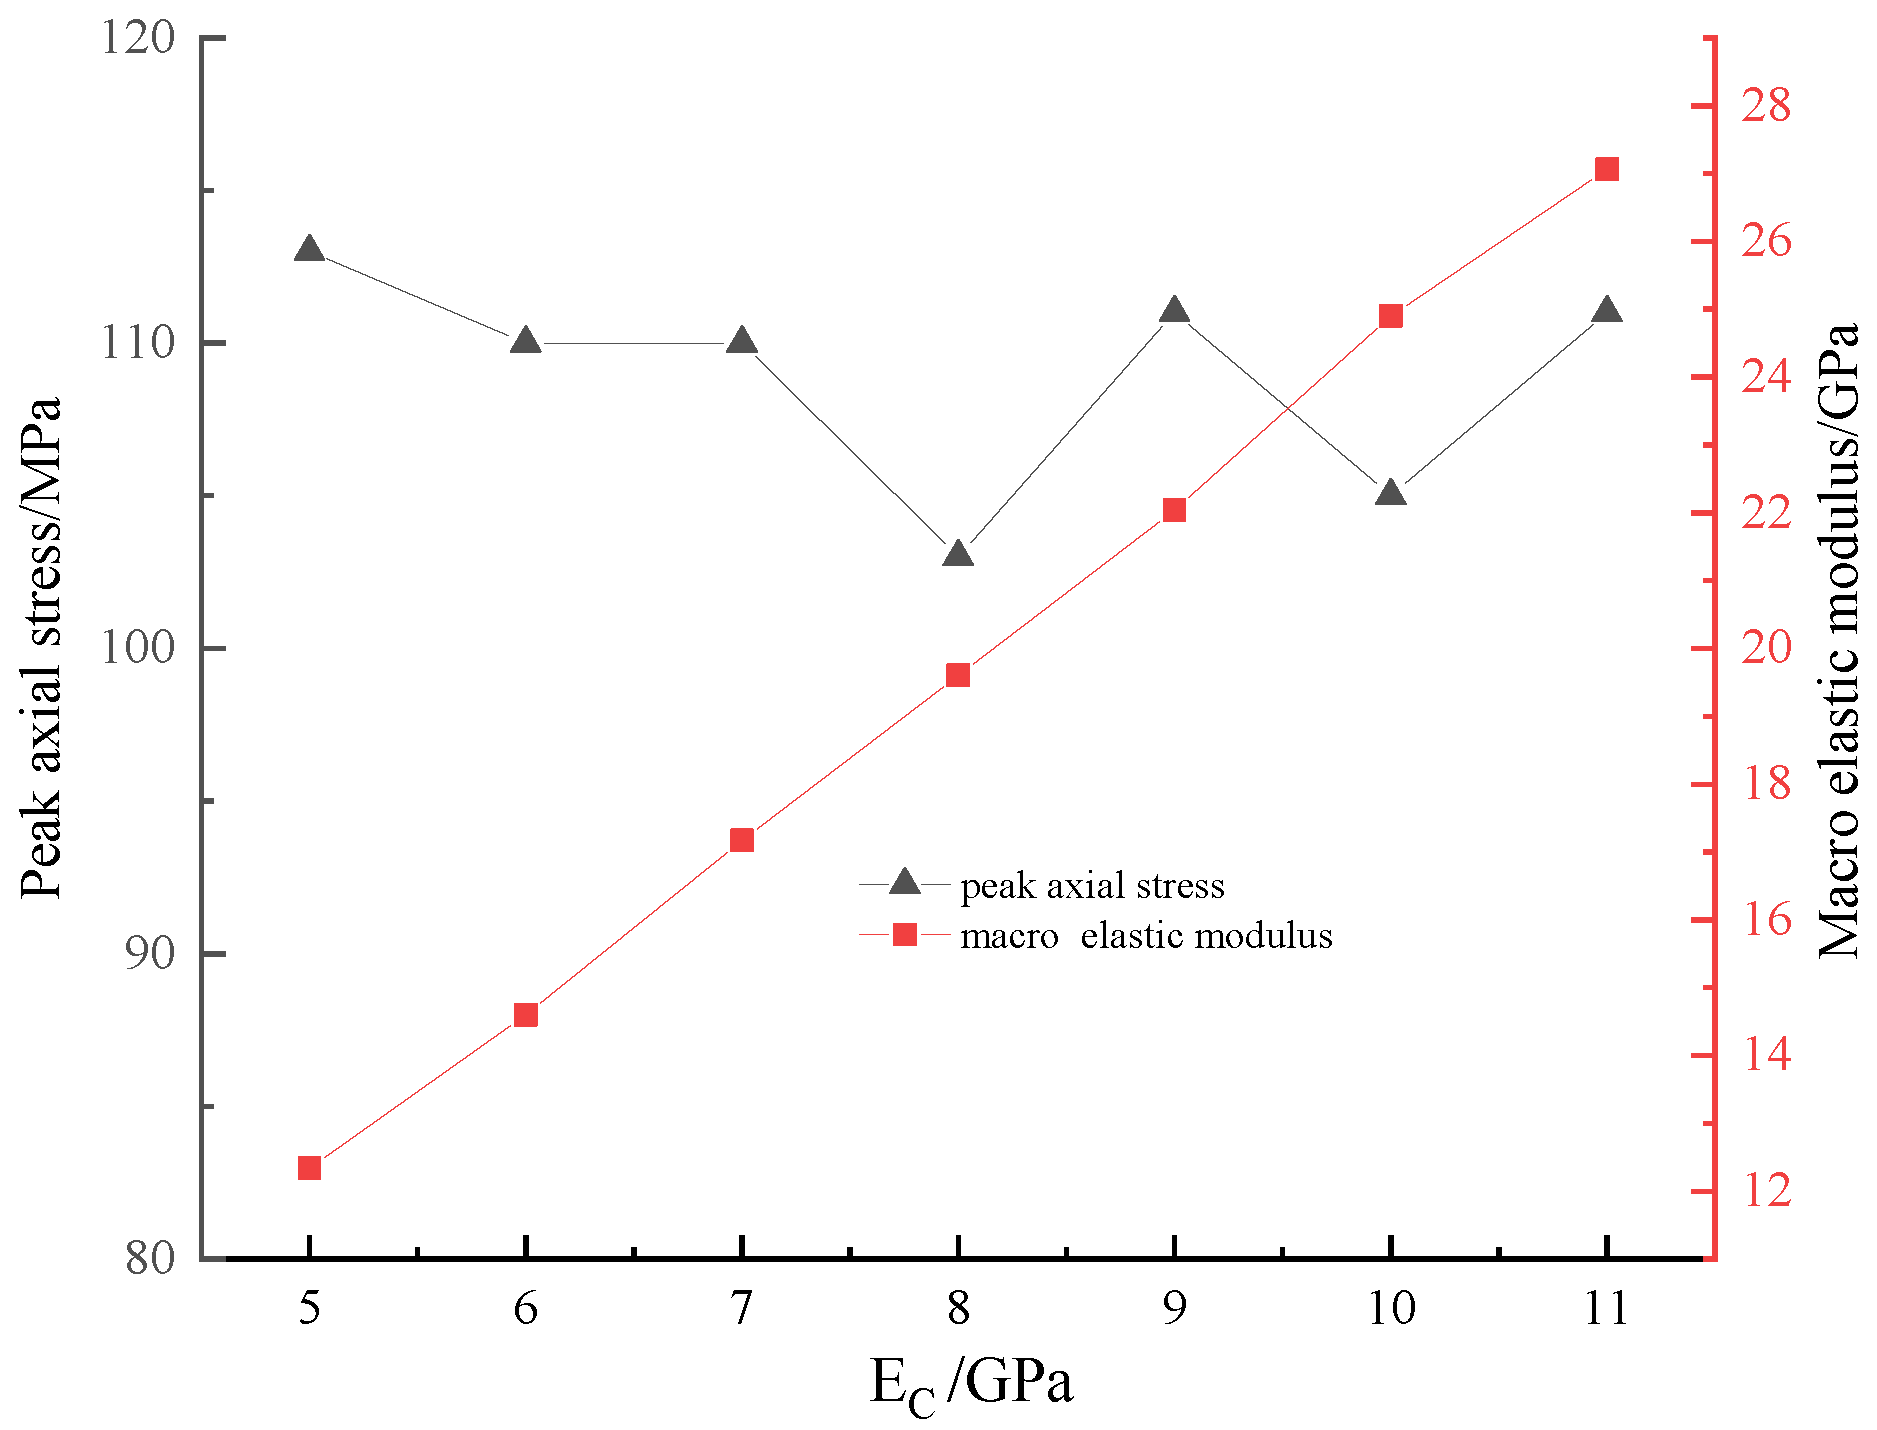
Figure 2 depicts the relationship between
and the macro-mechanical properties. When
changed from 5 GPa to 11 GPa,
fluctuated slightly between 102 MPa and 111 MPa. In addition, there was an obvious linear relationship between
EC and
E:
.
The influence of the
EC on the ultimate failure mode was very complex in
Table 1. The first line in
Table 1 was the crack distribution on the surface when
EC changed. The second line showed the central cutting plane of ball displacement in the X direction, which was abbreviated as
ux, and the displacement was negative in the gray area; that is to say, the particle displacement in the gray area were horizontal to the left. The micro parameter of
EC greatly influenced the failure mode. The crack distribution and displacement of the ball changed irregularly. In
Figure 3, total number of cracks fluctuated greatly with
EC, and there was only 16,000 pieces of cracks when
EC was 8 GPa. The ratio of tension–shear crack number fluctuated regularly between 2.0 and 2.4, and the cracks are mainly tension cracks. The above analysis showed that
EC mainly affected the direction of the main failure surface but did not change the main types of cracks.
2.2.2. Ratio of Normal to Shear Stiffness
Formulae (1)–(3) indicate that
would affect the force and moment between particles, which causes the change of the macro-mechanical properties and the ultimate failure mode. The effects of
on the macro-mechanical properties are detailed in
Figure 4. The curve of peak axial stress can be divided into two parts according to the different trends. The first part was from 1.4 to 1.6;
increased linearly when
increased. The second part
displayed a downward trend when
≥ 2;
changed approximately between 99 MPa and 114 MPa. Moreover,
E showed a downward trend, and
E changed between 12.75 and 15.25 GPa. For brittle materials, if the value of
usually was greater than 2, then both
and
E decreased when
increased within this range.
Table 2 showed the cutting plane of
ux when
changed. When
changed between 1.4 and 2.2, the boundary of the positive and negative X-displacement alternately changed. When
k was greater than 2.2, the direction of the boundary was roughly orthogonal to the surface of the internal crack, and the angle to the vertical direction tended to increase with the increase of
.
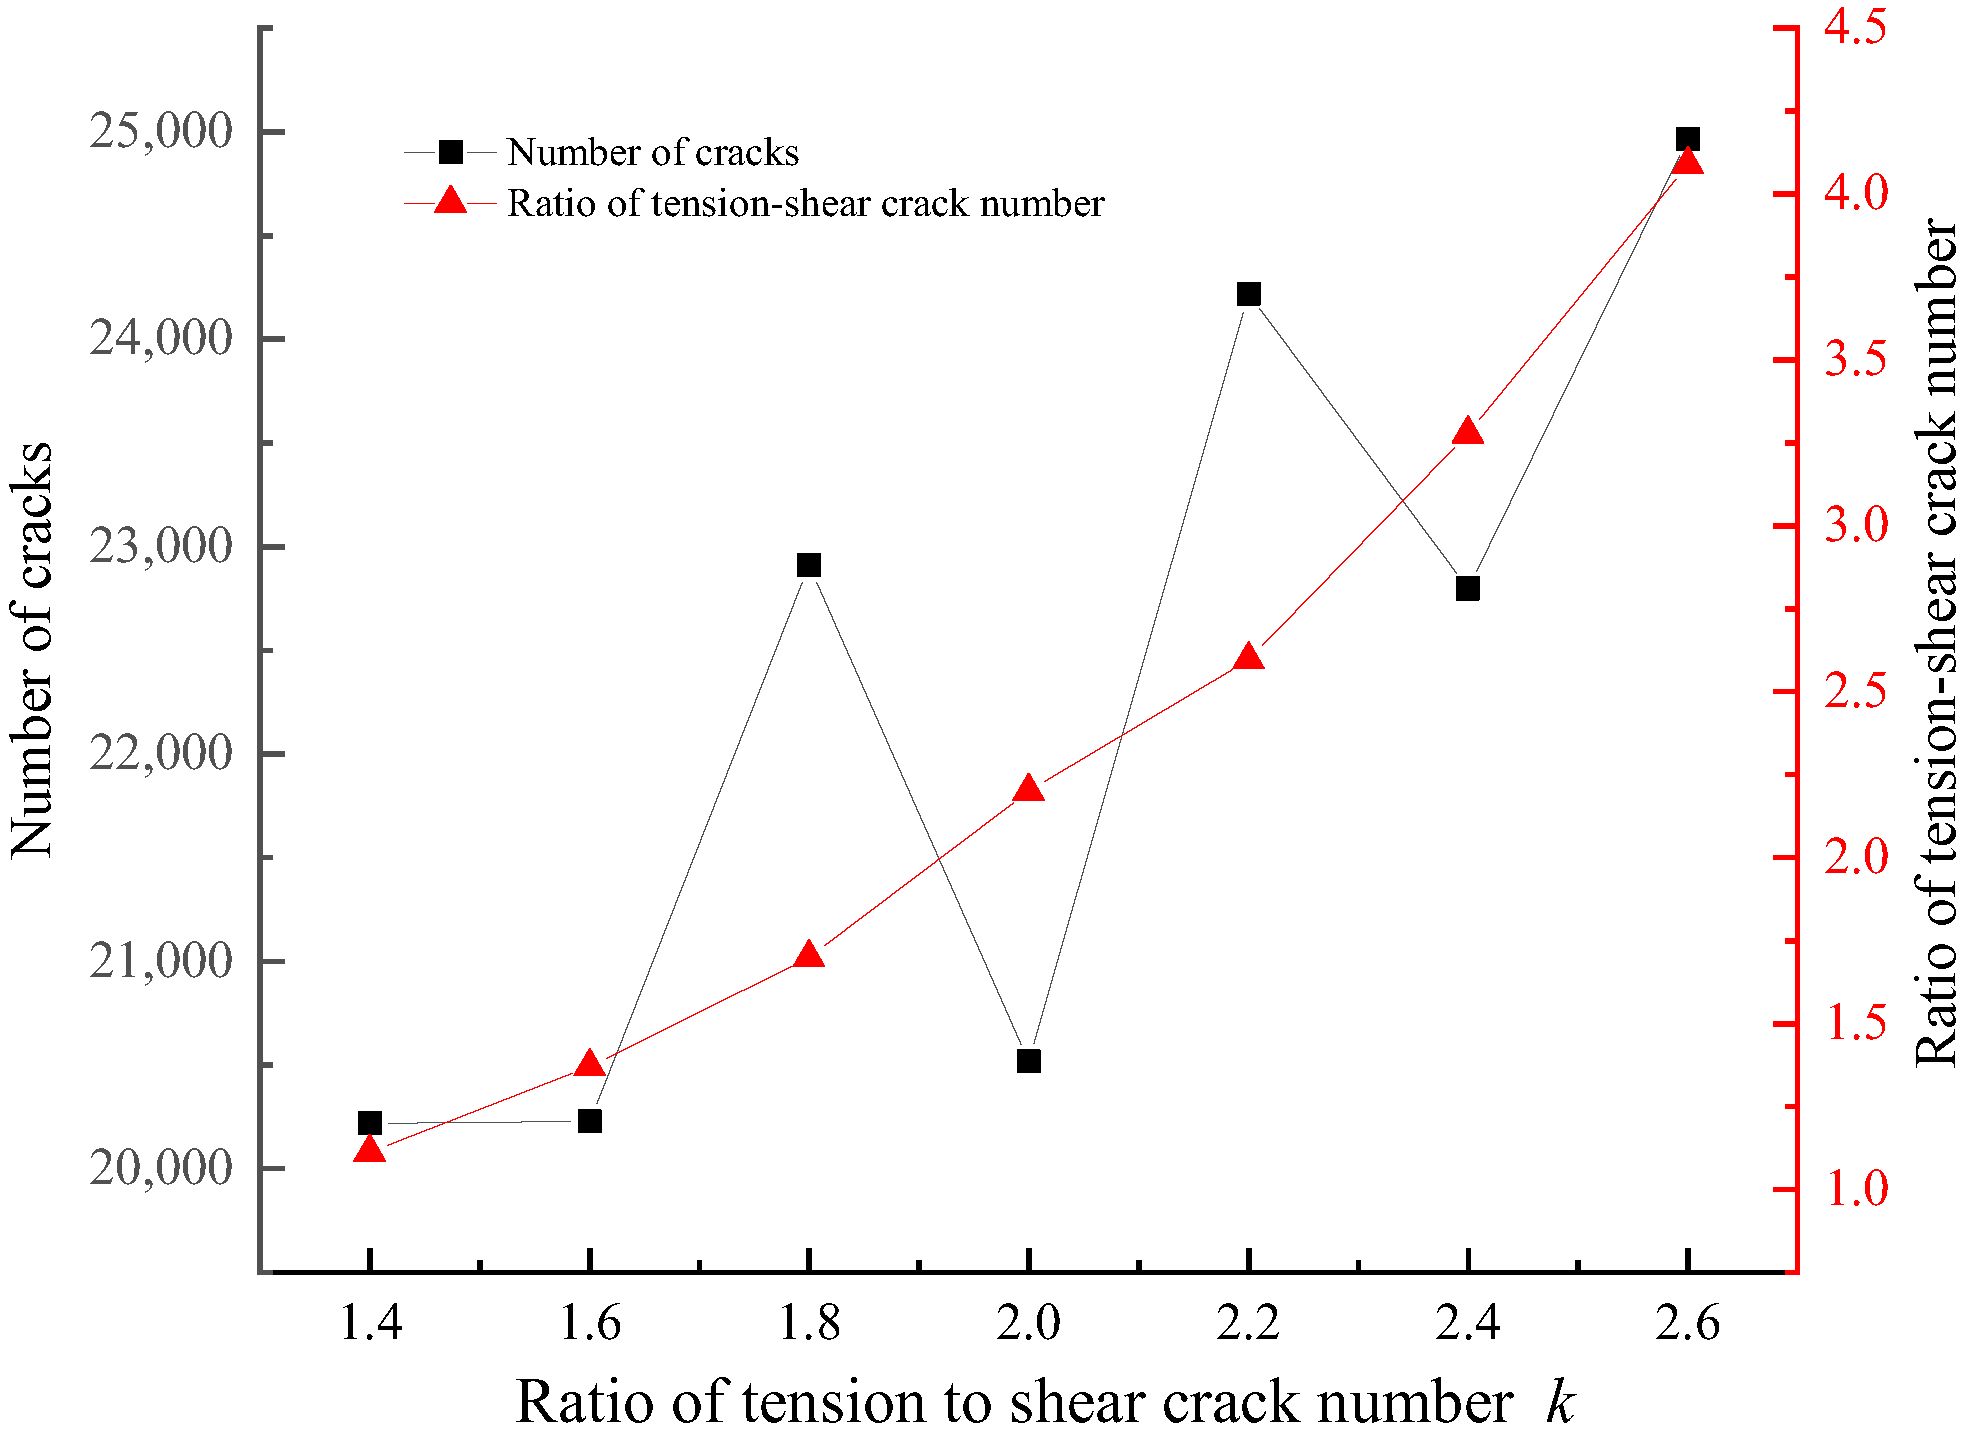
In
Figure 5, the curve of the total number of cracks fluctuated and tended to rise when
changed from 1.4 to 2.6. The ratio of normal to shear crack number increased approximately linearly with the increases of
. The ratio increased from 1.0 to 4.0, which meant that more tension cracks than shear cracks were generated when
k increased. The above discussion revealed that
not only affected the directions of the main failure surface; it also had major effects on the ratio of tension–shear crack numbers.
2.2.3. Friction Coefficient
In the linear-based models, when the contact is sliding,
mainly affects the shear force between particles as follows:
where
is the linear normal force and
is the shear force.
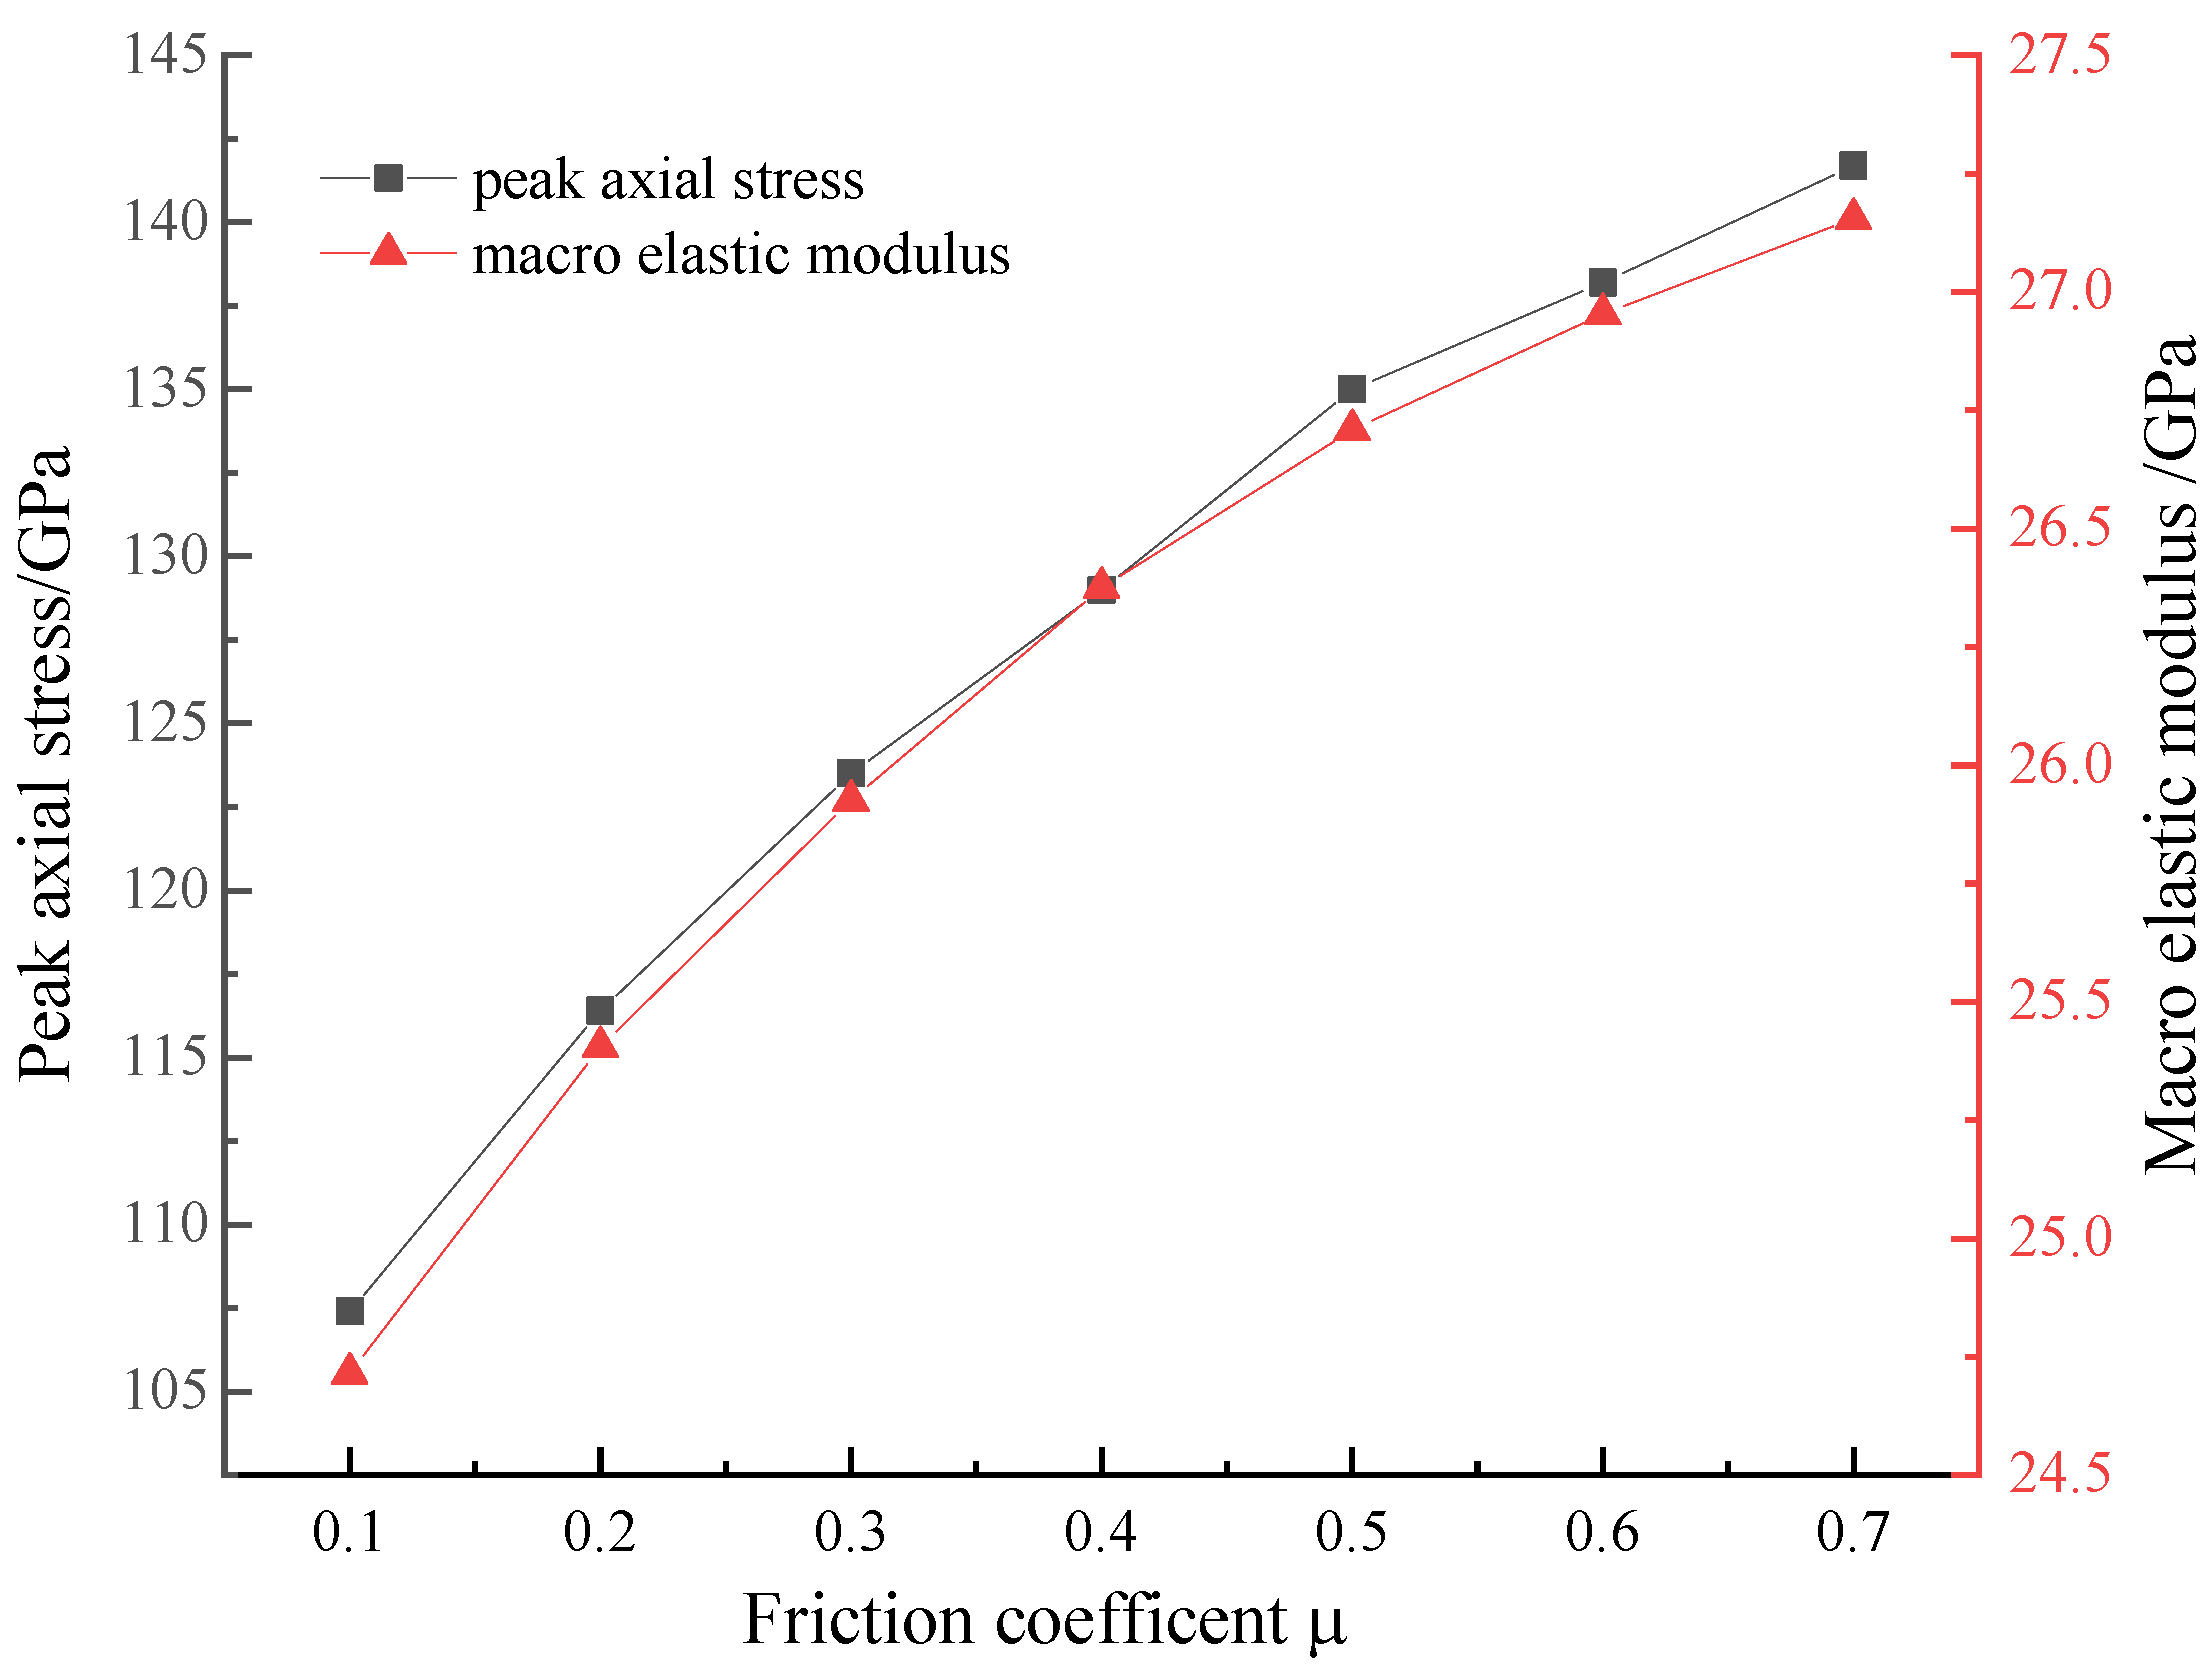
and
E increased linearly when
changed from 0.1 to 0.7 in
Figure 6, and two curves were coincided with each other. The fitting formulae were
between
E and
, and
(
).
The ultimate failure mode of the specimen changed slightly, which can be obtained from the cutting plane of
ux in
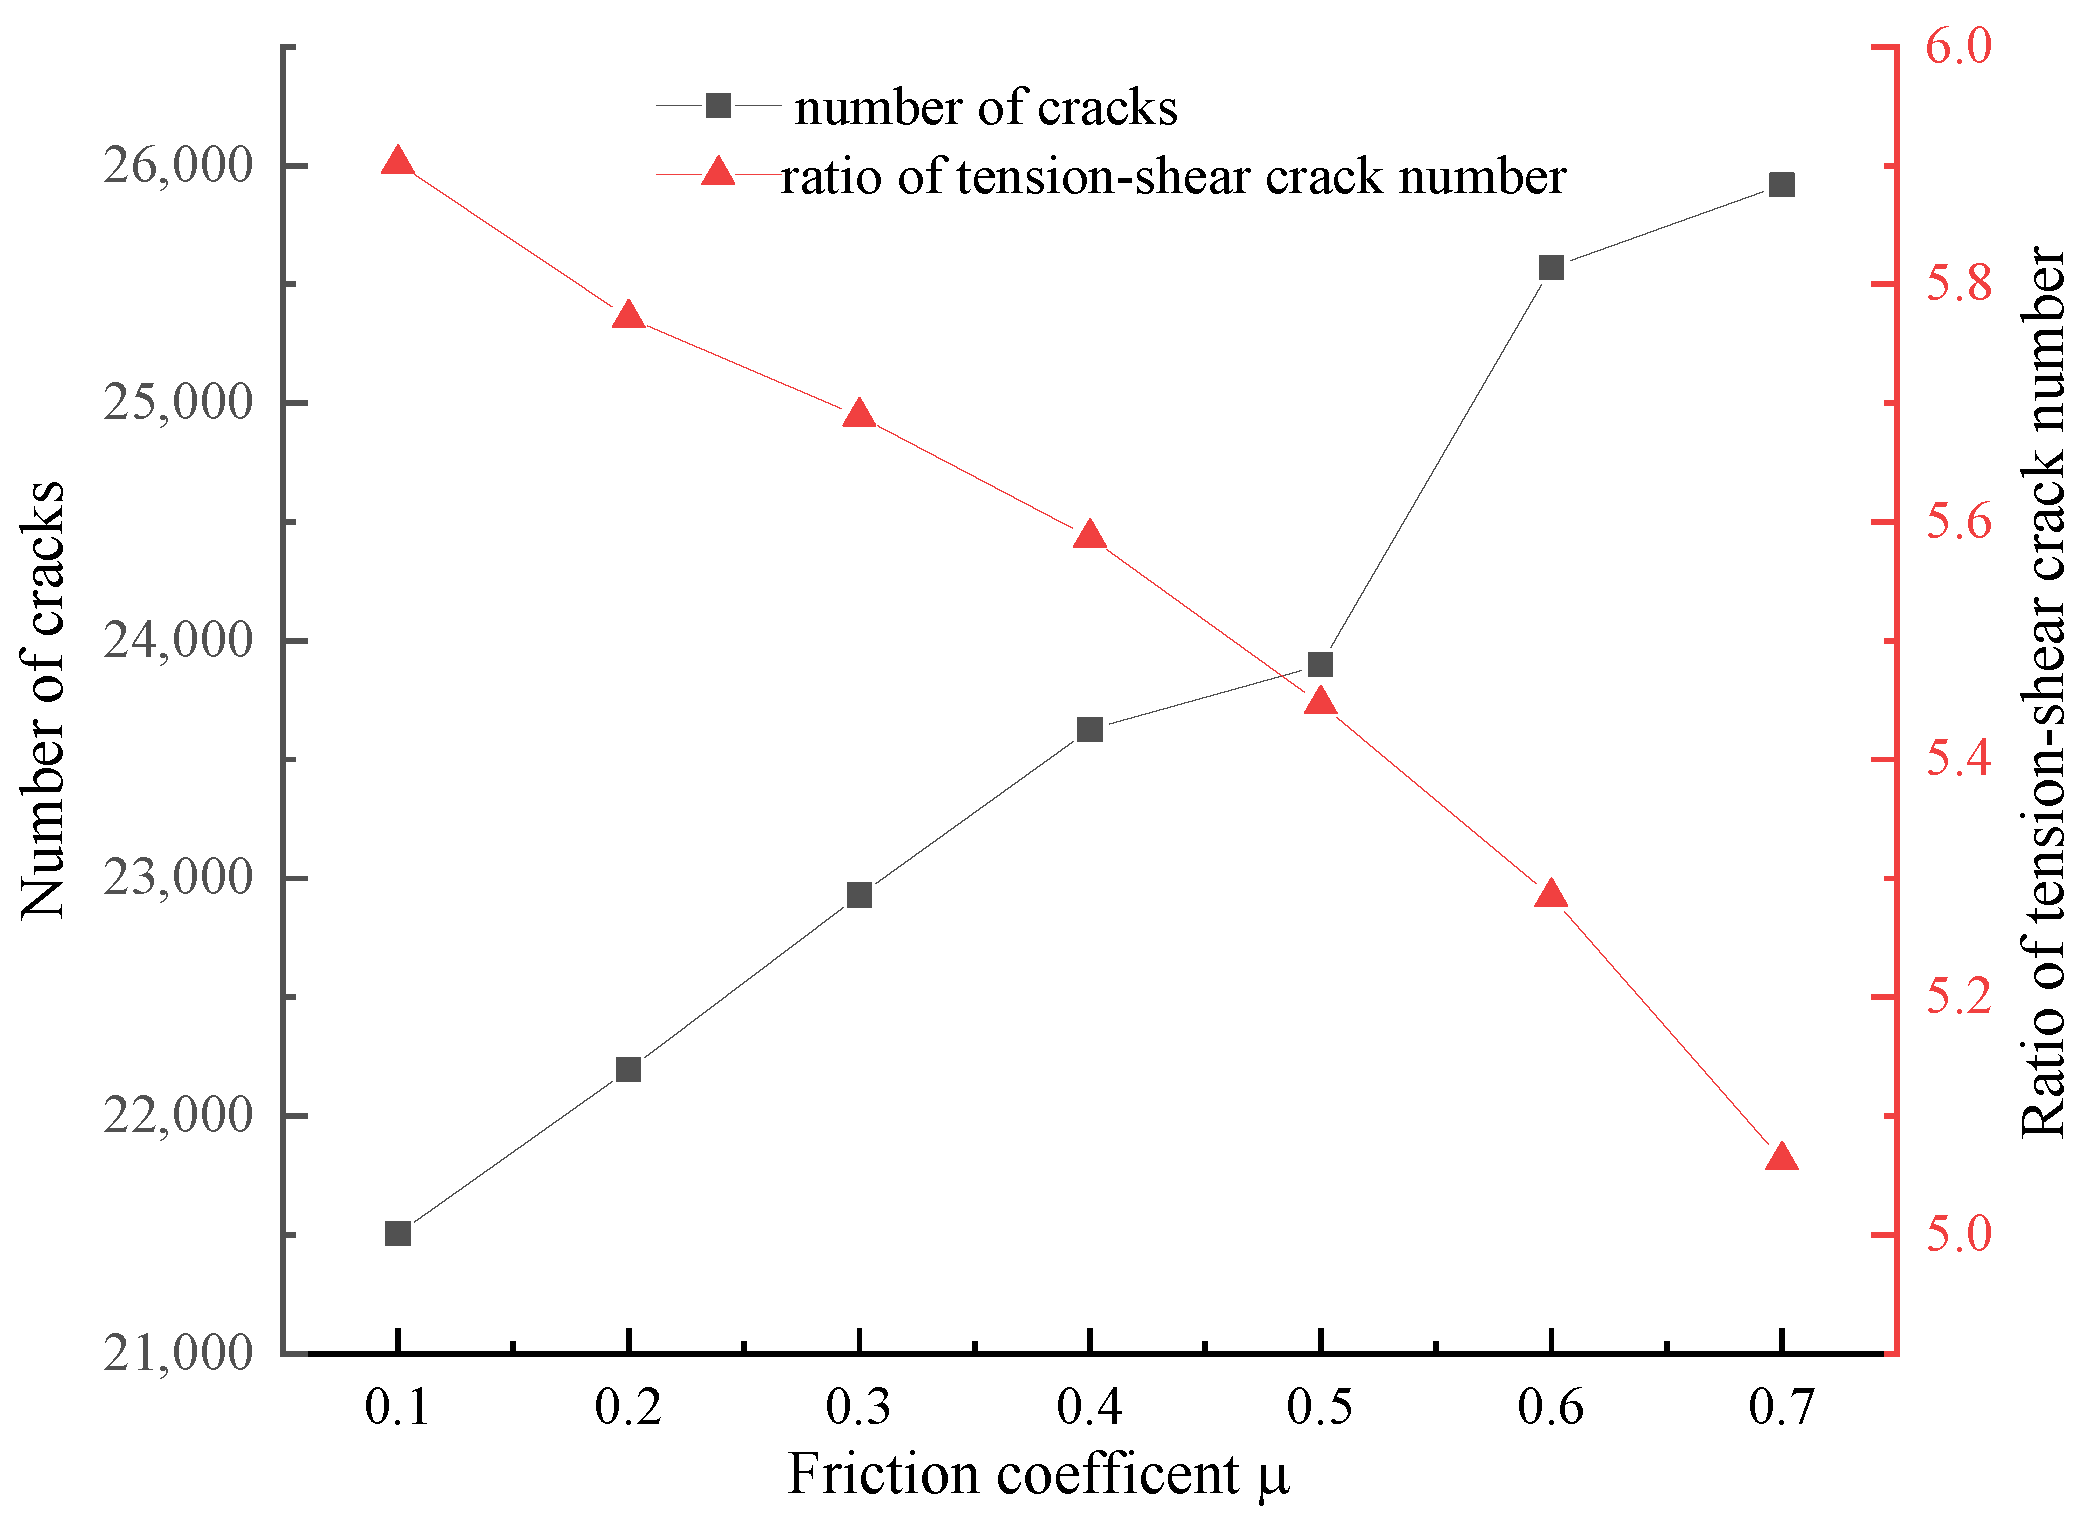
Table 3. The boundary between positive and negative X-displacement, which corresponded to the direction of the main failure surface, gradually moved up to the upper left corner, and the boundary became irregular especially near the internal crack. The total number of cracks increased, and the ratio of tension–shear crack numbers decreased linearly when
increased from 0.1 to 0.7 (
Figure 7). In addition, the cracks were mainly tension cracks as the ratio ranged from 6 to 5.
2.2.4. Tensile Strength
had no effects on
E, and
was increased linearly in
Figure 8. The fitting formula was
between
and
.
did not affect the final failure mode of the numerical specimen. The crack distribution area and the direction of the main failure surface did not change either, and the total number of cracks and the ratio of tension–shear crack numbers did not change overall. However,
had major impacts on the crack initiation process. Cracks emerged at a low stress around the internal crack when
was small. The initial stress
increased linearly with the increases of
in
Figure 9, and the positive linear correlation between them was
.
2.2.5. Ratio of Tensile Strength to Cohesion
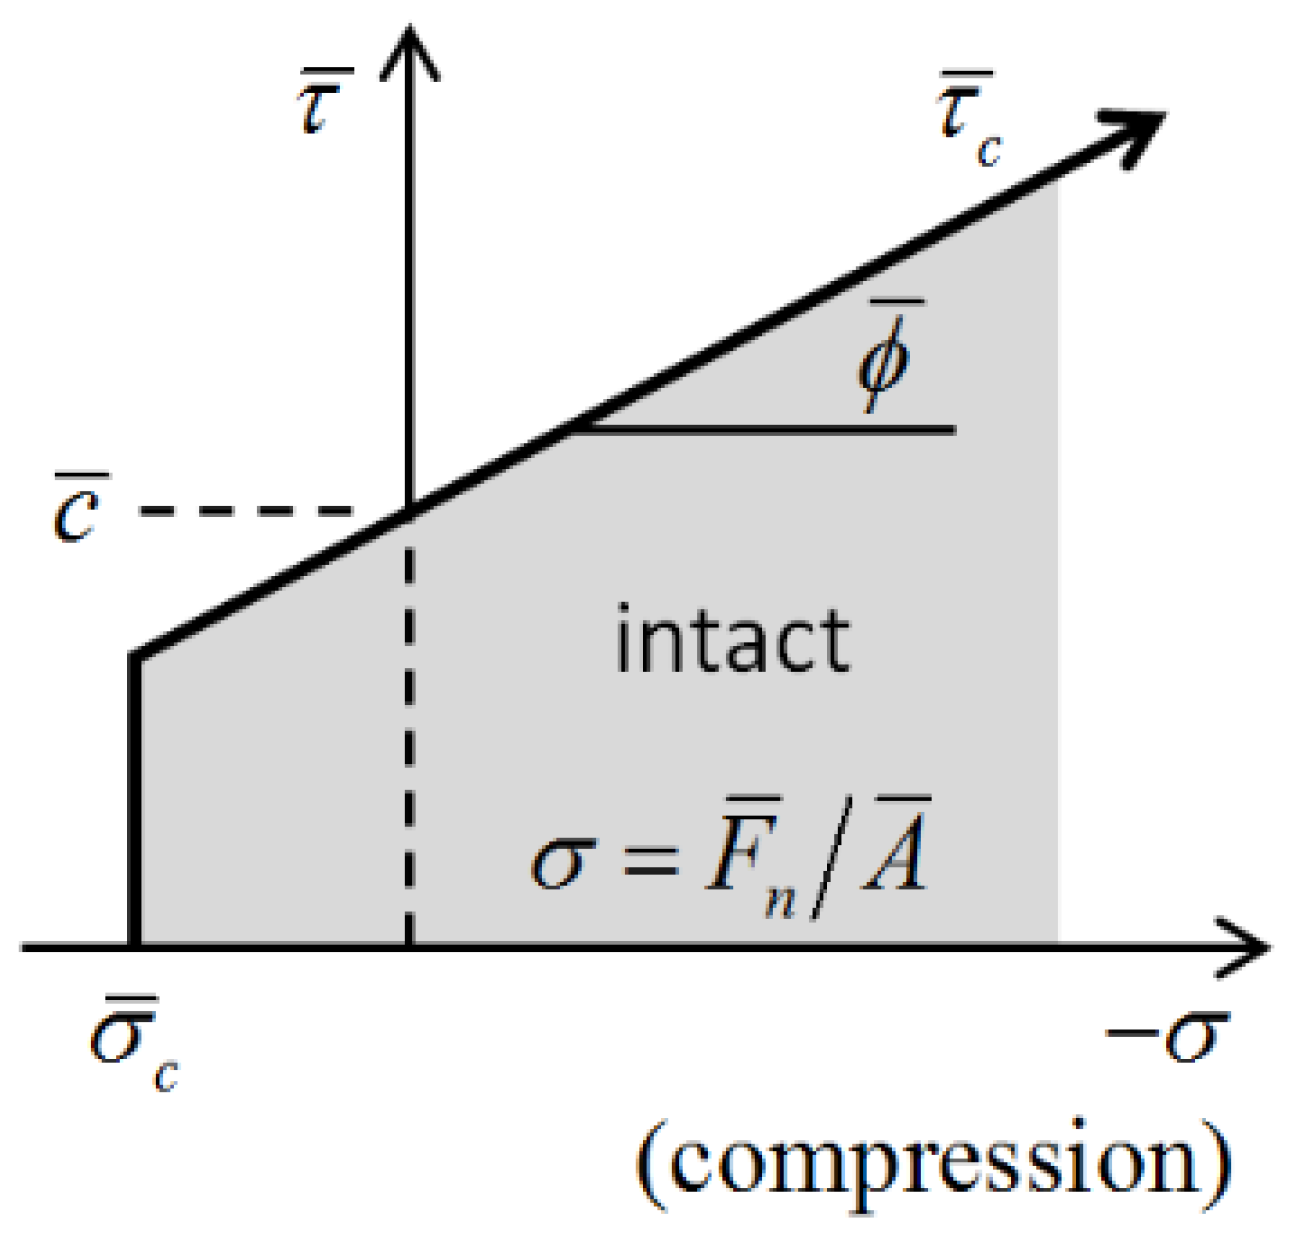
The tensile strength, cohesion and friction angle
were found to conform to the relationship shown in
Figure 10 (e.g.,
). Therefore,
was defined to explore the effects on the macro-mechanical properties when the cohesion
changed, which was considered to be more concise and to more accurately reflect the relationships between the strength parameters.
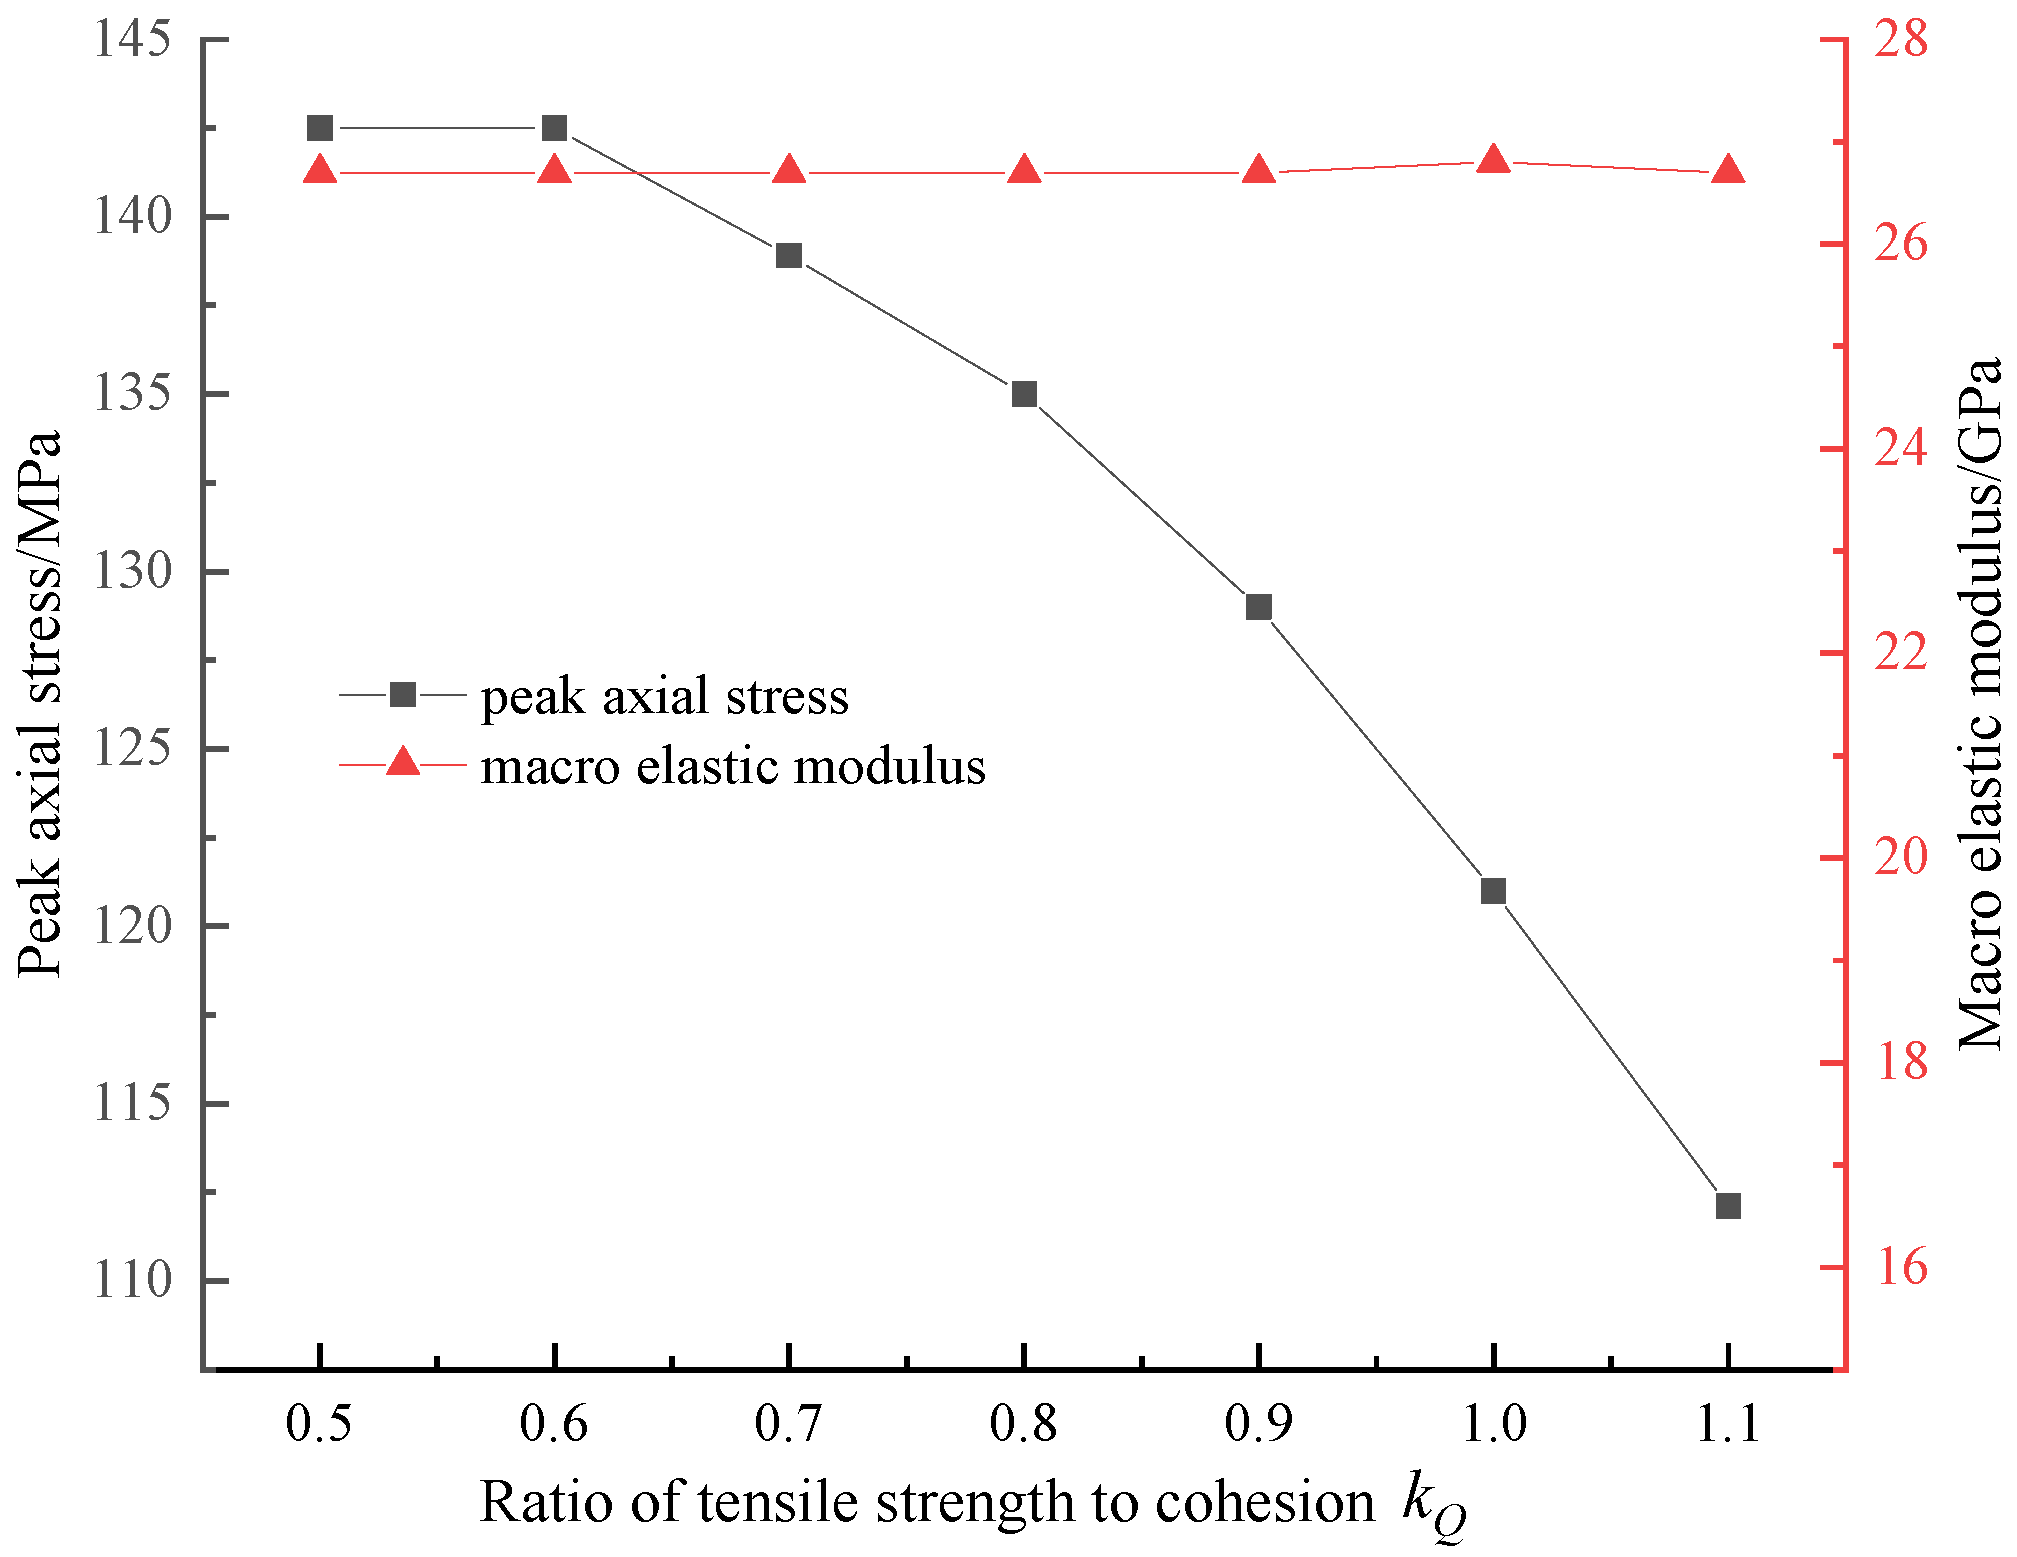
had no effects on
E as the parameter
. In addition,
showed a downward trend when
increased from 0.5 to 1.1 in
Figure 11. The relationship between strength parameters
, and the macro-mechanical properties was simple and clear: peak axial stress increased linearly when the strength parameters increased. However, strength parameters had no influence on the macro-elastic modulus.
The ultimate failure mode changed gradually when
increased from 0.5 to 1.1 in
Table 4 and
Figure 12. The blue color indicates a tension crack and the green color, a shear crack in
Table 4. Firstly, the distribution areas of cracks changed from large to small and from wide to narrow when
increased. Secondly the direction of the main failure surface changed slightly; the directions of the main failure surface were from the lower right corner to the upper left corner when
was small. However, the number of cracks distributing on the upper left corner decreased when
increased. Thirdly, the number of shear cracks obviously increased when
was greater than 0.8. The proportion of shear cracks increased from 0.5% to 53.5% (
Figure 12), so the main type of crack changed from tension to shear in the final instance. Although the direction of the main failure surface remained basically unchanged, the failure mechanism was different. Compared with the PFC2D simulation of the intact sample, the effects of
parameter were complex, including the failure area and the direction of main surface. However,
had mainly affected the ratio of the tension–shear crack numbers in the sample with 3D internal cracks with PFC3D.
2.2.6. Friction Angle
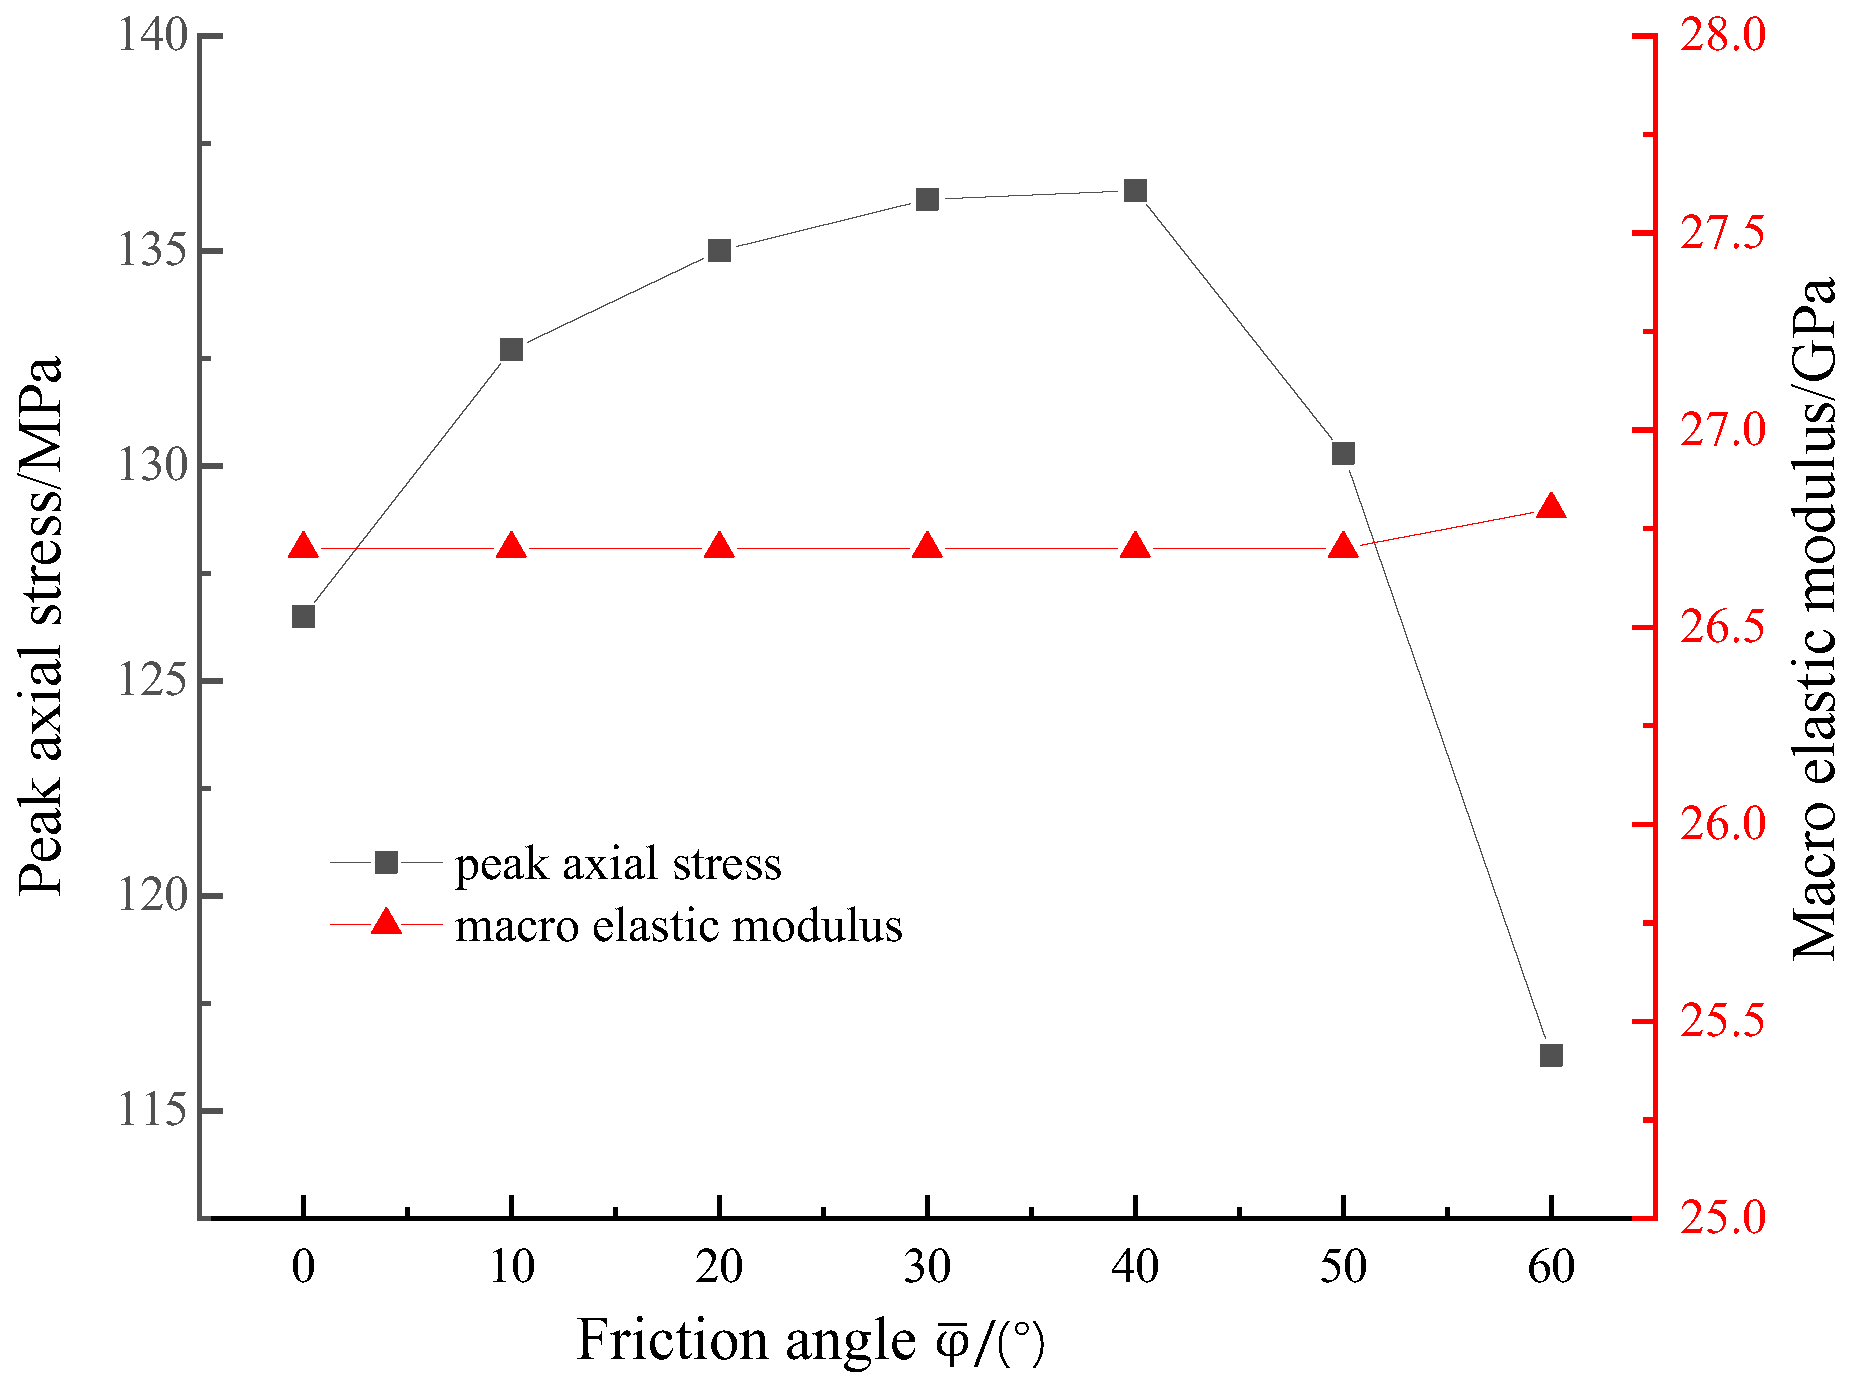
Friction angle of the rock ranged approximately between 20° and 55°. When was greater than 60°, the shape of the stress–strain curve was found to seriously deviate from the general curve of rock. Therefore, its value was limited within 0° to 60°.
E did not change when
increased, and the variation of
can be divided into two parts in
Figure 13.
increased when
changed from 0° to 40°, but rapidly decreased when
was greater than 40°.
The ultimate failure mode and the cutting plane of
ux were revealed in
Table 5 when
changed.
exerted little influence on the direction of the main fracture surface, but the coalescence states were different. When
was 0
, the failure surface did not completely coalesce and the cutting plane of
ux proved it too. With the increase of
, the main failure surfaces gradually extended upward and fully coalesce when
. However, the direction of the main failure surface changed slightly.
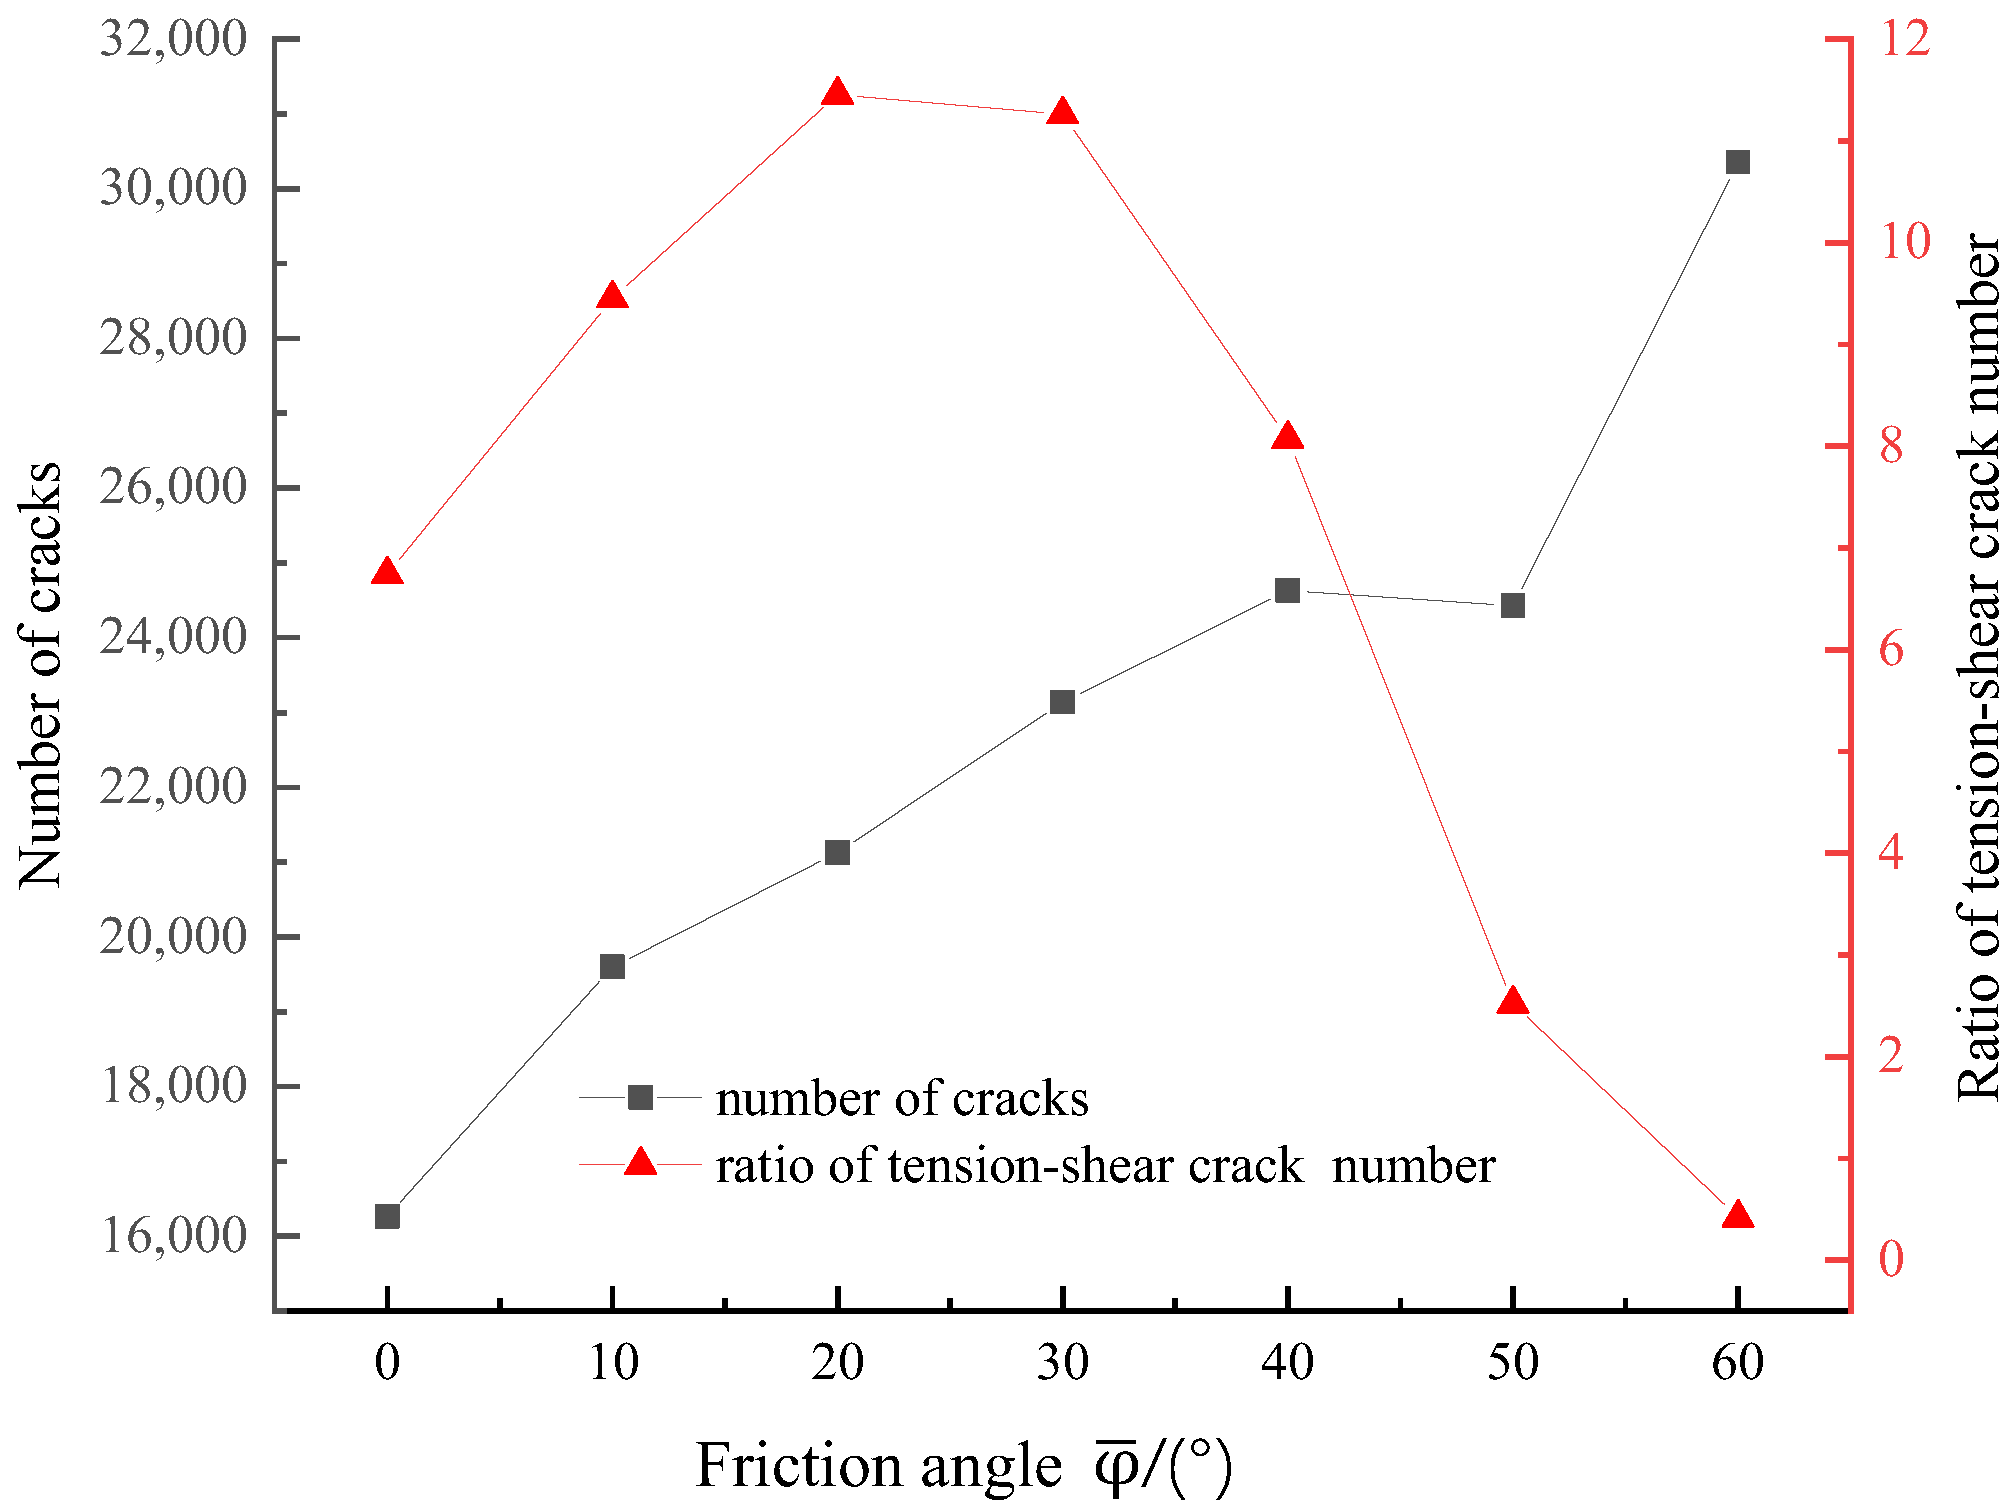
resulted in obvious changes in the number of cracks and the ratio of tension–shear crack numbers (
Table 5 and
Figure 14). The number of cracks increased with the increase of
, and the ratio of tension–shear crack numbers increased from 0
to
then decreased from 30
to
. The main crack type was tension, excluding
.
2.3. Relationship between the Macro-Mechanical Properties and S–J Model’s Micro-Parameters
Due to the fact that the size of the internal crack was smaller than the overall size of the sample, the volume proportion was 0.1%. Therefore, this study only simulated the internal crack with a 45° angle and did not involve changes in the geometric parameters of inclination angles and sizes. S–J model’s micro-parameters basically have no impact on the
and
of the model, in which
affected the ultimate failure mode. Subsequently, the direction of the main failure surface and coalescence state changed accordingly, as detailed in
Table 6. The main surface did not coalesce when
was 10 MPa, 20 MPa, 40 MPa, and 80 MPa, but coalesced completely in other cases.
affected the crack propagation processes and did not affect the ultimate failure form, as shown in
Table 7. When
was less than 10
6, the first crack originated from the crack itself, and the main type of cracks were S-J tension cracks accompanied by a small number of shear cracks. Then, matrix tensile cracks first appeared around the internal crack, which gradually expanded to other areas. When
was greater than 10
6, which was on the same magnitude as
of the matrix, the first PBM tension crack originated from the matrix around the internal crack. However, the ultimate failure mode remained unchanged.
3. Numerical Results on the Specimen with 3D Internal Crack
Based on the correlation analysis results of the macro and micro-parameters, the trial-and-error method was used to adjust the micro-parameters. Finally, the simulation results were validated by the stress–strain curve and the ultimate failure mode of the experiment. The micro-parameters in
Table 8 were determined for simulating the sample with 3D internal crack.
3.1. Comprison between the Experiment and Simulation
Figure 15 shows the stress–strain curves of the numerical simulations and laboratory tests of transparent resin [
20] under uniaxial compression. It can be seen that the two stress–strain curves were very similar. However, there are still some differences, as follows.
First of all, within the OA section, the experimental curve increased nonlinearly, and the curve was concave. However, the contact in the simulation between the particles was uniform and directly entered the linear elastic stage, and there was no concave process. Secondly, after point B, the failure process of the experimental sample tended to become slower, and the slope decreased. However, the curves in the simulation were still in the linear elastic stage, and the failure process was closer to that of the rock. The reason was that the sample in the experiment was pre-cooled at −10 °C temperature for two days, which made the sample behave as rock. However, the brittleness characteristics weakened when the temperature raised during the laboratory tests. Nonetheless, the material properties would not change in the simulation.
3.2. Crack Propagation Process
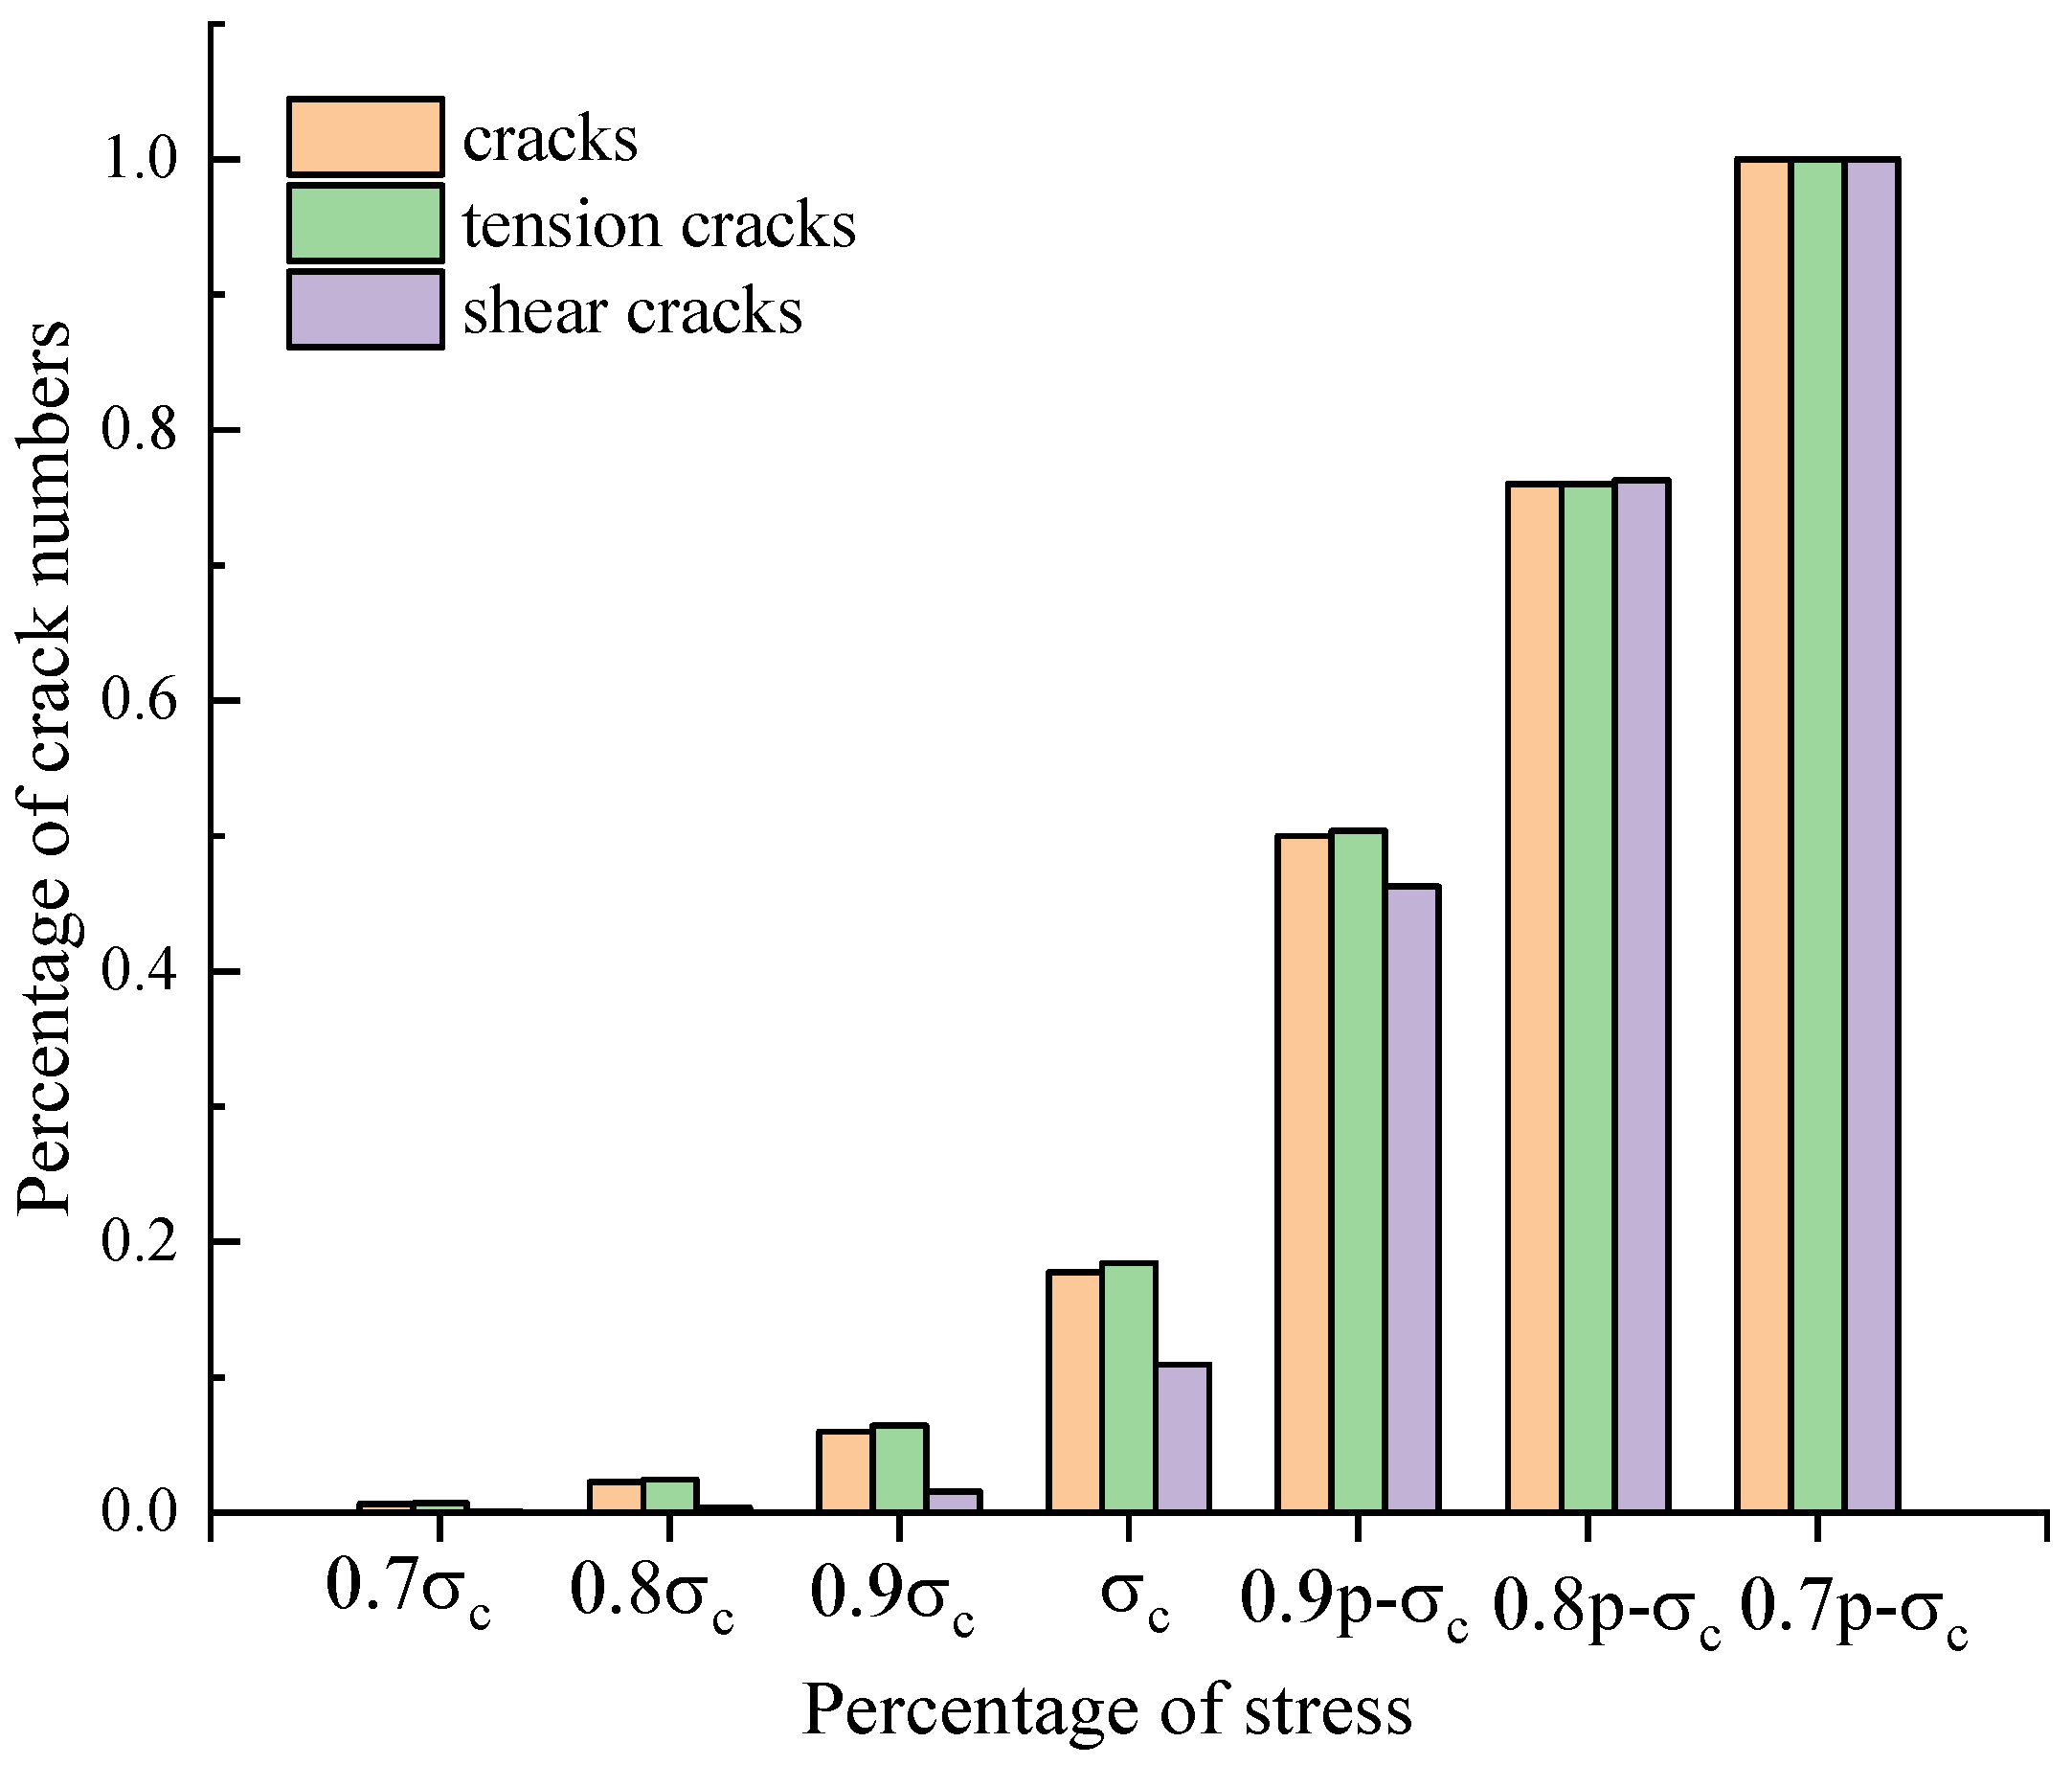
Figure 16 shows the evolution of number of micro cracks and
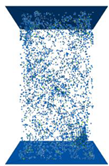
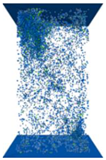
Table 9 demonstrated the cracking process in the specimen. The crack propagation process can be divided into three stages. The initial stage was from 0.7
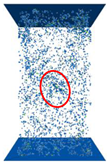
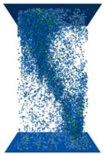
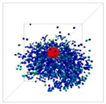
to peak stress in which the crack grew slowly. When the axial stress increased to 60% peak stress (82 MPa), a few micro tension cracks generated around the internal crack; then, more cracks emerged in the sample (0.8 peak), and the density of cracks around the internal crack was higher; this was circled with red in the X-direction of
Table 9B compared with the density in other areas. The image of the crack distribution of the Y-direction proved this. Due to the characteristic of PFC3D, micro cracks were generated when the contact broke, so cracks emerged everywhere rather than solely in a small area in the experiment. The distribution area of cracks changed from the end of the major axis to the short axis of the ellipse, which showed in the Y-direction of
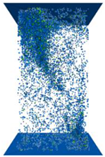
Table 9A,B. About 17% of the total number of cracks had been generated at peak axial stress. The propagation stage was from peak stress to 0.8 post-peak stress, in which the number of cracks increased faster. In addition, main failure surface formed basically. Cracks distributed more around the internal crack until 5 MPa in the post-peak stage. As the axial stress increased sequentially, more cracks generated around the top end of the specimen, which is shown in
Table 9H. When the axial stress was 19 MPa post-peak, the macro crack coalesced between the top end and the internal crack, and the main failure surface formed initially. The coalescence stage was the final stage in which the main failure surface expanded downwards to the right corner of the sample and caused the sample to be destroyed.
In the initial stage, there were only 10.9% of shear cracks generated, which was much less than 17% of total cracks and 18.4% of tension cracks. In the propagation stage, the percentage of total cracks increased to 33% as the stress decreased to 13.8 MPa after peak stress, and the percentage of tension cracks increased to 32% at the same process. The percentage of shear cracks was 35.1%, which meant shear cracks were generated faster after the peak stress. when the axial stress decreased from 114.2 MPa to 100.4 MPa, the increases of percentage were 26% (total crack), 25% (tension crack), and 30% (shear crack), respectively. The growth rate of the crack became smaller than that in the previous stress range.
4. Discussion
The crack propagation process of samples with a 3D internal crack obtained from PFC3D simulation can be used to investigate the type of crack initiation, propagation, and coalescence. The simulated results indicated that: (1) tension was the main type and generated first near the tip of the major axis of the internal crack; (2) shear cracks grew slower than tension cracks before peak stress; (3) the number of cracks increased faster after peak stress, especially in the period from peak stress to 0.9 post-peak stress; (4) the main failure surface formed at 0.8 post peak stress, and, accordingly, the percentage of total cracks was 76%.
The contact force distribution revealed the failure mechanism of the sample, as shown in
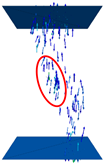
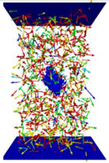
Table 10. The big contact force was distributed along the loading direction and influenced by the internal crack. There was less big contact force below the internal crack. In addition, the density of big contact force in the red circle was higher than that in other areas, and cracks were generated in the big contact force area. In addition, the direction of the contact force below the tip of the internal crack deviated from the vertical direction slightly, so there were components in the direction perpendicular to the plane of the internal crack which broke the bond as tension cracks. However, this phenomenon was not found to occur near the major axis at the upper end. Before the main failure surface completely coalesced, the big contact force distribution state around the internal crack remained unchanged. As can be seen from the Z-direction (
Table 10), the contact force located in the middle of the major axis and short axis was larger but not at the tip of the major axis. It was found to be consistent with the phenomenon observed in the experiment in Ref. [
17]. The small contact force of the S–J model displayed a concentrated distribution in the internal crack, and was finally distributed along the main failure surface after the surface had completely coalesced.
5. Conclusions
The following conclusions were reached in this study:
(1) Concerning the relationships between macro-mechanical properties and micro-parameters of the specimen in the simulation, we note the following: E increased linearly with the increase of and and decreased with the increase of . It did not change with strength parameters , , and . Peak axial stress increased linearly with the increase of and , decreased with the increase of and , and fluctuated with ;
(2) The ultimate failure mode changed irregularly with but changed gradually with the other micro-parameters of the matrix. The number of cracks increased with the increase of , , , and , decreased with the increase of , and was not influenced by . The ratio of tension to shear crack number decreased greatly with the increase of , increased slightly with the increase of and , and increased initially then subsequently decreased with the increase of . and influenced the crack propagation process;
(3) Due to the small volumes of the internal cracks, , and E, and ultimate failure mode of the samples basically did not change when micro-parameters of the S–J model changed. The strength parameters were found to have only slight impacts on the failure process;
(4) The stress–strain curve of the numerical simulations of the failure processes of transparent brittle materials with internal elliptical cracks under the uniaxial compression agreed well with the experimental result. The crack propagation process was consistent with the result of the experiment, especially in the initial stage. Crack first appeared near the major axis at the lower end of the internal cracks, then gradually expanded toward the short axis, and became densely distributed around the internal crack. The main failure surface expanded along the loading direction. The contact force distribution revealed that the contact force near the lower end of the major axis was larger, which was consistent with the initial cracks at the initial stage of loading.
Author Contributions
Conceptualization, Z.W.; methodology, Y.C.; software, S.C.; validation, S.C.; formal analysis, S.C.; investigation, Y.C.; resources, Y.C.; data curation, S.C.; writing—original draft preparation, S.C.; writing—review and editing, S.C.; visualization, Y.C.; supervision, Z.W.; project administration, S.C.; funding acquisition, Z.W. All authors have read and agreed to the published version of the manuscript.
Funding
This study were financially supported by National Natural Science Foundation of China grant number [52179104]. Natural Science Foundation of Shandong Province grant number [ZR2019BEE051], [ZR2020ME099], [ZR2020MD111].
Data Availability Statement
All the data, models or code generated or used in the present study are available from the corresponding author by request.
Conflicts of Interest
The authors declare no conflict of interest.
References
- Xie, H. Research review of the state key research development program of China: Deep rock mechanics and mining theory. J. China Caol Soc. 2019, 44, 1283–1305. [Google Scholar]
- Paulding, B.W. Crack Growth during Brittle Fracture in Compression; Massachusetts Institute of Technology: Cambridge, MA, USA, 1965. [Google Scholar]
- Zhang, L.; Cong, Y.; Meng, F.; Wang, Z.; Zhang, P.; Gao, S. Energy evolution analysis and failure criteria for rock under different stress paths. Acta Geotech. 2021, 16, 569–580. [Google Scholar] [CrossRef]
- Zhang, L.; Chao, W.; Liu, Z.; Cong, Y.; Wang, Z. Crack propagation characteristics during progressive failure of circular tunnels and the early warning thereof based on multi-sensor data fusion. Geomech. Geophys. Geo Energy Geo Resour. 2022, 8, 1–24. [Google Scholar] [CrossRef]
- Li, X.; Feng, Y.; Graham, M. Proceedings of the 7th International Conference on Discrete Element Methods; Springer: Singapore, 2017; Volume 188, ISBN 978-981-10-1926-5. [Google Scholar]
- Lee, H.; Jeon, S. An experimental and numerical study of fracture coalescence in pre-cracked specimens under uniaxial compression. Int. J. Solids Struct. 2011, 48, 979–999. [Google Scholar] [CrossRef]
- Zhao, G.; Dai, B.; Ma, C. Study of Effects of Microparamters on Macroproperties for Parallel Bonded Model. Chin. J. Rock Mech. Eng. 2012, 31, 1491–1498. [Google Scholar]
- Huang, Y.; Yang, S. Particle Flow Simulation of Macro-and-Micro-Mechanical Behavior of Red Containing Two Pre-existing Non-Coplanar Fissures. Chin. J. Rock Mech. Eng. 2014, 33, 1644–1653. [Google Scholar]
- Cong, Y.; Wang, Z.-Q.; Zheng, Y.-R.; Feng, X.-T. Experimental study on microscopic parameters of brittle materials based on particle flow theory. Chin. J. Geotech. Eng. 2015, 37, 1031–1040. [Google Scholar]
- Deng, S.X.; Zheng, Y.L.; Feng, L.P.; Zhu, P.Y.; Ni, Y. Application of design of experiments in microscopic parameter calibration for hard rocks of PFC3D model. Chin. J. Geotech. Eng. 2019, 41, 655–664. [Google Scholar]
- Huang, Y.; Yang, S. Particle Flow Analysis on Crack Coalescence Behavior of Sandstone Specimen Containing Three Pre-existing Fissures under Uniaxial Compression. J. Basic Sci. Eng. 2016, 24, 1232–1247. [Google Scholar]
- Hu, B.; Yang, S.Q.; Xu, P.; Tian, W. Time-scale effect of the creep model parameters and particle flow simulation of sandstone with a single crack. Chin. J. Geotech. Eng. 2019, 41, 864–973. [Google Scholar]
- Wang, G.L.; Liang, Z.Y.; Zhang, L. Study of influence mechanism of Z-type fissure on sandstone strength and fracture behavior. Rock Soil Mech. 2018, 39, 389–397. [Google Scholar]
- Wu, T.-H.; Zhou, Y.; Wang, L.; Sun, J.-H.; Zhao, H.; Sun, Z. Microscopic study of interaction mechanism between circular hole and fissures in rock under uniaxial compression. Rock Soil Mech. 2018, 39, 463–472. [Google Scholar]
- Tian, W.; Yang, S.; Huang, Y. PFC2D simulation on crack evolution behavior of brittle sandstone containing two coplanar fissures under different confining pressures. J. Min. Saf. Eng. 2017, 34, 1207–1215. [Google Scholar]
- Dyskin, A.V.; Sahouryeh, E.; Jewell, R.J.; Joer, H.; Ustinov, K.B. Influence of shape and locations of initial 3-D cracks on their growth in uniaxial compression. Eng. Fract. Mech. 2003, 70, 2115–2136. [Google Scholar] [CrossRef]
- Dyskin, A.V.; Jewell, R.J.; Joer, H.; Sahouryeh, E.; Ustinov, K.B. Experiments on 3-D crack growth in uniaxial compression. Int. J. Fract. 1994, 65, 77–83. [Google Scholar] [CrossRef]
- Wang, H.; Dyskin, A.; Elena, P. Comparative analysis of mechanisms of 3-D brittle crack growth in compression. Eng. Fract. Mech. 2019, 220, 1–36. [Google Scholar] [CrossRef]
- Sun, L.; Zhang, L.; Cong, Y.; Song, Y.; He, K. The meso-fracturing mechanism of marble under unloading confning pressure paths and constant axial stress. Sci. Rep. 2021, 11, 17835. [Google Scholar] [CrossRef]
- Guo, Y.S.; Ma, J.; Ji, Y.T. Three-dimensional Initial Fracture States of an Inclined Elliptical Flaw. Prog. Geophys. 2011, 26, 1206–1213. [Google Scholar]
Figure 1.
Simulation procedure of the sample with a 3D internal crack in PFC3D.
Figure 1.
Simulation procedure of the sample with a 3D internal crack in PFC3D.
Figure 2.
Relationship between EC and macro-mechanical properties.
Figure 2.
Relationship between EC and macro-mechanical properties.
Figure 3.
Number of cracks and ratio of tension–shear crack number when Ec changed.
Figure 3.
Number of cracks and ratio of tension–shear crack number when Ec changed.
Figure 4.
Relationship between k and macro-mechanical properties.
Figure 4.
Relationship between k and macro-mechanical properties.
Figure 5.
Number of cracks and ratio of tension–shear crack number when k changed.
Figure 5.
Number of cracks and ratio of tension–shear crack number when k changed.
Figure 6.
Relationship between and macro-mechanical properties.
Figure 6.
Relationship between and macro-mechanical properties.
Figure 7.
Number of cracks and ratio of tension–shear crack numbers when µ changed.
Figure 7.
Number of cracks and ratio of tension–shear crack numbers when µ changed.
Figure 8.
Relationship between and macro-mechanical properties.
Figure 8.
Relationship between and macro-mechanical properties.
Figure 9.
Relationship between and initial stress.
Figure 9.
Relationship between and initial stress.
Figure 10.
Relationship between strength parameters in PFC3D.
Figure 10.
Relationship between strength parameters in PFC3D.
Figure 11.
Relationship between and macro-mechanical properties.
Figure 11.
Relationship between and macro-mechanical properties.
Figure 12.
Number of cracks and ratio of tension–shear crack numbers when changed.
Figure 12.
Number of cracks and ratio of tension–shear crack numbers when changed.
Figure 13.
Relationship between macro-mechanical properties.
Figure 13.
Relationship between macro-mechanical properties.
Figure 14.
Number of cracks and ratio of tension–shear crack numbers when changed.
Figure 14.
Number of cracks and ratio of tension–shear crack numbers when changed.
Figure 15.
Comparison between experimental and numerical stress–strain curve.
Figure 15.
Comparison between experimental and numerical stress–strain curve.
Figure 16.
Percentage of crack number under different stress conditions: 0.9 p-: 0.9 post peak stress; 0.8 p-: 0.8 post peak stress; 0.7 p-: 0.7 post peak stress.
Figure 16.
Percentage of crack number under different stress conditions: 0.9 p-: 0.9 post peak stress; 0.8 p-: 0.8 post peak stress; 0.7 p-: 0.7 post peak stress.
Table 1.
Ultimate failure mode and cutting plane of ux when EC changed.
Table 2.
The cutting plane of ux when .
Table 2.
The cutting plane of ux when .
Table 3.
The cutting plane of ux when µ changed.
Table 3.
The cutting plane of ux when µ changed.
Table 4.
Ultimate failure mode when changed.
Table 4.
Ultimate failure mode when changed.
Table 5.
Ultimate failure mode and the cutting plane of ux when changed.
Table 5.
Ultimate failure mode and the cutting plane of ux when changed.
Table 6.
Ultimate failure mode when of S–J model changed.
Table 7.
Crack propagation process when of S–J model changed.
Table 8.
Micro-parameters in the PFC3D model.
Table 8.
Micro-parameters in the PFC3D model.
| Micro-Parameters of PBM | Values | Micro-Parameters of SJM | Values |
|---|
| Young’s modulus EC (GPa) | 28.69 | Normal stiffness (GPa) | 20 |
| Ratio of normal to shear stiffness k | 2.78 | Ratio of normal to shear stiffness | 2 |
| Friction efficient µ | 0.51 | Friction efficient | 0.5 |
| Tensile strength (MPa) | 78 | Tensile strength (MPa) | 6.25 |
| Ratio of tensile strength to cohesion | 1.25 | Ratio of tensile strength to cohesion | 1.25 |
Table 9.
Crack propagation process of brittle materials with 3D internal crack.
Table 10.
Evolution of contact distribution.
| Disclaimer/Publisher’s Note: The statements, opinions and data contained in all publications are solely those of the individual author(s) and contributor(s) and not of MDPI and/or the editor(s). MDPI and/or the editor(s) disclaim responsibility for any injury to people or property resulting from any ideas, methods, instructions or products referred to in the content. |
© 2023 by the authors. Licensee MDPI, Basel, Switzerland. This article is an open access article distributed under the terms and conditions of the Creative Commons Attribution (CC BY) license (https://creativecommons.org/licenses/by/4.0/).
