1. Introduction
High-Performance Cutting (HPC) works with a maximum metal removal rate per cut. This distinguishes HPC milling from High-Speed Cutting (HSC), which uses high cutting speeds with small infeeds and extreme feed rates [
1]. Due to the high radial infeed in HPC, the peripheral cutting edges are exposed to high loads, which means that there is a risk of the tools vibrating and the peripheral cutting edges breaking off. As a result, the service life of the tools is often limited and the unsteady running results in high noise levels.
The production of components in tool and mold making usually takes place in several production steps. First, the component to be manufactured is pre-machined with solid carbide rough milling in a soft state using HPC with a residual stock allowance. This is necessary, as economic production is not possible in a hardened state due to the high tool wear, and as the required component quality cannot be maintained. Machining in the hardened state with the use of the same tool concepts is only possible with low infeed and feed rates. However, this is uneconomical and is rarely used. After hardening the component, finishing is carried out with a solid carbide finishing mill. This production concept therefore consists of several individual process steps and results in high throughput times. However, companies in the manufacturing industry are facing tough competition, which means that solid carbide end mills in the HPC sector have to guarantee a high metal removal rate and a long tool life at the same time. Added to this are the ever-increasing demands of customers for machining and surface qualities under difficult cutting conditions. Materials with high hardness and toughness often need to be machined, particularly in tool and mold making. One material that is frequently machined, for example, is the tool steel Toolox 44.
The primary aim is to enable economical roughing and finishing in a hardened state. To achieve these goals, tool wear must be low, high machining and surface quality must be guaranteed and a high metal removal rate must be achieved. Improved chip breaking and chip evacuation are required to achieve this. This is to be achieved by improving chip breaking, which prevents the jamming of long chips. This should also reduce the thermal load on the tool. By improving the force distribution on the peripheral cutting edges, the process forces are reduced. This should prevent peripheral cutting edge and chip breakage, and thus reduce tool wear. Improving the force distribution has a positive effect on the dynamic behavior, which reduces the oscillation of the tools. By reducing chatter vibrations, the machining results are improved and tool wear is reduced. In contrast to existing tools, the aim is to increase the metal removal rate by increasing the axial and radial depth of cut and the feed rate.
Roughing millers are usually used in machining operations for rough machining and are often designed with a chip breaker on the peripheral cutting edges. These have the task of ensuring better chip breaking and thus improving the application behavior. According to DIN 1836, the chip breaker can consist of a flat or round profile [
2]. The exact design is selected depending on the material to be machined. Depending on the material application group (N, H, W), a distinction is made between fine, normal and coarse cord toothing. For example, fine cord toothing (HR, HF) is selected for machining hard, tough and/or short-chipping materials. The flat profile can improve the surface quality, but there is an increased risk of tool wear.
Further designs can be found on the market for milling tools and in patent specifications. A general overview can be found in
Table 1. It can be seen that chip breakers usually consist of a serrated edge (usually a sinusoidal shape). In addition, in the case of pure roughing end mills, additional chip breakers are fitted within the flute or on the flank face to improve chip breaking. The proposed roughing/finishing cutters have alternating or consecutive cutting edges with and without chip breakers.
The literature also contains cutters that have varying helix angles and varying tooth pitch to improve dynamic behavior [
11,
12,
13]. Another way is to use flank champers to increase process stability [
14]. Ellersiek developed a solid mill with two radial recessed roughing cutting edges with a flank chamfer and two sharp finishing cutting edges which significantly increased process stability [
15].
The tool concept described in this work provides for chip breakers in the form of polygons on the peripheral and face cutting edges. These should contribute to wear resistance and enable roughing and finishing while maintaining a high metal removal rate when machining materials that are difficult to machine.
This paper presents this innovative tool concept and shows the results of experimental investigations in the first development step and compares them with conventional tools. The aim is to highlight the high potential of the innovative tool concepts. To this end, the effective and working variables are examined in detail. This is done by analyzing the process forces, tool wear, chip formation and component quality.
The high necessity of a solid carbide end mill for rough finishing is based on the high production share of milling within the machining production of 47 percent and the share of milling tools with shank of 43 percent. This puts the production value at 0.8 billion euros per year [
16]. The innovative tool concept is intended to increase the market position of manufacturing companies.
2. Materials and Methods
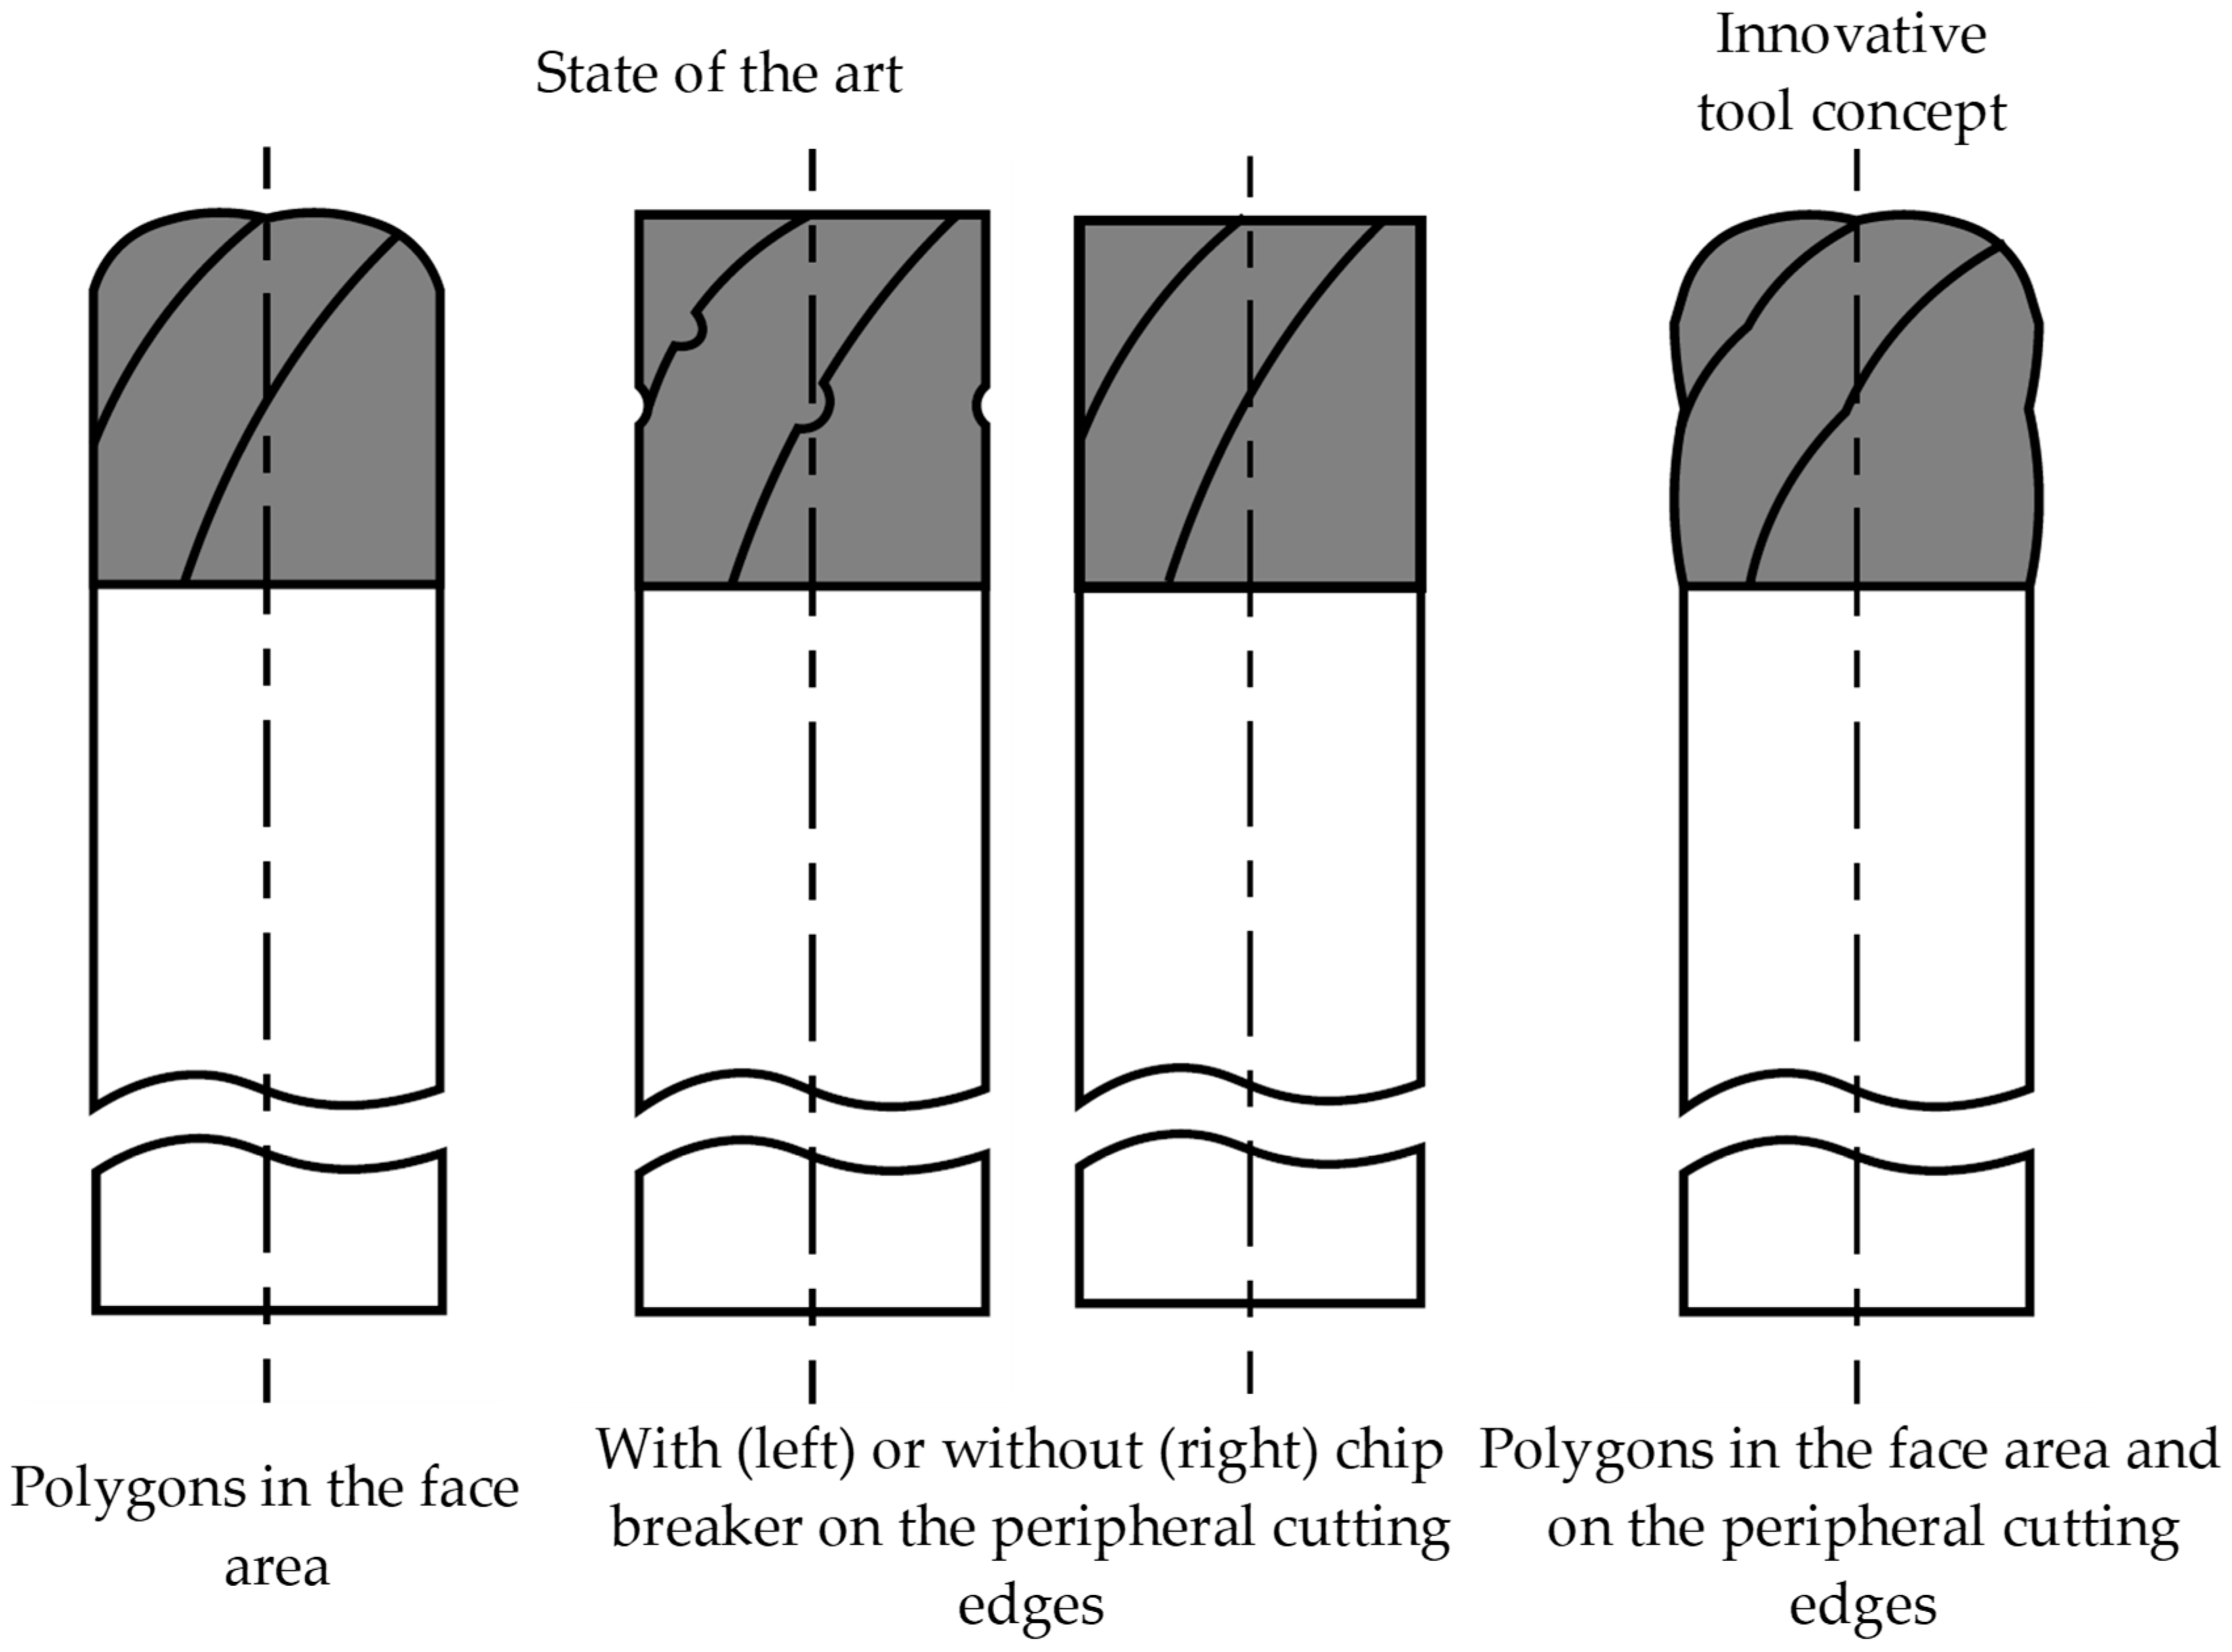
The development of the innovative tool concept for roughing and finishing is divided into several steps due to its high complexity. This is necessary because there are no scientific findings on the design of such tools. The aim is to improve the dynamic process behavior by reducing the mechanical and thermal loads so that the tools are suitable for roughing and finishing and meet the required quality criteria on the workpiece. To achieve this, the geometry of the chip breaker, which is located on the tool circulation, should correspond to a polygon. This structure is already used successfully for solid carbide polygon mills in the face geometry area (
Figure 1, left). Thanks to the very stable tool geometry, these tools achieve the best roughing results with high wear resistance. The advantage of this geometry is the increased contact area between the cutting edge and the workpiece, so that the resulting forces can be distributed better along the cutting edge.
In order to achieve optimum force distribution and smoother running with the HPC as well, these two concepts should be combined and the polygons in the project should therefore also be attached to the tool circumference in addition to the face area (
Figure 1, right). This should be done with overlapping. In order to be able to use the tool for both roughing and finishing, the diameters of the individual cutting edges and polygons are to be varied. The polygons should be unevenly distributed along the individual cutting edges to increase smoothness and ensure better force distribution.
The development of the solid carbide end mill requires several steps. The first step is to create the basic structure. In addition to determining the number of teeth, this includes the degree of spiralization (helix angle) of the tool. Subsequently, the effect of various process parameters on the effective and working variables is analyzed. The polygon structure should then be refined. To do this, the position, number and size of the polygons are examined. Finally, the macro and micro geometry of the tool and a special coating will be developed. The steps required to develop the solid carbide end mill are shown in
Figure 2. This paper presents the results for determining the basic structure.
3. Boundary Conditions for the Experimental Tests
This section describes the boundary conditions required to carry out the experimental tests. For this purpose, the reference workpiece and the test material used are presented as a basis for comparison. Afterwards, the exact structure of the test tools is described. Finally, the test equipment used is briefly presented.
3.1. Reference Workpiece
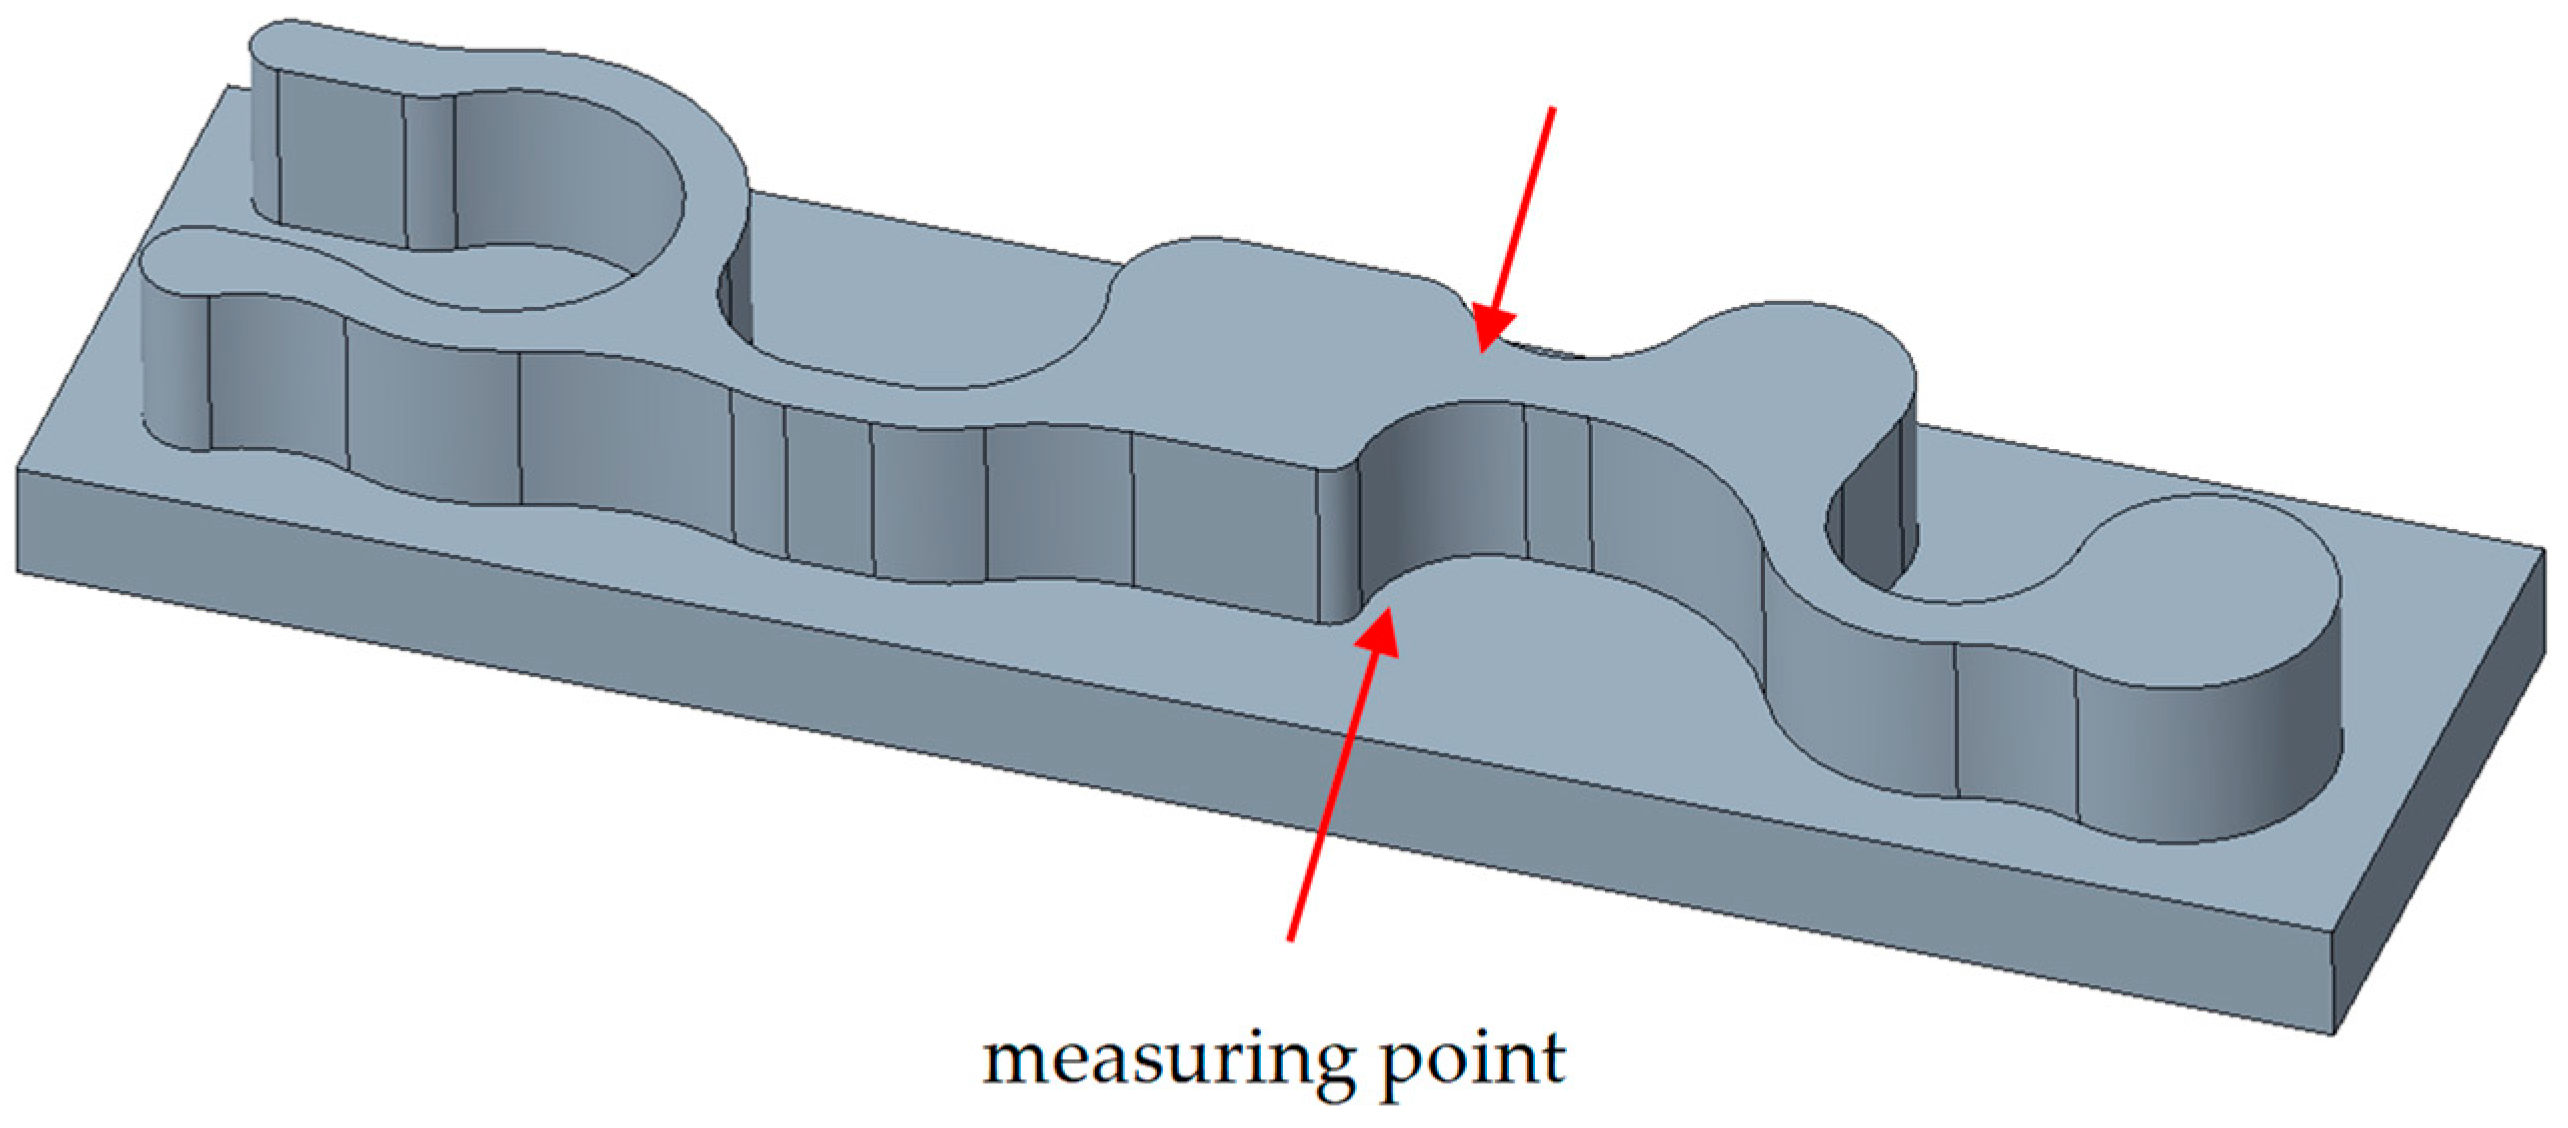
In order to create comparability, a reference workpiece is constructed for the experimental tests. The contour of the reference workpiece reflects frequently occurring geometries that are manufactured with conventional tools. For this purpose, several components from industrial practice and research were analyzed in advance and a geometry was derived from these. The curved contours demonstrate a dynamic milling. A measuring point with a straight surface was used to analyze dimensional accuracy and roughness. The size of the reference workpiece was selected based on empirical values from industrial practice. The aim was to be able to carry out regular measurements along the tool life quantity in order to evaluate the effective and working variables of a milling operation between the different variants. This is intended to make the technical performance of the demonstrator tools comparable.
Figure 3 shows the developed reference workpiece. This is intended to make the technical performance of the demonstrator tools comparable.
Figure 3 shows the developed reference workpiece with an integrated measuring point (flat surface).
The semi-finished products made of the tool steel Toolox 44 with dimensions of 150 × 40 × 20 mm required to manufacture the reference workpiece were cut from a single batch. This made it possible to minimize systematic errors caused by deviations in the alloying elements between workpiece samples.
The reference workpiece was machined in synchronization by roughing and finishing. The machining parameters used for this are summarized in
Table 2. The machining parameters were taken from tables for conventional tools for roughing and finishing. The milling concept followed corresponds to HPC machining to achieve the highest possible metal removal rate. While a radial depth of cut 0.1 × D was used for roughing, 0.025 × D was used for finishing.
3.2. Tool Steel Toolox 44
The material Toolox 44, which is frequently used in tool and mold making, is used in the experimental investigations. Toolox 44 is a hardened and tempered tool steel that combines the positive properties of the materials 1.2311 and 1.2312. The tool steel is annealed for three to five weeks at high tempering temperatures and therefore has low stresses. It therefore guarantees good dimensional accuracy during machining and is suitable for injection molding tools, for example, due to its low distortion. This material is also extremely pure, practically segregation-free and has high strength. Due to its high toughness and wear resistance, the material is considered to be moderately machinable. The chemical composition of the tool steel Toolox 44 is summarized in
Table 3 below.
Toolox 44 has a hardness of 45 HRC and a tensile strength of 1450 MPa.
Table 4 summarizes the technical specifications.
3.3. Experimental Tools
The experimental tests are carried out using a solid carbide end mill with a diameter D = 12 mm. According to a representative market research study by Westermann, this size class is one of the most commonly used tools [
16]. With the selected cutting edge length L = 12 mm, the tool has an L/D ratio = 1. The test tool has four cutting edges that are arranged at an angle of 90 degrees to each other. There are two roughing and two finishing cutting edges. The two roughing cutting edges are provided with polygons. These are intended to contribute to good chip breaking and, at the same time, ensure moderate process forces with a high metal removal rate. The polygons on the peripheral cutting edges are defined by their position, number and size. The test tools in this work have two polygons on each roughing edge which have an outer radius of 12 mm (=1 × D) and a transition radius of 0.2 mm and are arranged evenly along the peripheral cutting edges. In addition, the polygons are determined by a transition radius. This is set to 1 mm in the context of this work. The selected sizes of the polygons are based on empirical knowledge. To achieve a high surface quality, the tool has two finishing cutting edges without polygons in addition to the two roughing cutting edges. The end cutting edges also have polygons based on polygon milling cutters.
The helix angle, also known as the side rake angle, refers to the angle between the cutter axis and the cutting edge [
18]. This corresponds to the pitch of the helix. The direction of the resulting cutting force vector is determined by the helix angle and thus significantly influences the profile generation [
19].
Large helix angles lead to strongly curved profiles, which can lead to unacceptable deviations. From the point of view of profile generation and avoiding disturbances to the workpiece contour, smaller helix angles are therefore preferable. There is also an additional axial force in the direction of the spindle, which increases as the helix angle increases [
20]. In contrast, larger helix angles favor the flow of chips, which reduces chip jamming and thus the risk of tool breakage [
19]. At the same time, larger helix angles allow several cutting edges to be engaged simultaneously. This reduces fluctuations in the cutting forces and enables a smoother milling process. The helix angle also influences the chip thickness. As the helix angle increases, the average chip thickness h
m decreases (h
m = f
z − cos λ) [
1]. The selection of the helix angle depends on the material to be machined [
20]. A larger helix angle is often used for softer materials, as their soft chips can be guided better in the tighter spirals. The experimental tests carried out compared helix angles of 30° and 40°, as conventional tools, both in the patents under consideration and in research work, have a helix angle in this range. The characteristics of the experimental tools used are summarized in
Table 5.
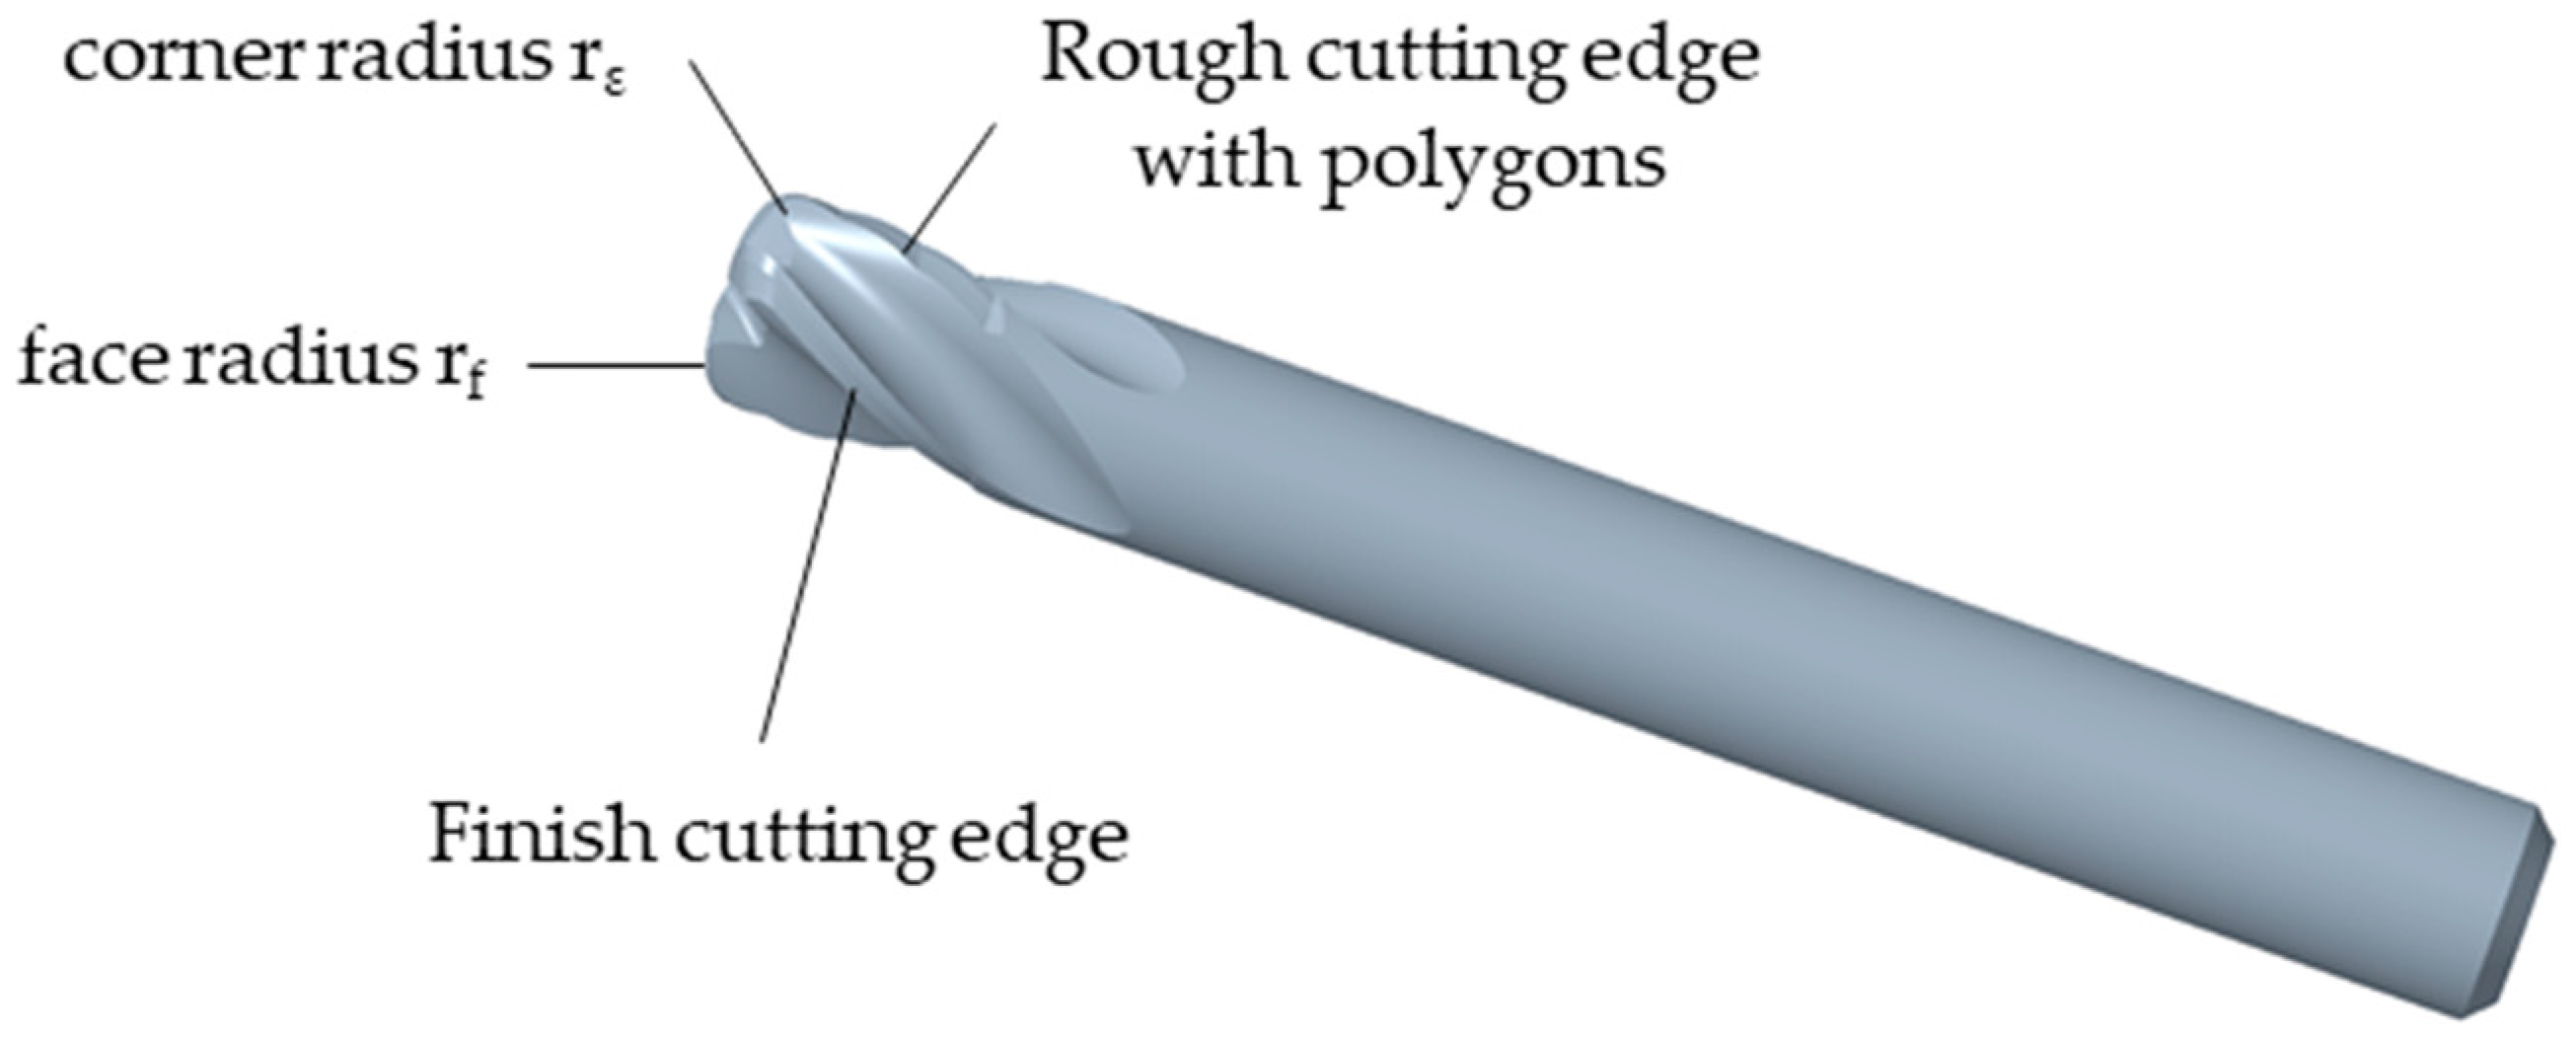
The described tools with the different helix angles are compared with conventional roughing and finishing tools. These differ significantly from the newly developed tools in their peripheral and face geometry. Both variants have a flat face geometry. One variant has chip breakers on the peripheral cutting edges. All cutting edges have a helix angle of 40°. The other variant has no chip breaker on the peripheral cutting edges and is equipped with different helix angles. The opposing cutting edges have helix angles of 35° and 38°, respectively. For illustration purposes, the tool with the polygons and a helix angle of 30° is shown as an example in
Figure 4.
The tools were manufactured by grinding in a multi-stage process. In addition, the tools all have a specially developed pvd (physical vapor deposition) coating for highly stressed solid carbide milling tools. The 3 µm thick coating has a hardness of 3300 HV and high oxidation resistance (oxidation temperatures of up to 1100 °C).
3.4. Experimental Machine
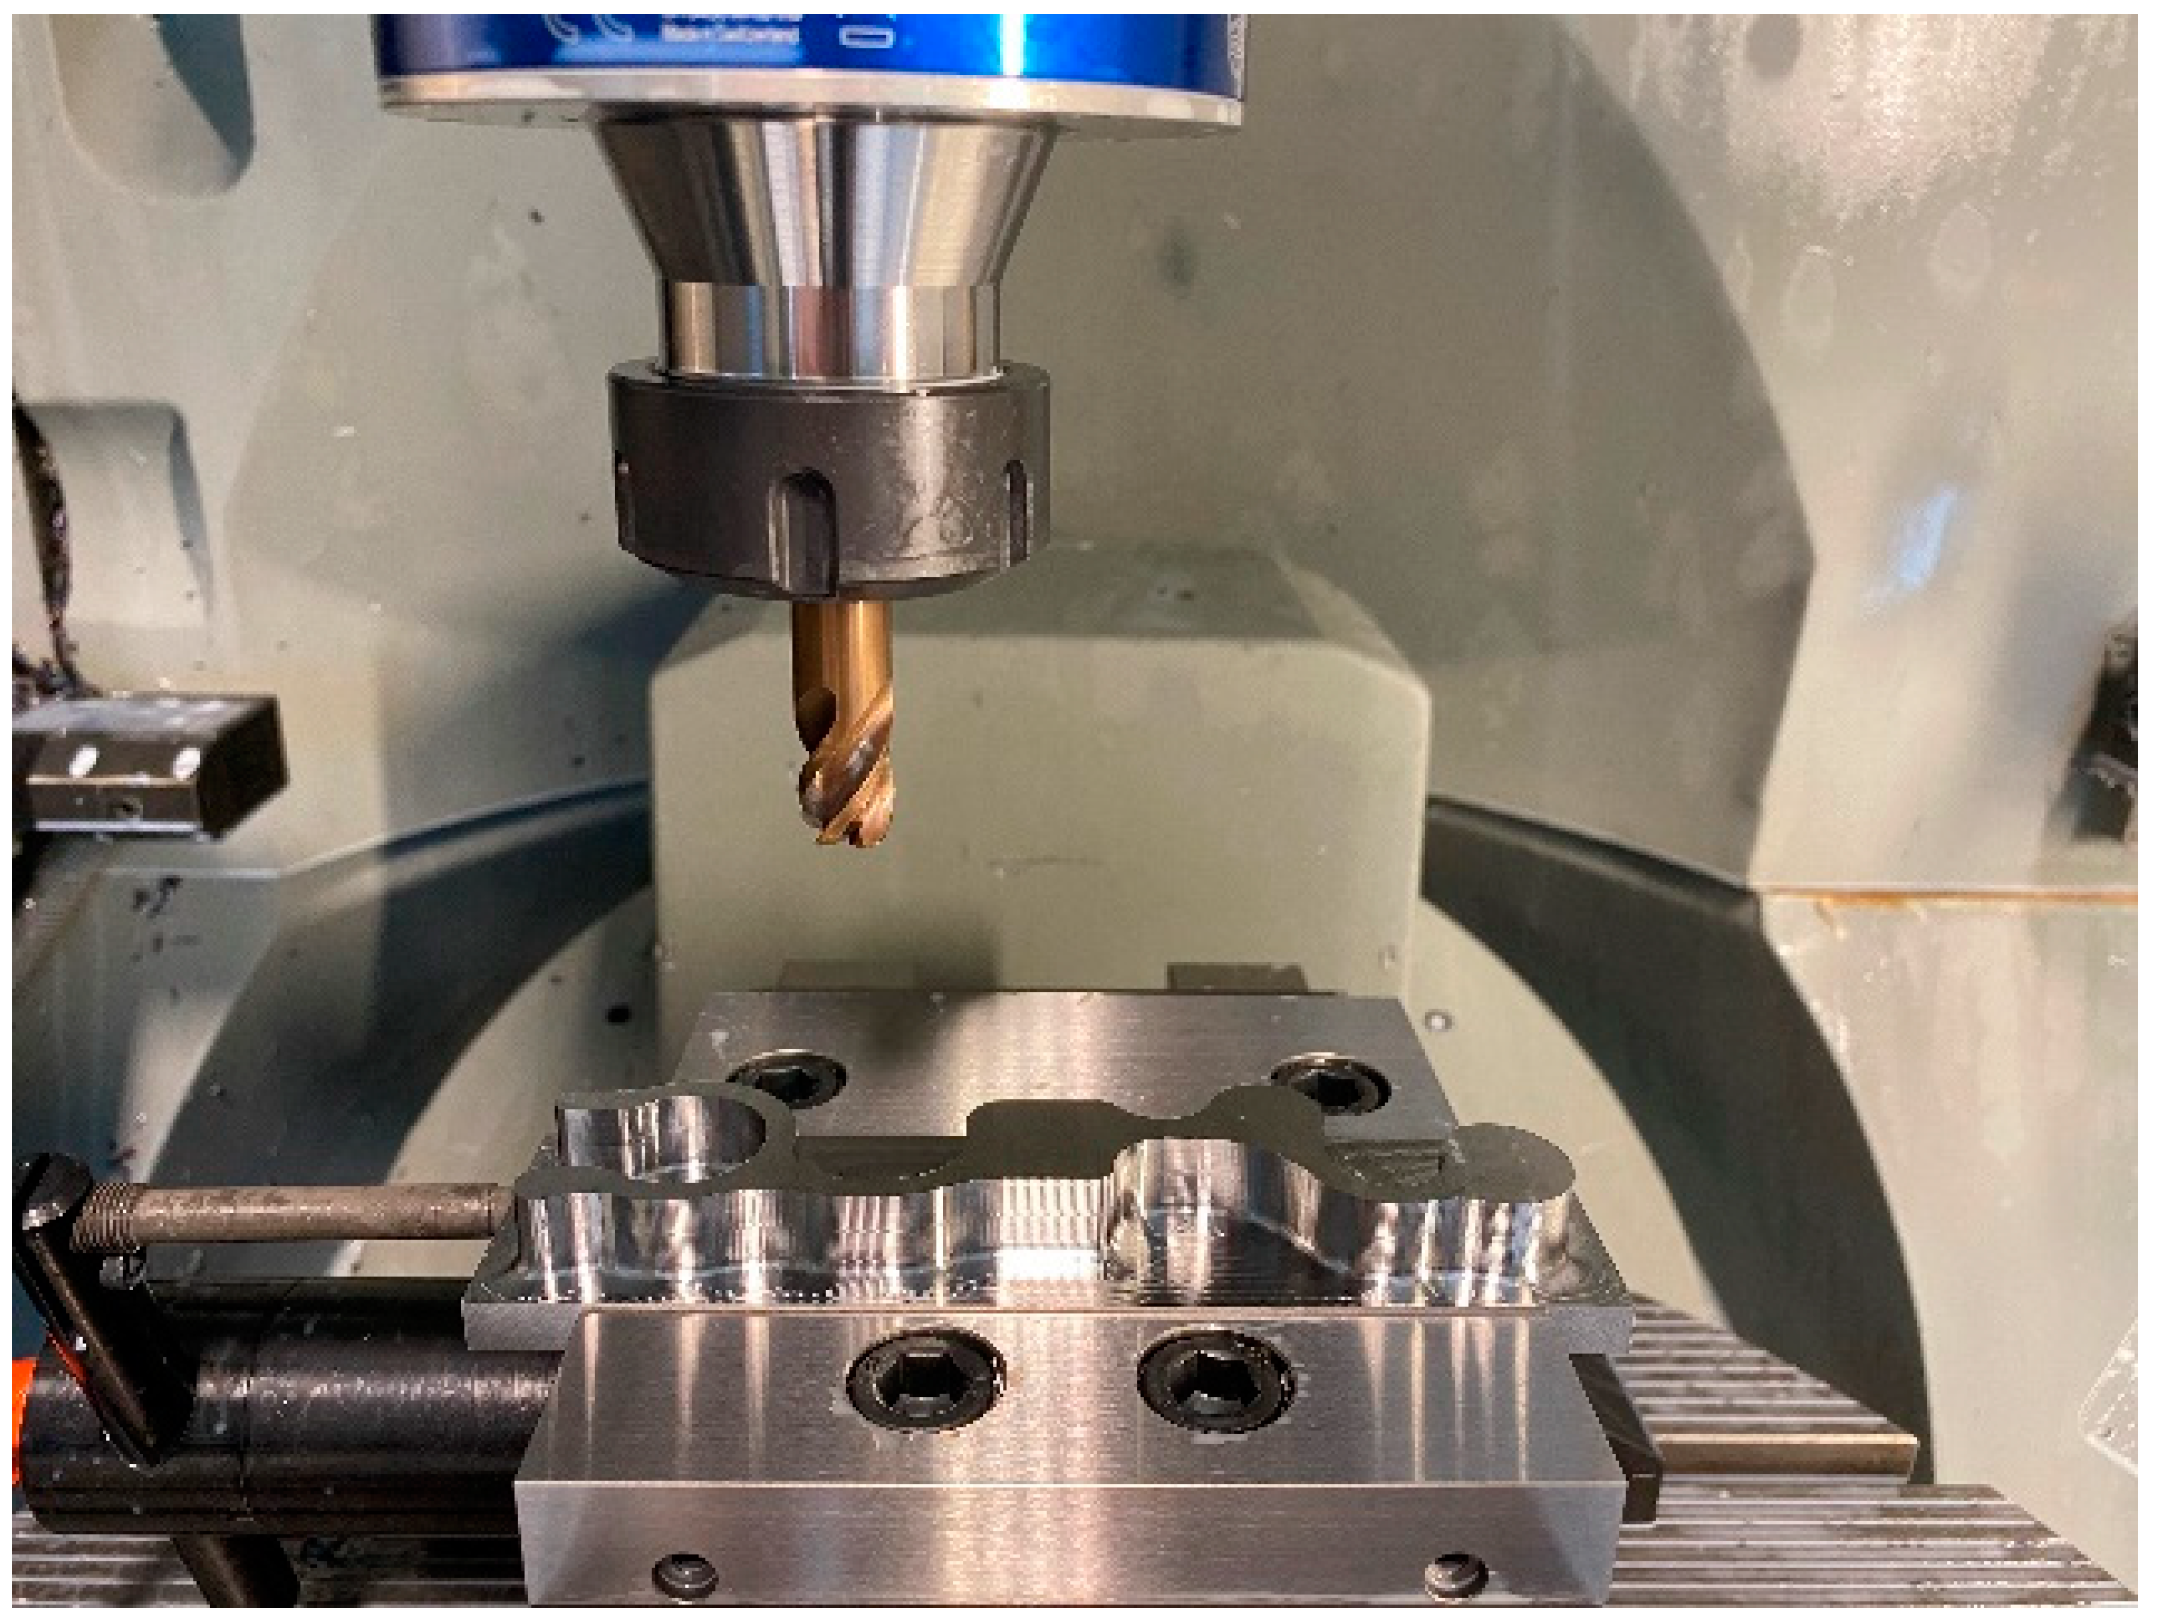
The experimental tests were carried out on a DMU 50 eVolution five-axis simultaneous machining center from the manufacturer Deckel Maho Gildemeister (DMG, Bielefeld, Germany). The experimental setup with the reference workpiece and the sensory tool holder is shown in
Figure 5 below.
4. Result and Discussion
To evaluate the application behavior, various effective and working variables were analyzed along the tool life. Significant tool wear was defined as a tool life criterion. During the tests, the cutting point was flooded with a cooling lubricant emulsion. Two test tools were used for each of the two variants. The measurement points shown in all the following diagrams represent the average value. The maximum tool life quantity was defined based on preliminary tests with twelve workpieces, as significant wear occurred with the conventional tool and a decreasing component quality was observed.
The conventional tool (variant 1) showed tool breakage after seven or eight reference workpieces. The conventional tool (variant 2) reached the tool life quantity of twelve reference workpieces in each case. With variant 3 (helix angle λ = 30°), twelve reference workpiece were produced in each case. With variant 4 (helix angle λ = 40°), tool breakage was detected in the area of the finishing cutting edge after six and seven reference workpieces (
Table 6).
4.1. Process Force and Moments
A sensory tool holder was used to measure the process forces and torques during the machining of the reference workpiece. The wireless four-component dynamometer (RCD) used by the manufacturer Kistler is based on the piezoelectric principle and works with a sampling rate of 10 kHz, which enables the acquisition of highly dynamic measurement data. The measuring device is used to directly measure the spindle torque M
t and the forces F
x and F
y on the working plane. The active force F
a acting on the working plane can be calculated from the forces in the x and y directions. The usual force components of the tangential force F
t and radial force F
r in the tool coordinate system can be calculated using the spindle torque M
t, the tool diameter D and the active force F
a [
21]. The axial force F
z acting in the axial direction is also recorded.
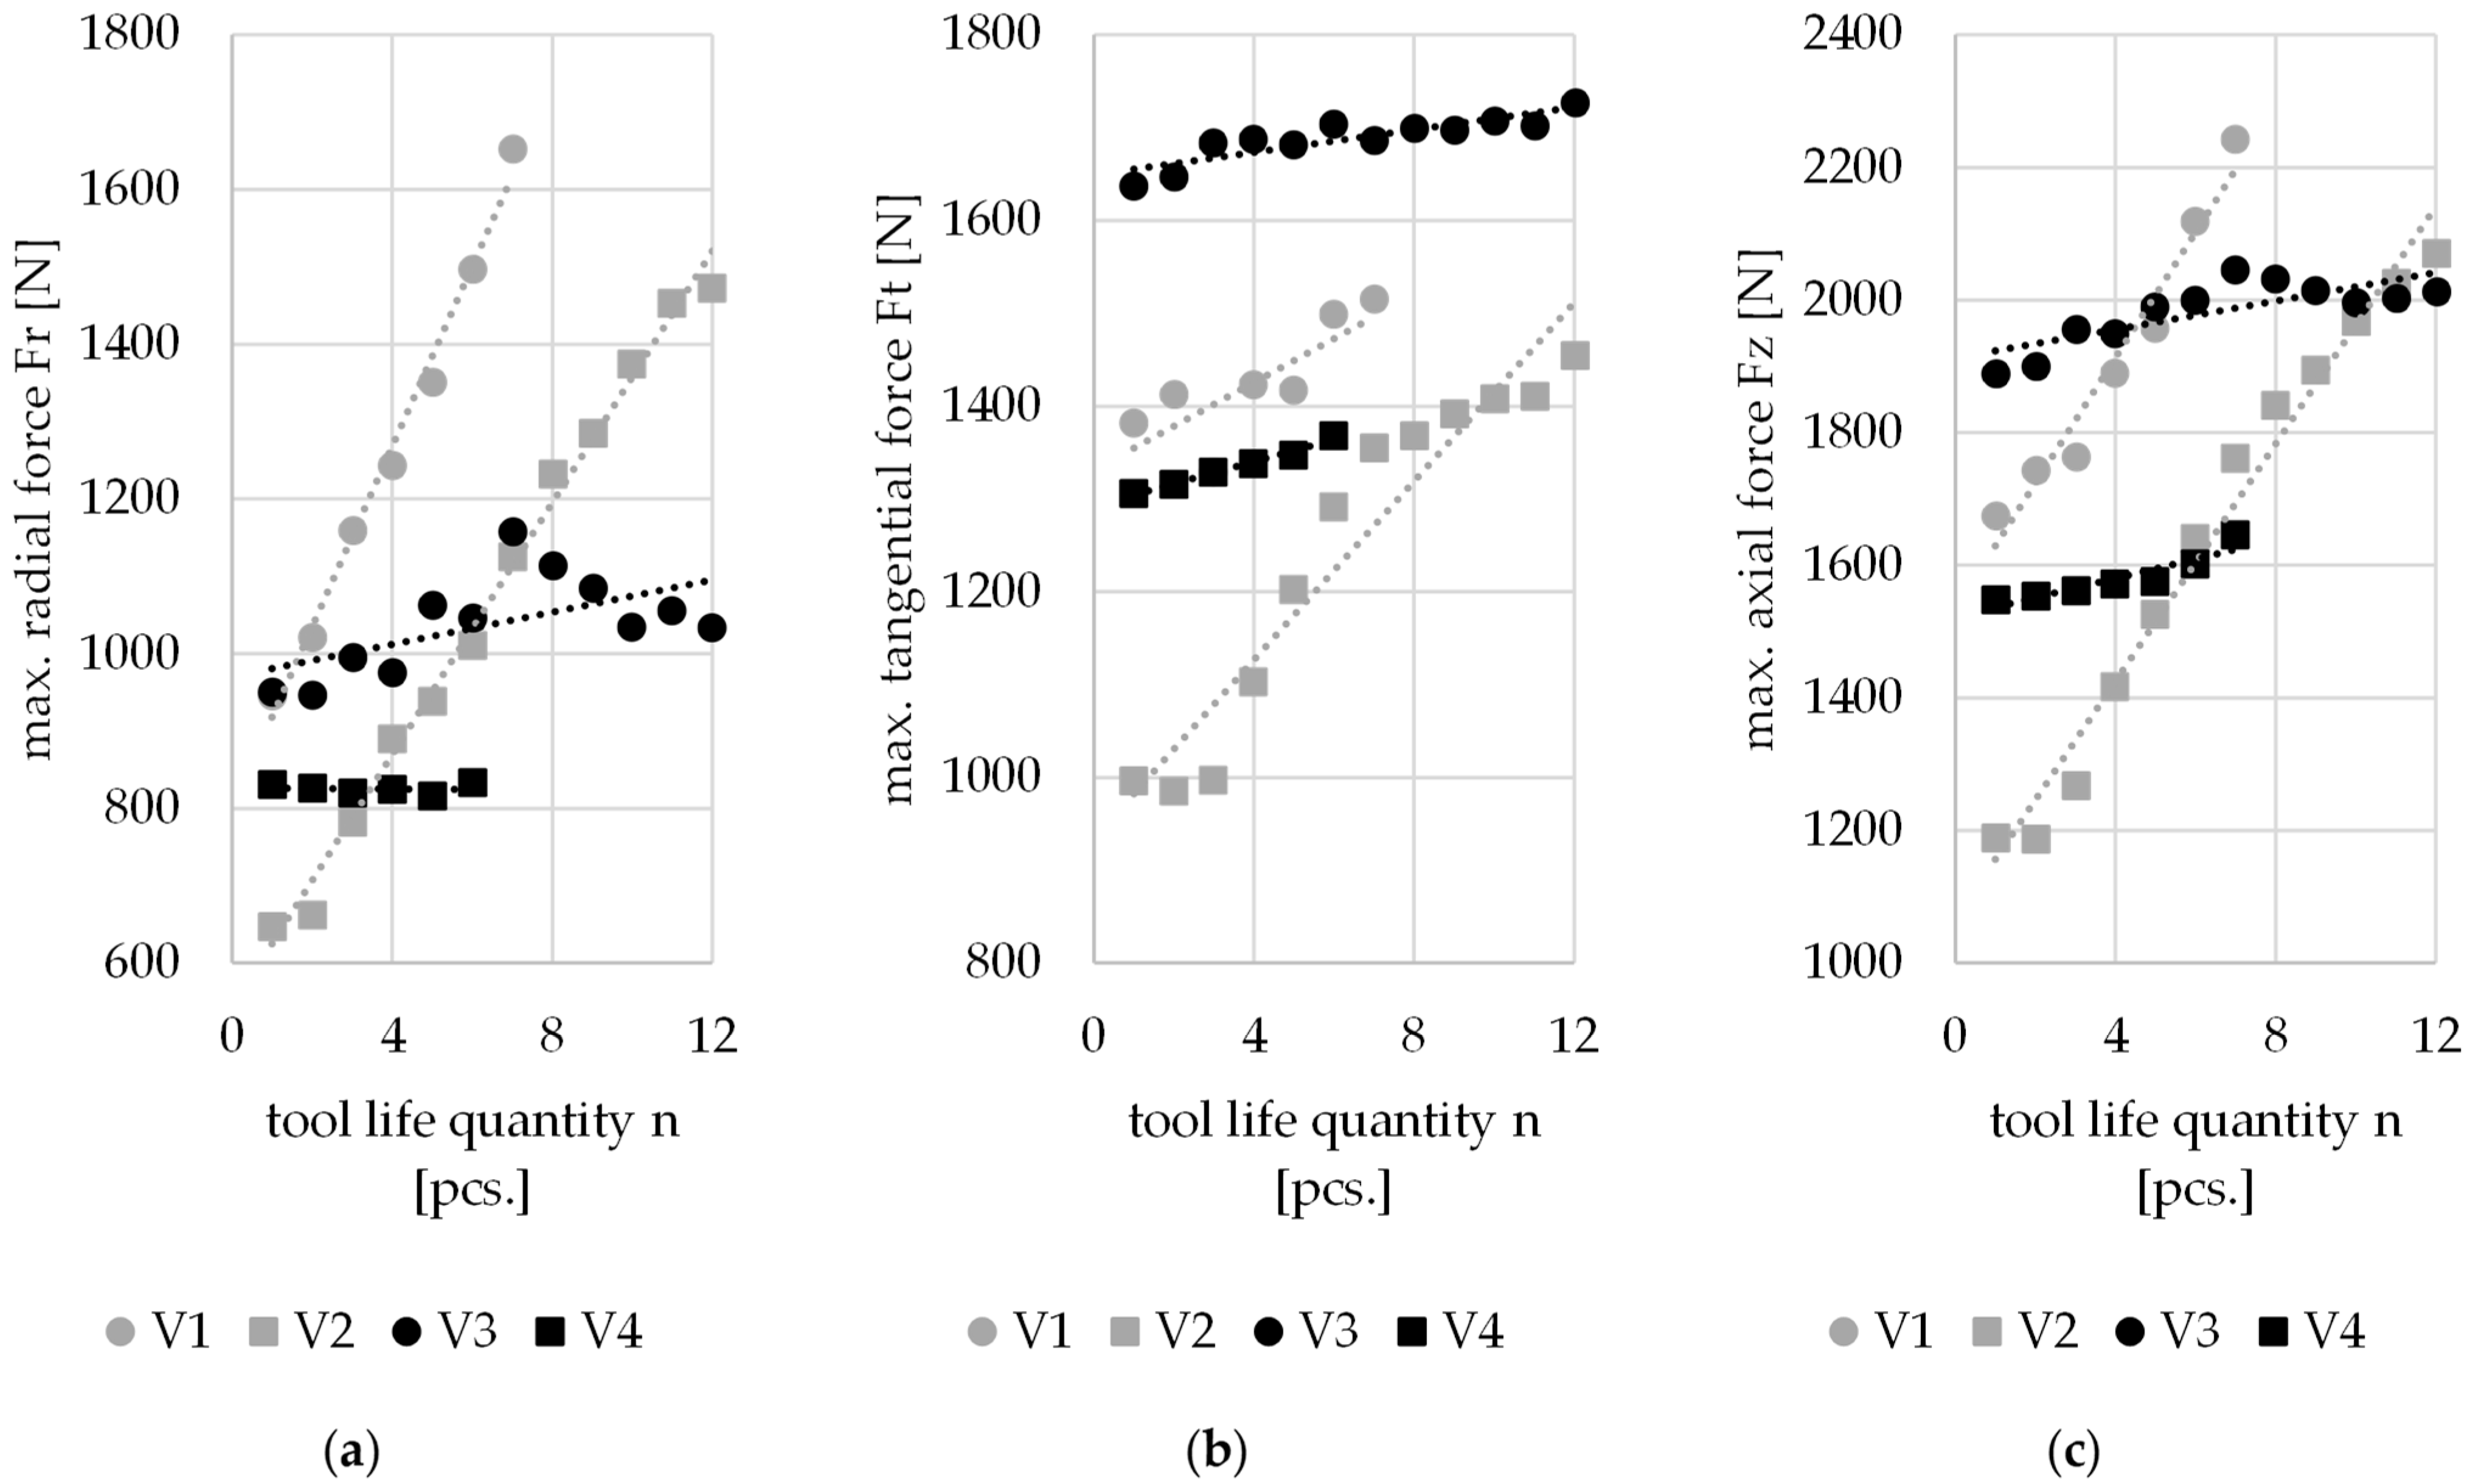
The maximum force component was used to quantify the results along the processing time. The results are shown alongside the tool life quantity, n, in
Figure 6.
It can be seen that the radial forces (
Figure 6a) remain almost unchanged with increasing tool life for tools with a helix angle λ = 40° (variant 4) and only increase sharply at break-out. For the tool with a helix angle λ = 30° (variant 3), on the other hand, an increase can be observed along the tool life. The radial forces F
r of the conventional tools are initially similar, and for variant 2 are even lower. At tool life quantity
n = 12, the radial force Fr of variant 3 is 40% lower than that of the conventional tool. However, these increase significantly with increasing tool life quantity. The tangential force (
Figure 6b) is lowest for variant 2, at a low level. It is noticeable that it rises sharply with an increasing stand quantity, while the tools with the polygon remain almost constant and only increase slightly linearly. The lower radial and tangential forces for the tool with a helix angle λ = 40° (variant 4) compared to a helix angle λ = 30° (variant 3) are due to the fact that the higher helix angle means that several cutting edges are engaged simultaneously and the forces are better distributed across the individual cutting edges. The cutting process for the tool with a helix angle λ = 40° is therefore quieter overall, which is confirmed not only by the reduced force components but also acoustically by measuring the noise emissions. The axial force shows that variant 2 is much lower in low tool life quantity, but increases more than the polygon tools as the tool life quantity increases (
Figure 6c).
4.2. Wear Analysis
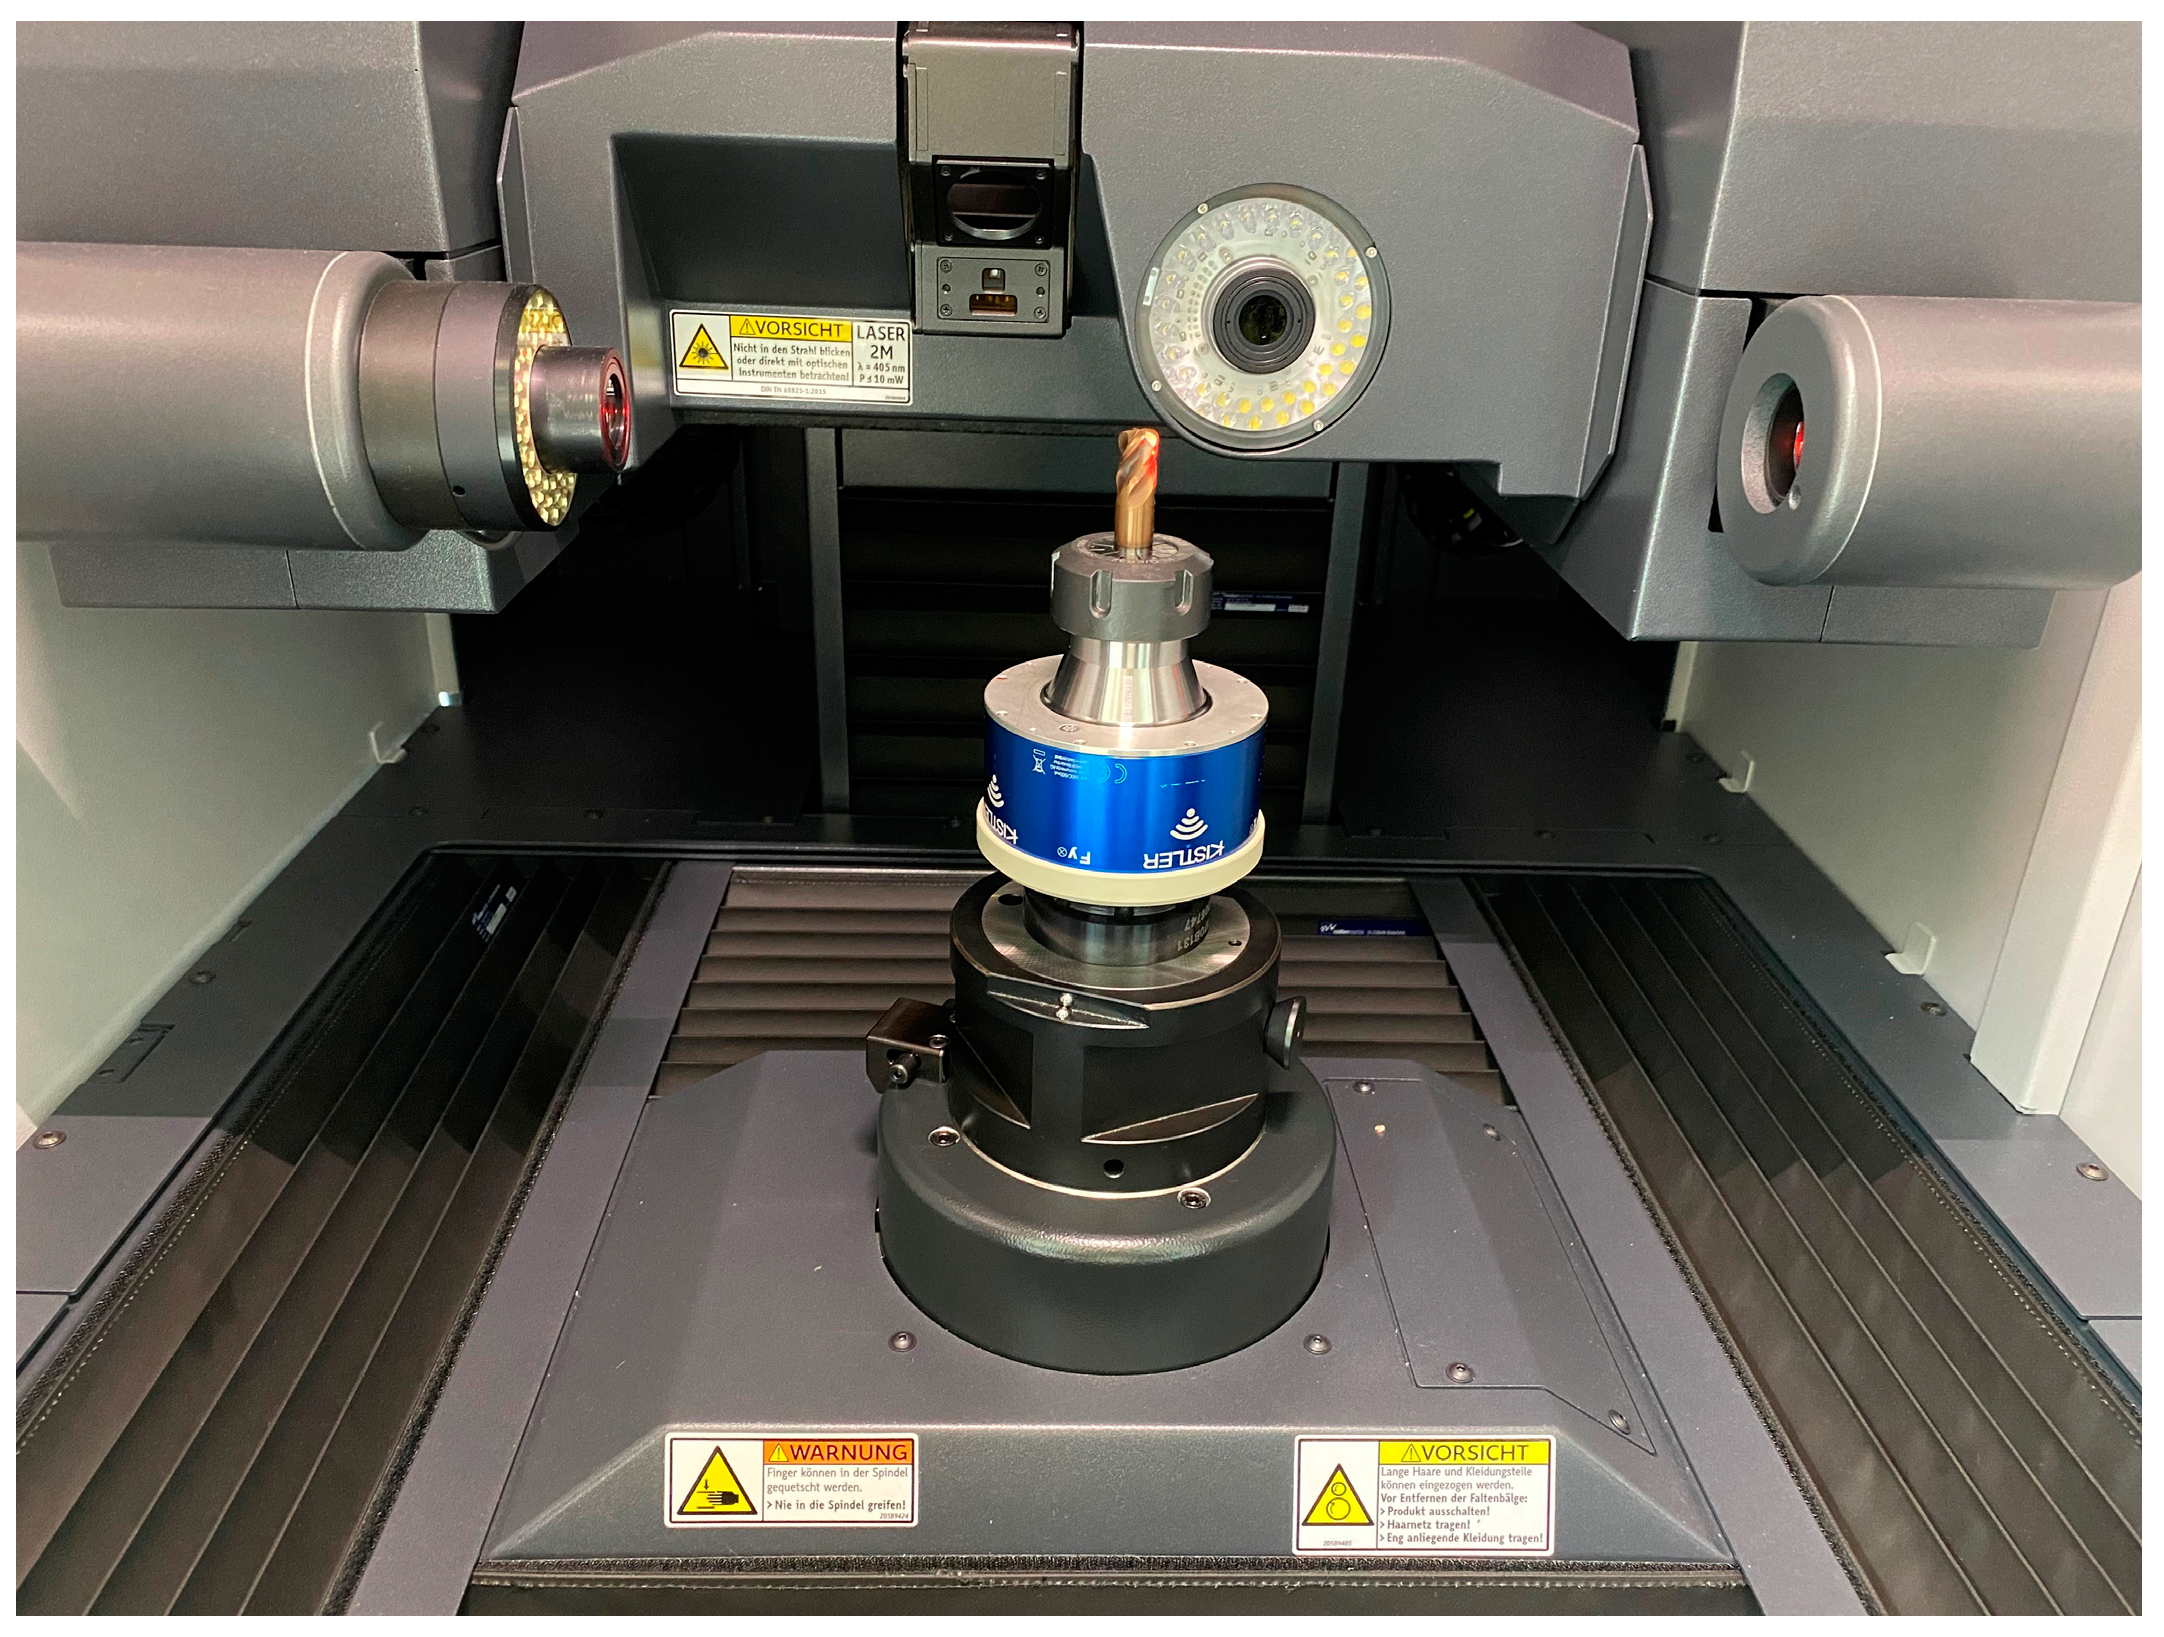
To evaluate tool wear along the tool life, the universal measuring machine “edgeControl” from the manufacturer Zoller was used. An integrated 3D sensor detects wear and defects along the cutting edge fully automatically. The integrated software can be used to measure the width of flank wear land VB for quantitative wear analysis. The universal measuring machine is shown in
Figure 7.
Measurements were taken after each reference workpiece produced at several positions along the cutting edge of the tool.
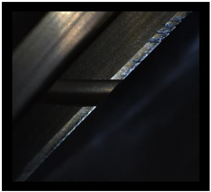
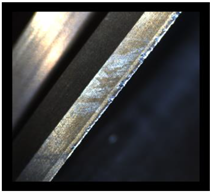
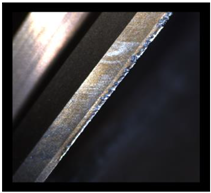
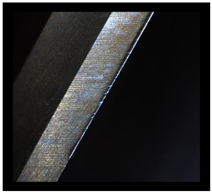
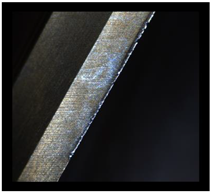
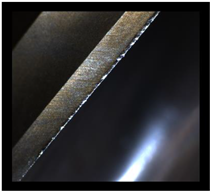
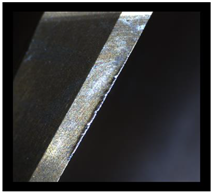
Table 7 compares the tool wear of the different variants. For the tools with polygon, the finishing and rough cutting edges are considered separately.
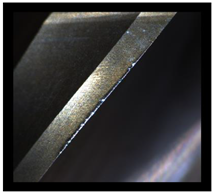
The result shows that the conventional tools show significantly greater signs of wear overall. In particular, flank wear can be observed. This occurs even after a short time in use. In addition to flank wear, crater wear and chipping along the cutting edge and layer spalling on the flank face can also be seen. Variant 4 shows more signs of wear than variant 3. The greater signs of wear after tool life n = 6 on the tool with helix angle λ = 40° are due to the cutting process having more scraping, which puts more stress on the cutting edge. A comparable wear condition only occurs on the tool with a helix angle λ = 30° after a longer time in use.
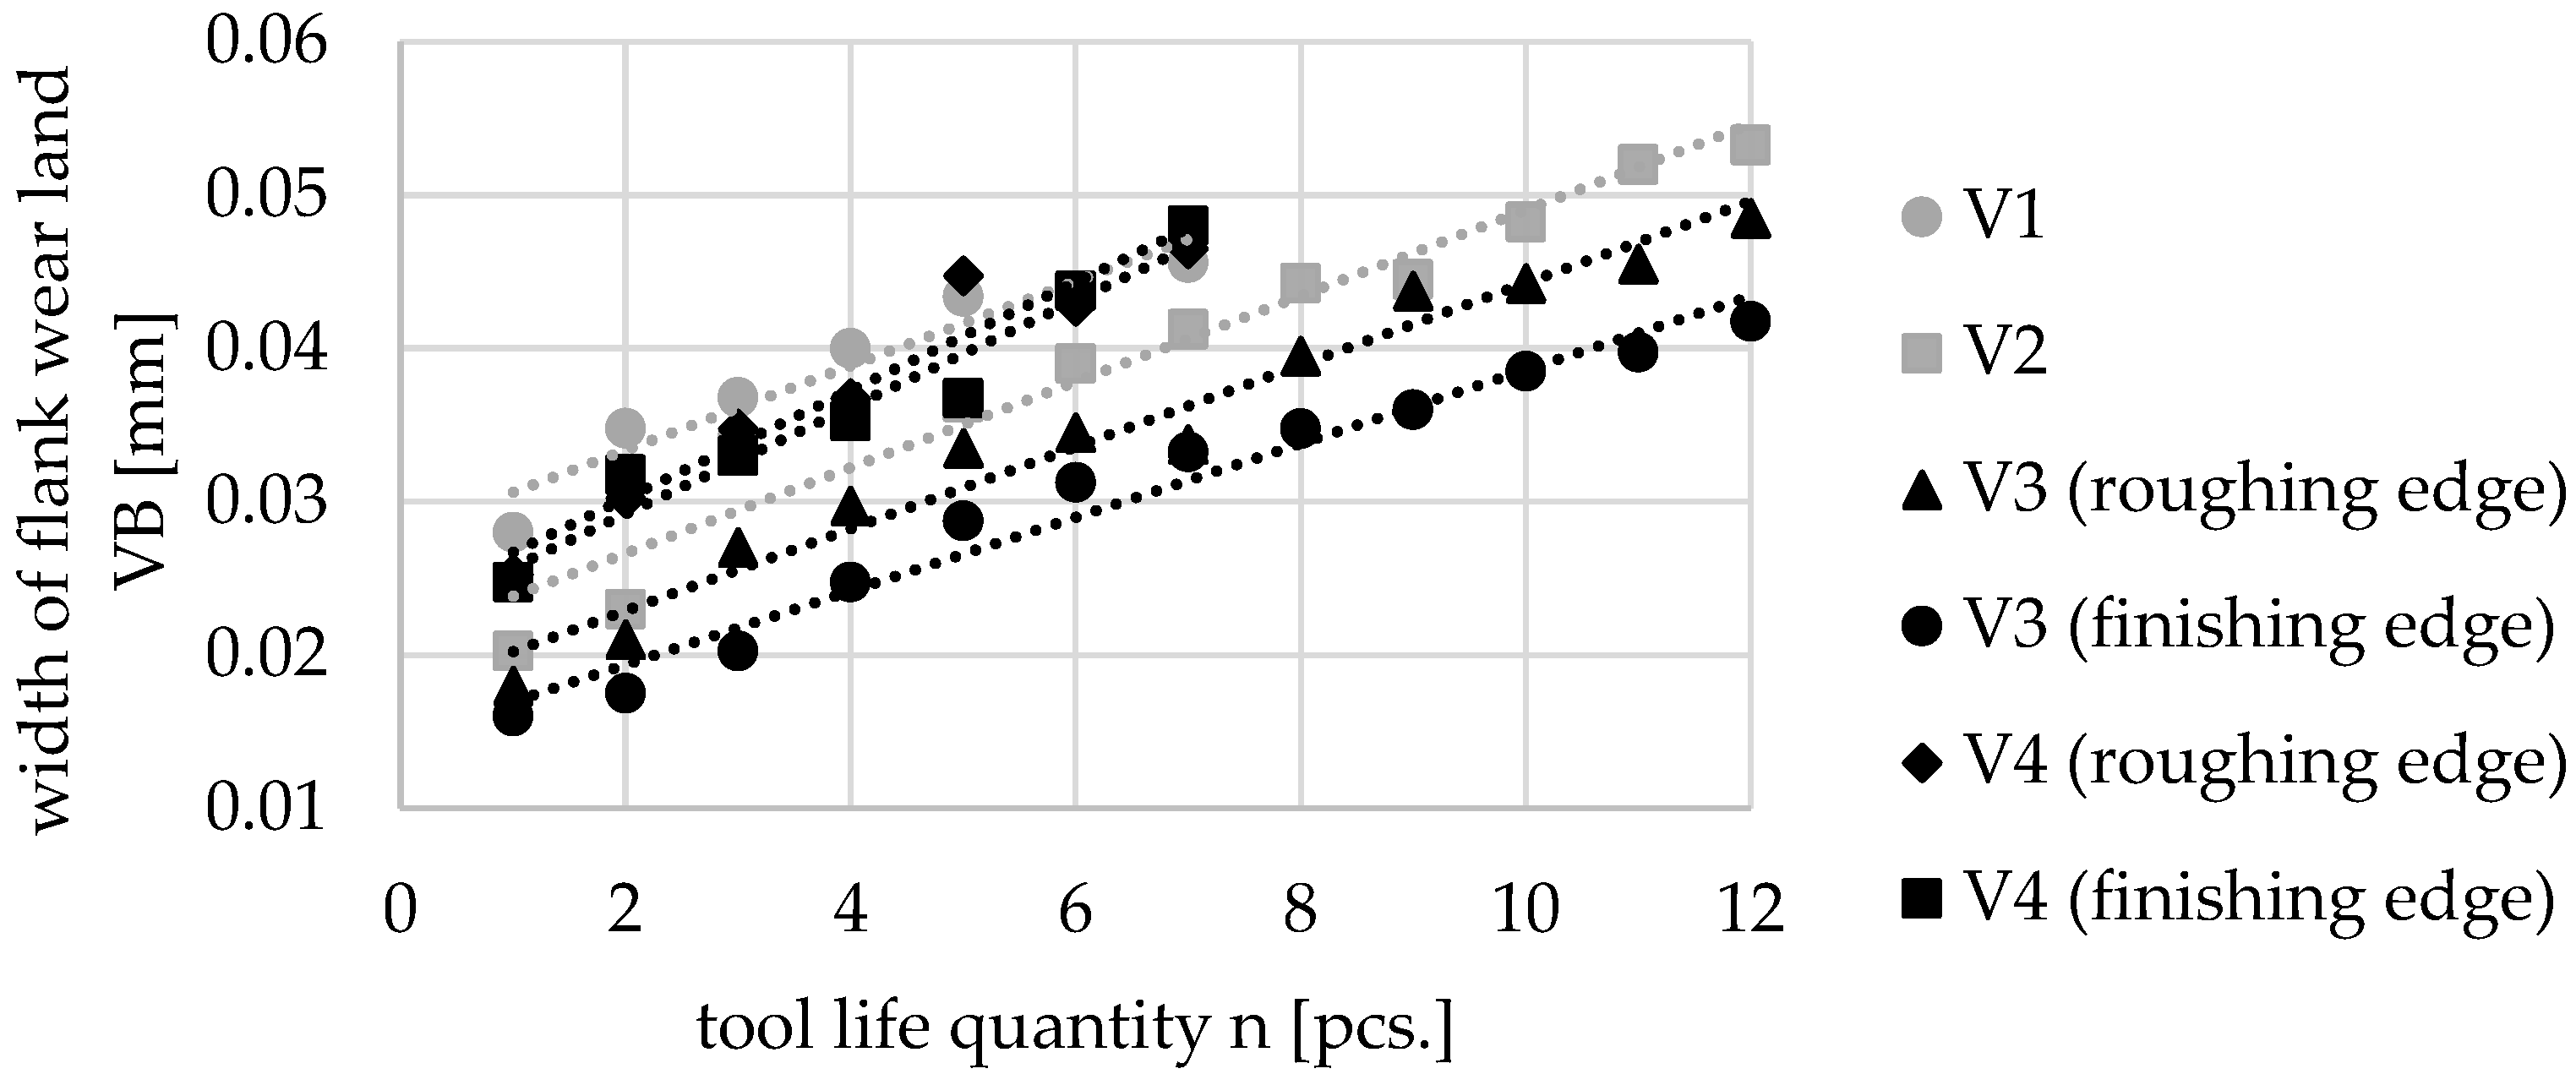
For the quantitative evaluation of tool wear, the width of flank wear land VB was measured along the tool life quantity. Its extension in the cutting direction is referred to as the width of flank wear land VB [
18]. The maximum wear mark width VB was determined for the variants with polygon for both rough and finish cutting edges. The results are shown in
Figure 8 below. These each represent an average value of the two opposing cutting edges for the variants with polygon and an average value from all four cutting edges for the conventional tools.
The results show that the width of flank wear land VB increase almost linearly with increasing tool life quantity. The lowest width of flank wear land VB can be seen with variant 3. The rough and finish cutting edges both have a smaller wear mark width along the tool life quantity than the conventional tool. The width of flank wear land VB is lower for the finishing cutting edge, as it is relieved by the polygons. Variants 1 and 4 have a higher width of flank wear land VB directly at low tool life quantities.
4.3. Component Quality
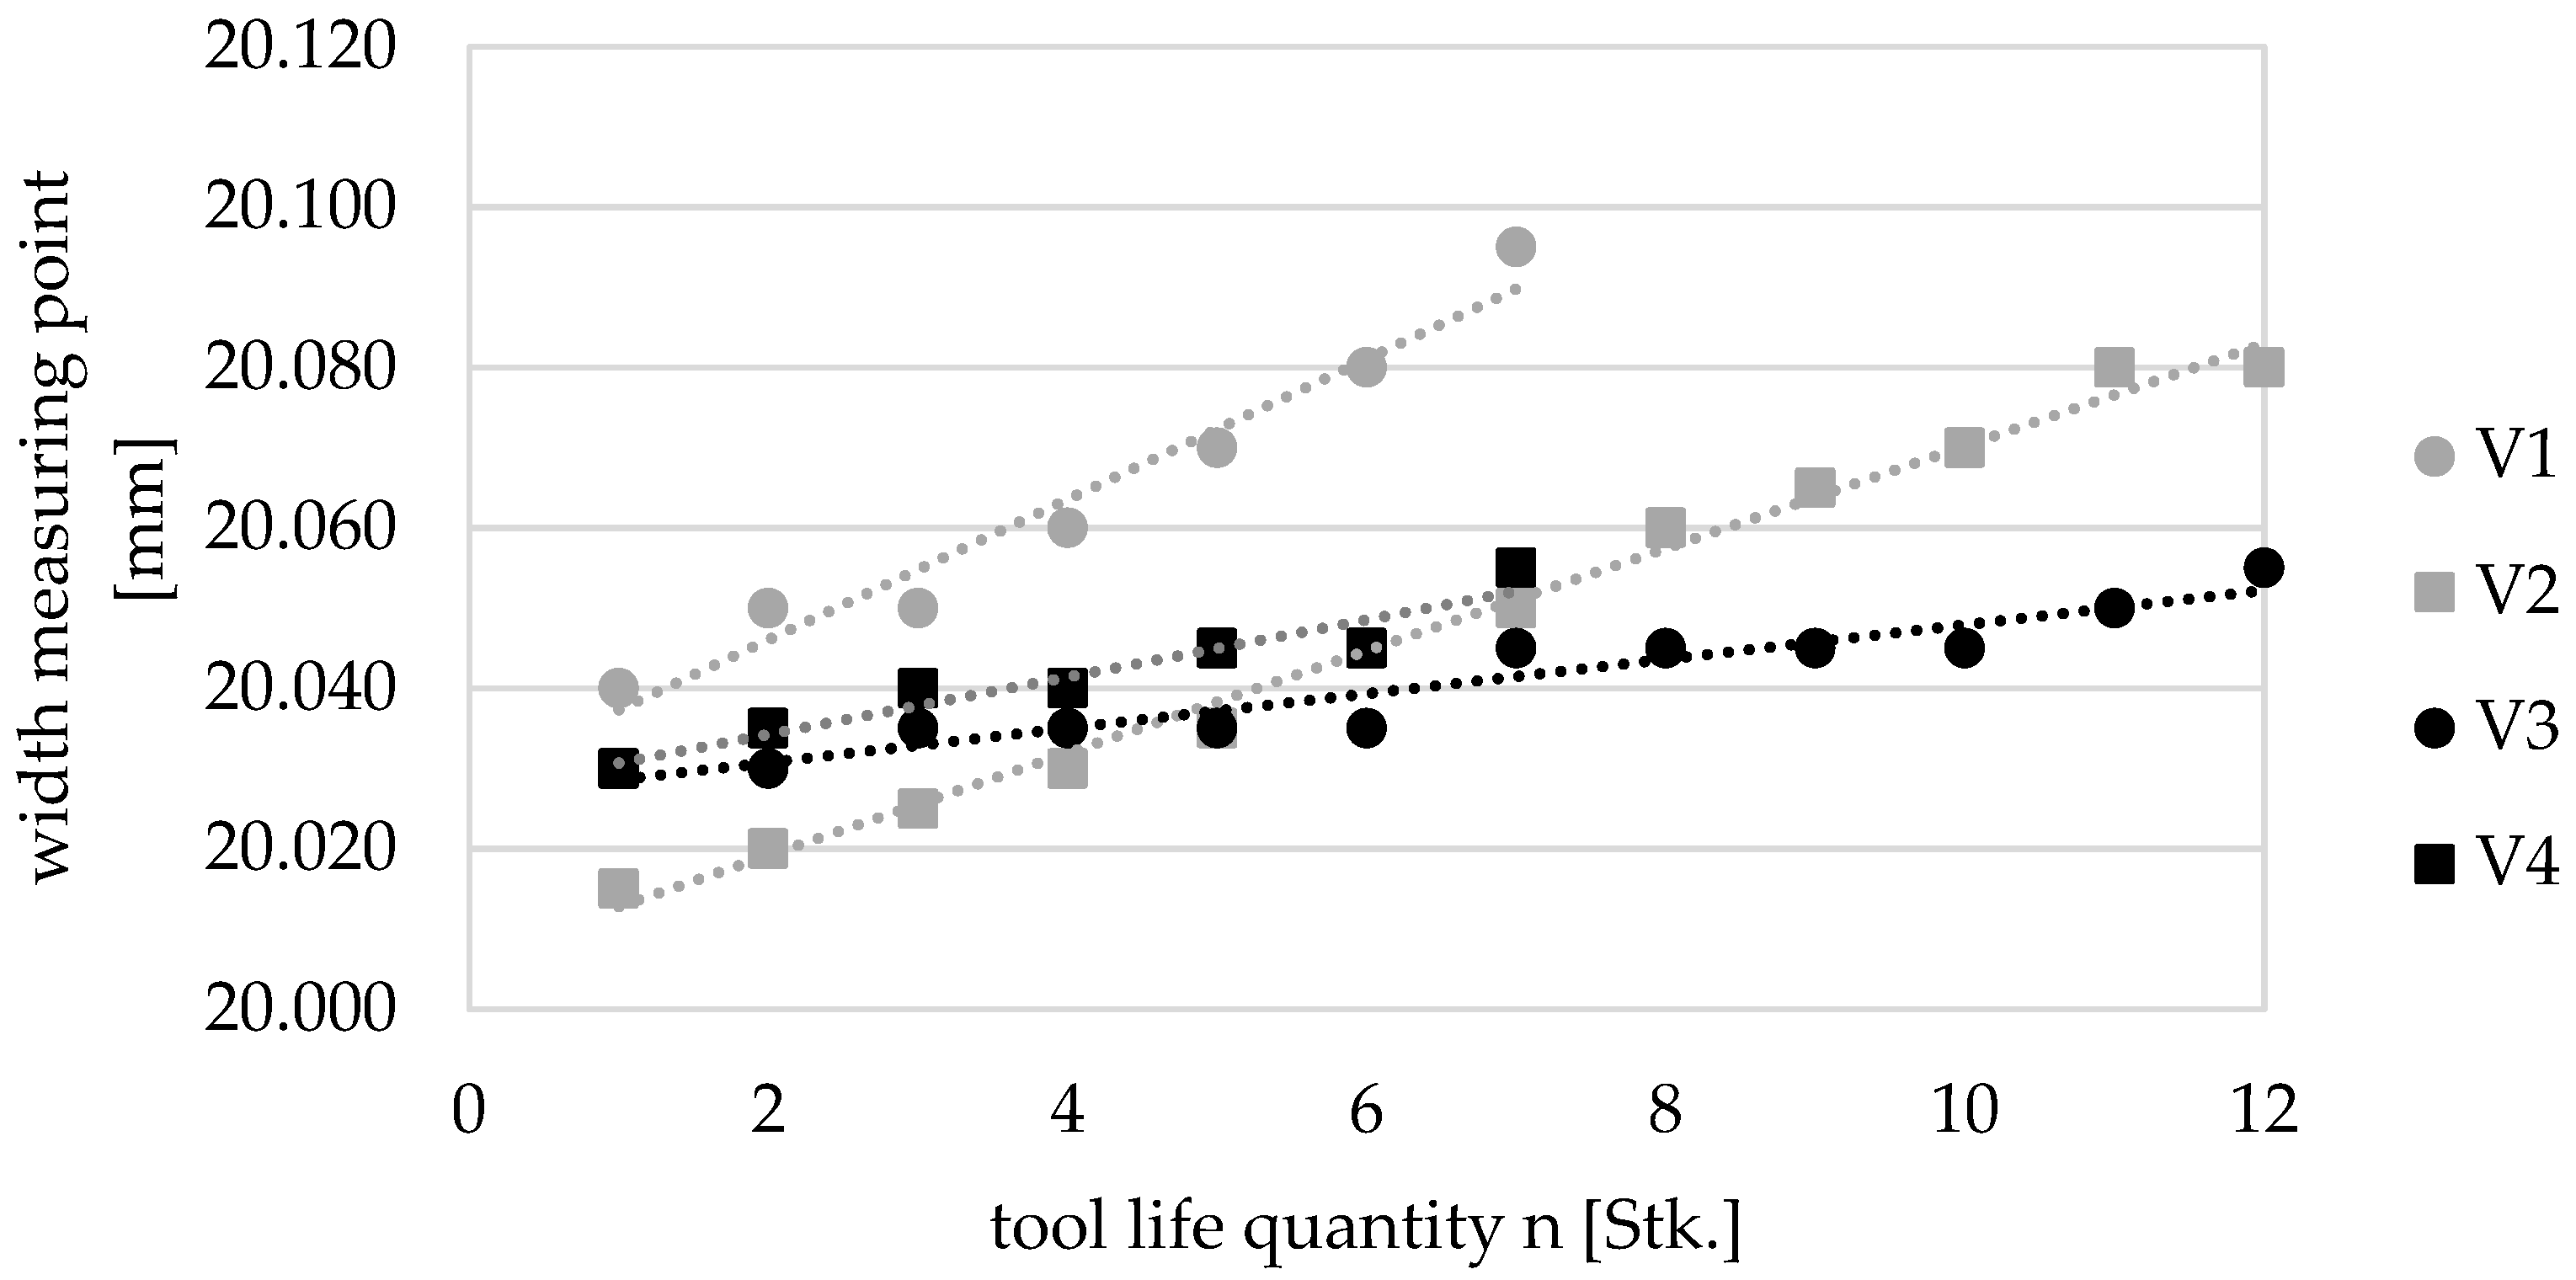
To evaluate the component quality, the dimensional accuracy of the reference workpiece was measured tactilely at the defined measuring points using a micrometer gauge. The results are shown in
Figure 9. These show that the web width increases much more in components manufactured with conventional tools. In variant 3, the web width is almost constant up to a tool life quantity
n = 6 and only increases by 0.005 mm. In variant 4, a slightly higher increase of 0.015 mm can be observed. At a tool life quantity
n = 7, the dimensional deviation of the tool with a helix angle λ = 40° increases due to the breakout. For tools with a helix angle λ = 30°, comparable deviations can only be observed from a tool life quantity
n = 12. The larger deviations reflect the higher radial forces and the greater tool wear with the conventional tools.
The surface roughness was also measured to quantitatively assess the component quality. In accordance with DIN EN ISO 21920-3 for profile measurement, characterization and specification of the surface quality of components, each measuring point was recorded with a tactile perthometer from the manufacturer Mahr [
22]. Setting class Sc3 was selected and the primary profile was recorded at a measuring distance L
e = 4 mm. To analyze the roughness, the arithmetic mean Ra and averaged roughness depth Rz were determined with the cut-off wavelength λ
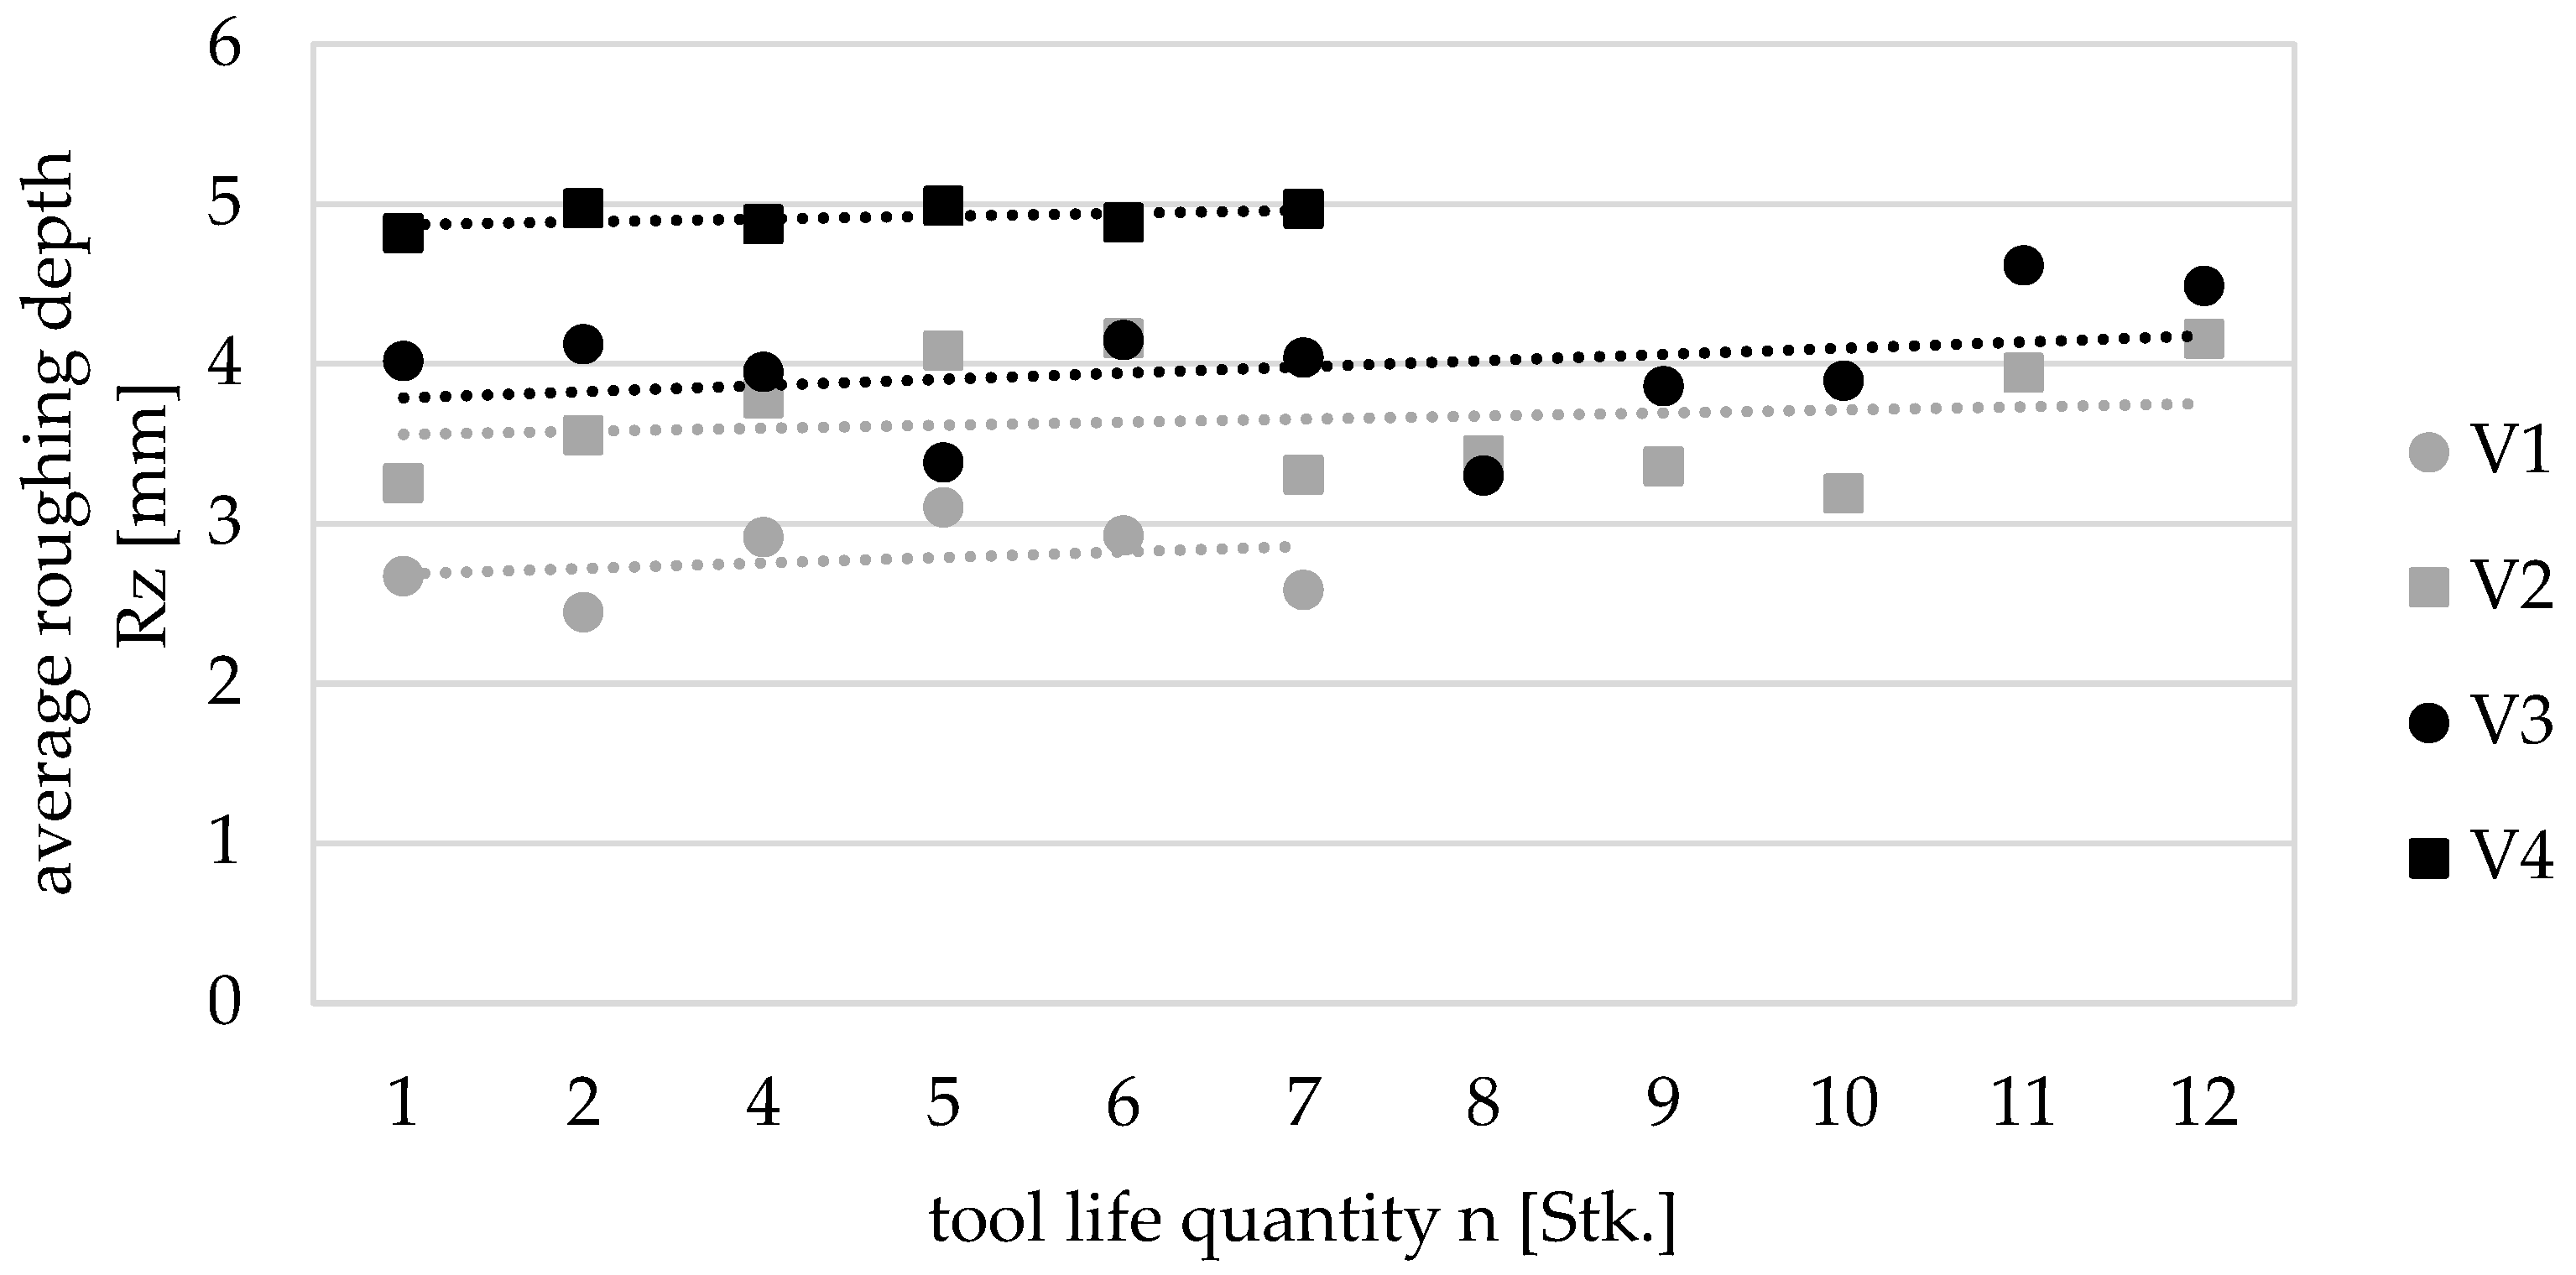
c = 0.8 mm. The results for the average roughness depth Rz are shown in
Figure 10.
The results show that the average roughness depth Rz remains almost constant along the tool life quantity and only increases slightly. It can be observed that the conventional tools produce a lower average roughness. The rough cutting edges therefore cause a higher roughness through the polygons.
4.4. Chip Formation
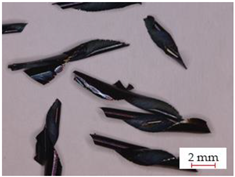
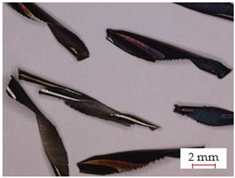
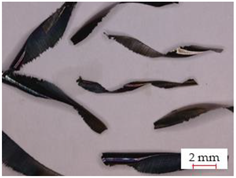
To evaluate the chips, samples were taken from the inside of the machine tool after each reference workpiece produced. For characterization, the samples were analyzed with the VR-5000 structured light microscope from Keyence (Singapore).
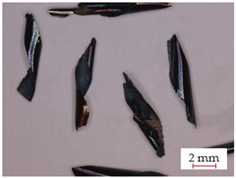
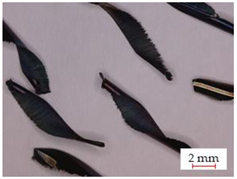
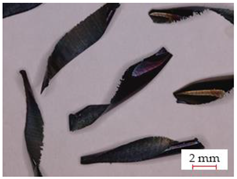
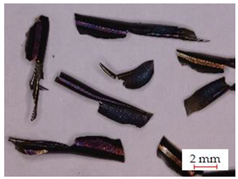
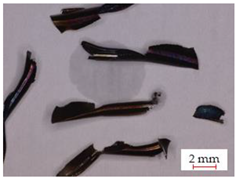
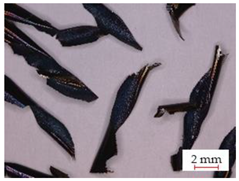
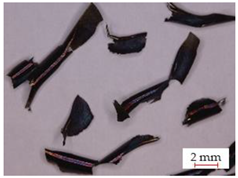
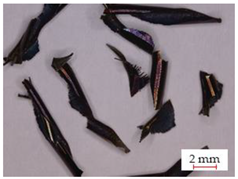
Table 8 shows the chips taken along the tool life quantity.
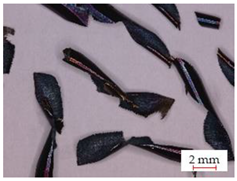
The tools with a polygon essentially produce short, helical chips. Based on the chip volume ration and the chip form classification, these can generally be rated as good. However, a detailed examination of the chips shows that the tools with a helix angle of λ = 40° fraying in the cutting area at tool life quantity n = 6. This is only visible at a tool life quantity of twelve for tools with a helix angle of λ = 30°. This indicates a direct influence of tool wear and chip form. It can also be seen that the chips on the tools with a helix angle of λ = 40° are clearly purple. This indicates that the temperature and therefore the thermal load on the tool are significantly higher during the machining process. These observations are due to the scraping chip removal. The chip form of the conventional tools are similar, but the chips are longer, especially in variant 2. This indicates poorer chip breaking. In addition, fraying can be seen even at low tool life quantities. Variant 2 shows better chip breaking due to the chip breakers.
5. Conclusions
This paper describes the development of an innovative tool concept for rough and finish milling for difficult-to-machine materials. The design of the tool is presented and the basic feasibility is confirmed by experimental investigations. For this purpose, conventional tools were compared with the innovative tool concept. The necessary degree of spiralization of the solid carbide end mill when machining the tool steel Toolox 44 was analyzed in the experimental investigations carried out. For this purpose, tools with polygons and a helix angles λ = 30° and 40° were compared with each other and their process behavior and component quality were evaluated using various effective and working variables. The results of the experimental investigations are summarized below:
The cutting forces were examined in the time range. It was found that these are lowest with the conventional tool without a chip splitter (without chip breaker, helix angle = 35°/38°) when the tool life quantity is short, but increase sharply with increasing tool life quantity. The tools with polygons remain almost constant. In variant 4 (polygons, helix angle λ = 40°) the process forces are significantly lower than in variant 3 (polygons, helix angle λ = 30°).
The analysis of the chips showed that the chip form is almost identical, but with the conventional tool without a chip breaker longer chips are created due to the poorer chip breaking. However, it can be observed that with the tool with a helix angle λ = 40°, the chips fray in the cutting area even at a low tool life quantity. This can only be observed much later with the tool with polygons and a helix angle λ = 30°. In addition, purple discoloration of the chips can be observed on the tool with polygons and a helix angle of λ = 40°. This indicates a higher temperature during the cutting process and therefore a higher thermal load.
The tool wear is significantly higher on the conventional tools. This is shown qualitatively in addition to the flank wear by the increased chipping along the cutting edge with increasing tool life quantity. Quantitatively, there is also a higher width of flank wear land VB on the conventional tools. Tool wear is higher for variant 4 (polygon, λ = 40°) than for variant 3 (polygon, λ = 40°), both on the rough and finish cutting edges.
The component quality was evaluated by the dimensional accuracy and surface roughness. It was shown that the tools with polygons show a significantly lower increase in dimensional deviation over the tool life quantity. This confirms the overall lower tool wear. With regard to the measured average roughness depth Rz, it can be seen that this is slightly better for the conventional tools due to the four finishing cutting edges.
The experimental investigations show that the process forces for conventional tools are lower with a short tool life quantity than for tools with polygons, but increase sharply with increasing tool life quantity. This is due to the greater tool wear of conventional tools and is particularly evident in the significantly lower dimensional accuracy. This confirms that the innovative tool concept achieves high-quality results over a longer tool life quantity and thus reduces tool costs. The experimental investigations also show that the process forces are overall higher for tools with polygons and a helix angle of λ = 30° compared to λ = 40°, but there is a positive effect on chip formation, wear and dimensional accuracy. Overall, it can therefore be concluded that variant 3 (polygon, helix angle λ = 30°) can contribute to an increase in performance due to the high achievable tool life and good dimensional accuracy.
The results presented in this work form the basis for further development steps of the innovative tool concept for roughing and finishing difficult-to-machine materials. In the next development step, the polygons on the tool circumference are developed. The aim is to determine the optimum position, number and size of the polygons. The macro and micro geometry is then developed. Among other things, the influence of clearance and rake angle, core diameter and cutting edge rounding on the process behavior and the work result will be investigated.
The development of the innovative tool concept makes it possible to carry out roughing operations economically in the hard state of the material in the future. This means that the process chain can be significantly shortened, making the innovative tool concept attractive for industrial applications.
