BASIC CONCEPTS
Mastication is defined as the act of chewing foods. It represents the initial stage of digestion. It is usually an enjoyable activity that uses the senses of taste, touch, and smell. When the stomach is full, feedback inhibits these positive feelings and we feel full (
Okeson, 1998). The pleasure we get from food slowly decreases during the meal. This phenomenon is called the satiety cascade, and it influences how much you eat (
Zelman, 2008).
For a therapist to comprehend the whole eating process they need to understand the ‘The Chewing Stroke’. Mastication consists of rhythmic, well-controlled opening and closing of the maxillary and mandibular teeth. This activity is under the control of the Central Pattern Generator (CPG) located in the brain stem (
Okeson, 1998). Each opening and closing movement of the mandible represents a chewing stroke. The complete chewing stroke has a movement described as tear-drop shaped. It can be divided into an opening phase and a closing phase. The closing movement has been further subdivided into the crushing phase and the grinding phase (
Okeson, 1998).
During mastication similar chewing strokes are repeated over and over as food is broken down. When the mandible is traced in the frontal plane during a single chewing stroke, the following sequence occurs. The mandible drops forward from the inter-cuspal position to where the incisal edges of the teeth are separated about 16 to18 mm. The mandible then moves laterally approximately 5 to 6 mm from the midline as the mandible begins to close. The first phase of closure traps the food between the teeth and is called the crushing phase. As the teeth approach each other, the lateral displacement is lessened so that when the teeth are approximately 3 mm apart the jaw occupies a position only 3 to 4 mm lateral to the starting position of the chewing stroke. At this point the teeth are positioned so that the buccal cusps of the mandibular teeth are almost directly under the buccal cusps of the maxillary teeth on the side to which the mandible has been shifted. As the mandible continues to close, the bolus of food is trapped between the teeth. This starts the grinding phase of the closure stroke. During the grinding phase the mandible is guided by the occlusal surfaces of the teeth back to the inter cuspal position. This causes the cuspal inclines of the teeth to pass across each other, permitting shearing and grinding of food. When food is initially introduced into the mouth the amount of lateral movement is great and then becomes less as the food is broken down. The amount of lateral movement also varies according to the size of the bite and the consistency of the food. The harder the food, the more lateral the closure stroke becomes. This action is frequently referred to as the ‘Bennet Shift’ (Okeson, 1984). The hardness of the food also helps determine the required number of chewing strokes (
Miyawaki, Ohkochi, Kawakami, & Sugimura, 2000). It is a complex function that uses not only the muscles, teeth, and periodontal supportive structures, but also the lips, cheeks, tongue, palate, and salivary glands. It is a functional activity that is generally automatic and practically involuntary, yet when desired, it can be readily brought under voluntary control (
Okeson, 1998).
The Bennett Shift should be used while chewing, it is “a slight horizontal slide of the condyle from centric occlusion to the working side” (
Snow, 2003, p. 63). The Bennett Shift should be used with two exceptions: (1) If the patient has a denture; (2) If the patient has TMJ problems.
When teeth are not present, as in an infant, or when the person is edentulous, the mandible is braced by placing the tongue forward and between the dental arches or gum pads resulting in an infantile swallow or also known as a visceral swallow. When teeth are present, the posterior teeth move into occlusion, the mandible becomes braced by the occluding teeth and an adult or mature swallow is usually assumed. Occlusion that interferes with correct mastication may cause: gastric distress, indigestion, bloated stomach, excessive burping, and excessive flatus.
The lips are closed while swallowing, which seals the oral cavity. There is no lip movement. Teeth are brought up into their maximum inter cuspal position stabilizing the mandible. The mandible must be fixed so contraction of the suprahyoid and the infrahyoid muscles can control proper movement of the hyoid bone (
Okeson, 1998).
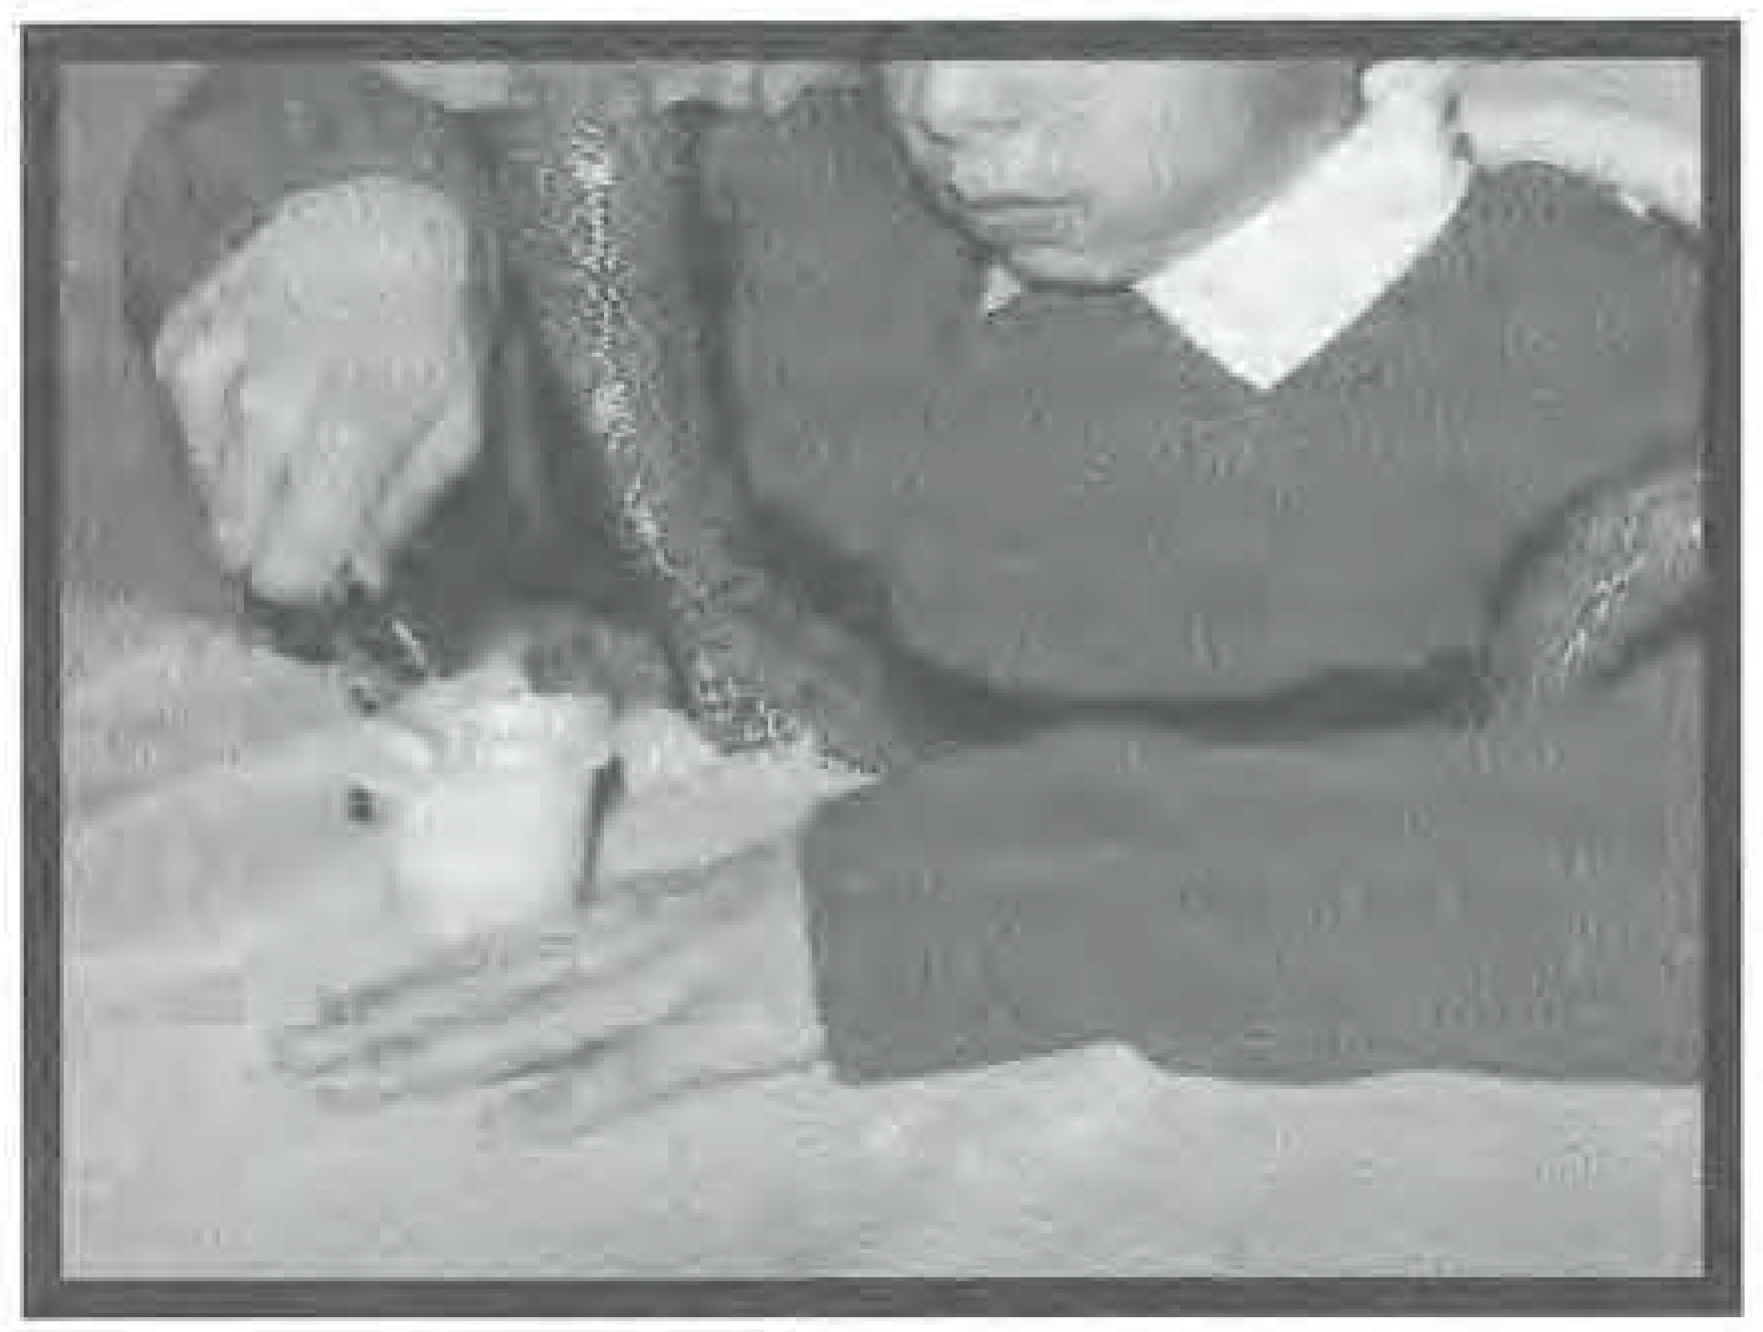
Look at the right hand in the picture titled immature grasp (
Figure 1). This picture demonstrates the spoon gripped improperly. Holding a utensil this way is frequently referred to as an immature grasp. Much of the literature regarding soft neurological signs indicate that there is frequently more than one sign or symptom that sensory motor integration may be compromised, We often see a person with a tongue thrust holding silverware or a pencil with an immature grasp, In conversation with Eileen Richter, MPH, OTR, FAOTA in 1990, she suggested that “there is a strong association between sensory integration and sensory motor problems.” In my own experience, patients with an orofacial muscle dysfunction (tongue thrust) often exhibit an immature grasp. Over the years I’ve discussed this topic with both speech therapists and physical therapists. When asked the question, “Do you feel there is any relationship between a tongue thrust and an immature grasp?” The majority of these therapists responded ‘Yes’. They support the idea that a large number of patients with a tongue thrust also exhibit an immature grasp.
While discussing these seemingly related problems, with a physical therapist on staff at a local hospital, she explained that if a young child’s shoulder area, upper arms, and trunk of the body are not as strong as they should be, it forces the child to use large motor movements, rather than fine motor movements. Even though the child eventually develops fine motor control, the immature swallow and an immature grasp may have become a habit.
Between 23 to 36 months, a child should be exhibiting the palm of the hand in an upward position when bringing a spoon or fork to their mouth, the parent may stab food for the child with a fork (
Bahr, 2010). If there are no physiological conditions restricting the patient, treatment by a Certified Orofacial Myologist, may be able to establish correct function. After a couple of sessions, if the patient is not able to habitually hold the utensil in a correct manner, you may want to discuss, the problem with: the referring source, the patient, and if the patient is a child with the child's parents. Any medical problems should be diagnosed by a physician. The physician may suggest physical therapy for possible muscular development of the upper body.
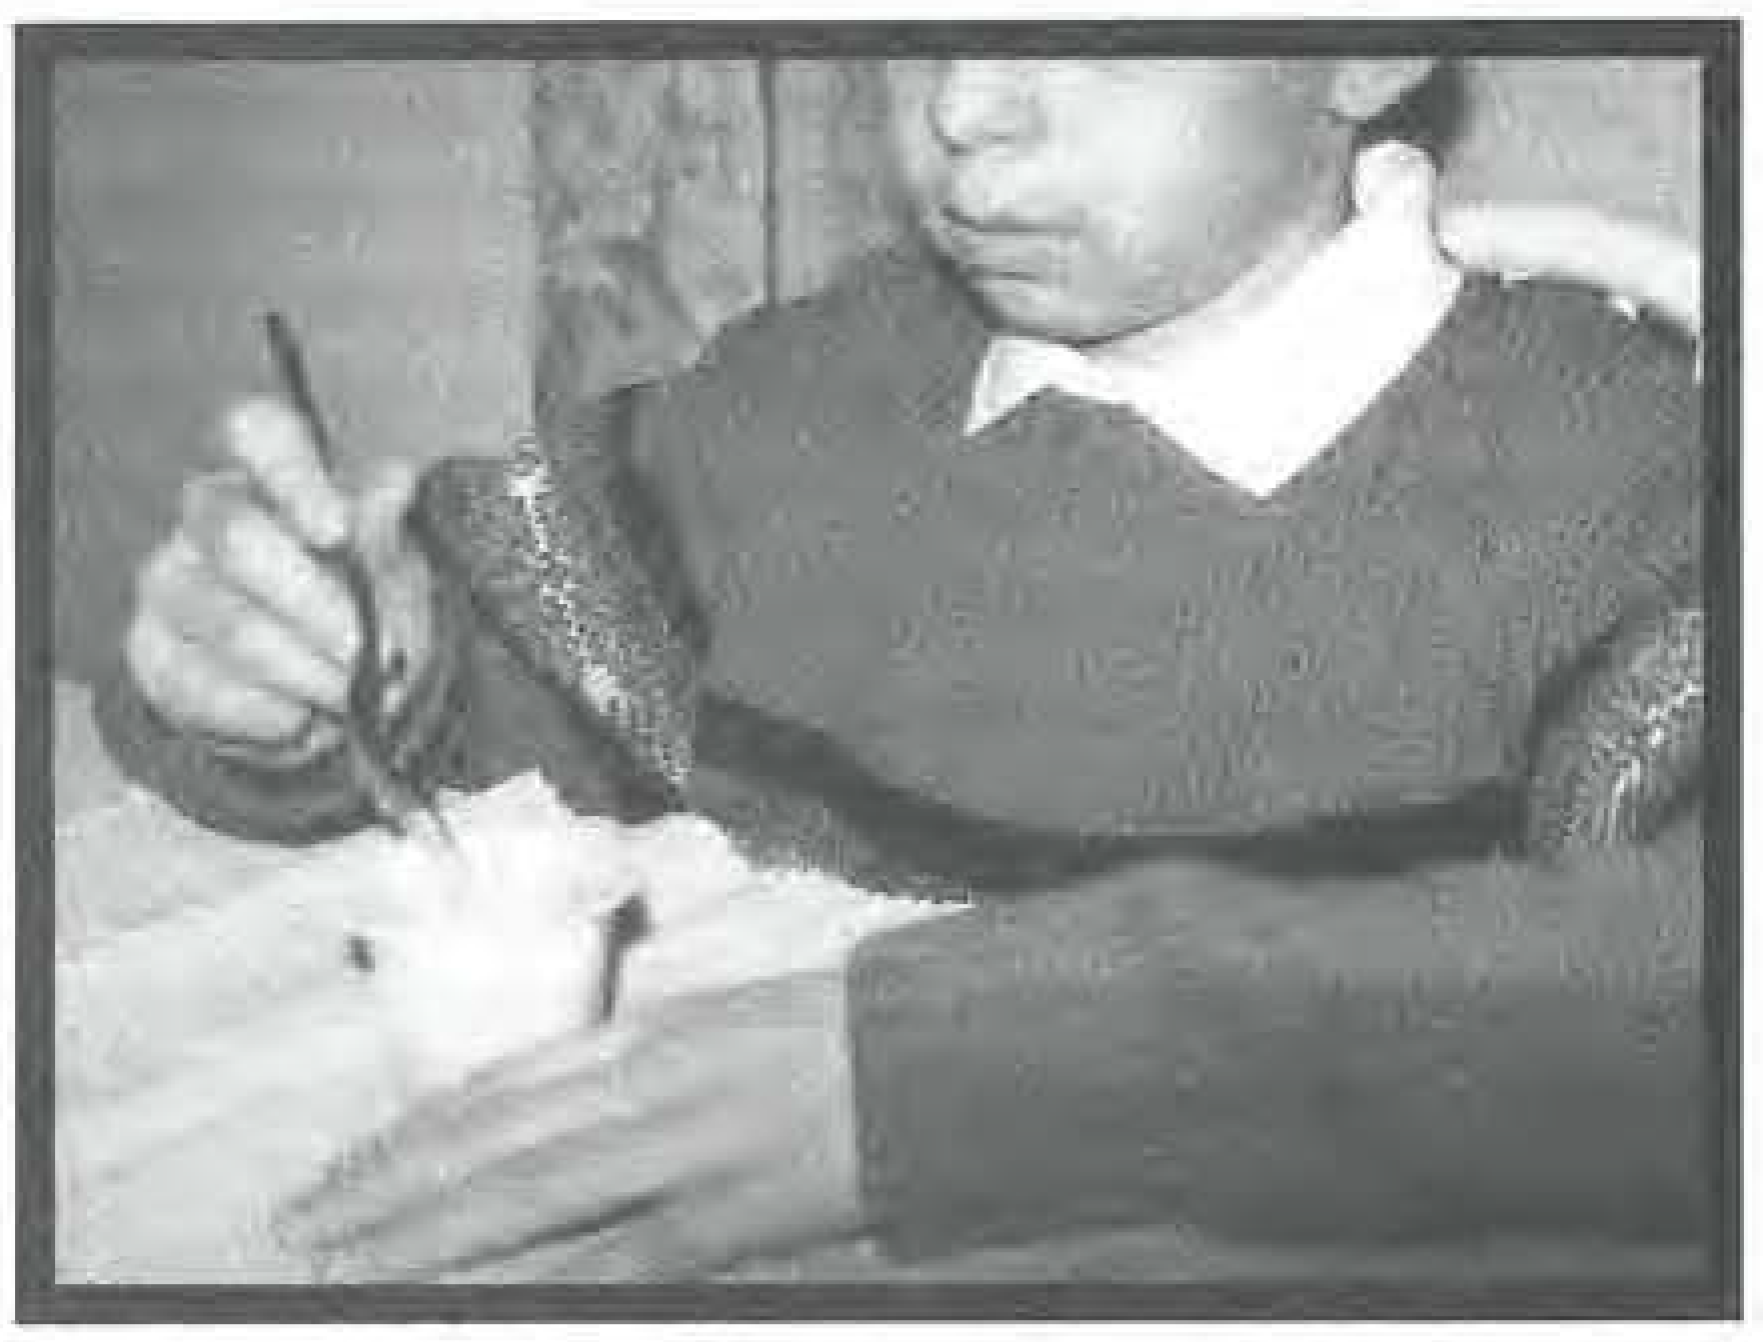
Just to dot all the l’s and cross all the t’s
Figure 2 demonstrates the correct grasp.
How many times should we chew our food? Much of the literature states a person should chew anywhere from 20 to 30 times per bite. For most of the food we eat this may be true. However, a better answer to the question may be: the amount of chewing required to properly prepare a piece of food for swallowing depends on the size and texture of the food (
Kraus et al., 1970).
When we first place food into our mouth, the taste and smell of the food stimulate the salivary glands. Chewing increases the surface area of the food, and as the chewing continues the enzymes in the saliva begin to break down the carbohydrates in the food. The desire to continue chewing decreases when the food is ready to be swallowed.
Eating fork food properly, involves the correct grasp of the fork. In American style—the fork is held between the thumb and index finger with the tines pointing up. The handle of the fork rests on the knuckle of the middle finger. The fork can then be used to either lift the food or scoop it onto the fork.
To cut with a knife, hold the fork in your left hand with the tines pointing downward piercing the food you wish to cut. The knife is held in your right hand when cutting a piece of food.
Use the index finger on your left hand to put pressure on the neck of the fork, and place the index finger on your right hand on top of the blade of the knife. In the United States after cutting the food and before eating, the knife is usually placed on the upper rim of the plate with the cutting edge facing inward. After cutting, the fork is transferred to the hand that had been holding the knife.
In Continental style—Europeans generally hold their fork in the left hand with the tines pointing downward to spear the food. The fork usually stays in the left hand while eating. The knife usually stays in the hand that did the cutting and is frequently used to help push the food onto the fork. For either style of eating the important action to achieve, is the correct wrist movement. The wrist has the flexibility needed to properly insert the food into the mouth.
Since it is easier to eat with your hands and more difficult to master the use of a knife, fork, or spoon, my reasoning for starting food swallows first with utensils is because it gives the patient longer to develop and practice the necessary feeding skills while still in therapy. The mechanics of a food swallow, once the food is in the mouth, is similar whether the food is inserted with a fork, spoon, or fingers. The muscles of the lips and face should not contract during swallowing (
Pierce & Warvo, 1976, p. 27).
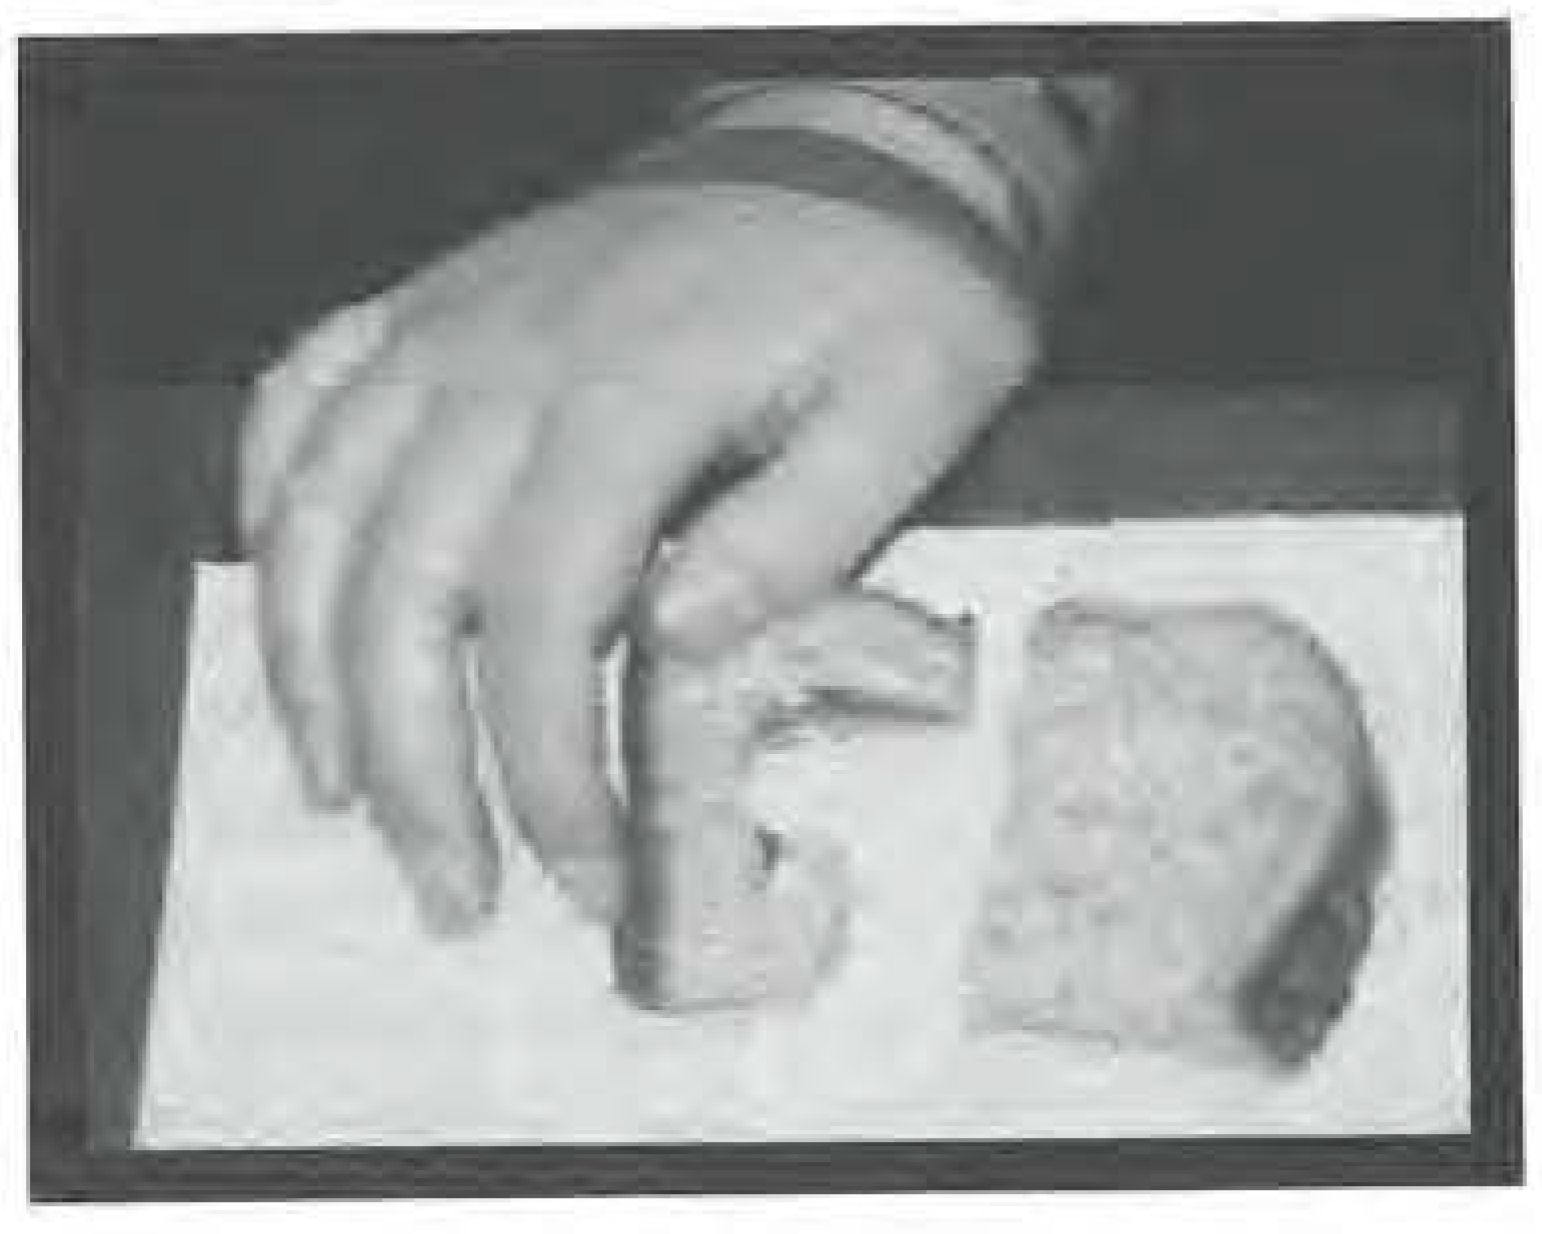
The first time I had a teenage boy bring a sandwich to the office to start the finger portion of the food program, he brought in a large fast food burger. Before I could say “Wait”, he had devoured the whole thing in three bites! As I continued to refine my food program, it was evident he wasn’t the only patient who didn’t transfer the size of a bite eaten from a fork (fork food) to what I refer to as finger food. He wasn’t the only child or adult to take huge bites. This isn’t surprising, because most tongue thrusters don’t bring their back teeth together during their food swallows. If the jaws are apart, it allows a person to swallow a larger bite of food than when the teeth are together (
Miyawaki et al., 2000). To help patients that didn’t seem to have a clue about the correct size of bite, I developed the ‘The Rule of the Thumb’. The Rule of the Thumb states: A bite should be no larger than the size of your thumb from the knuckle to the tip (
Figure 3 and
Figure 4).
DEVELOPING A MATURE FOOD AND LIQUID SWALLOW
Before starting any food and liquid program, it is important to review the patient's medical history. If the patient has been diagnosed with any medical problem such as dysphasia, this program may need modification or this program may not be appropriate for them. If it has been determined the patient is medically acceptable for the eating phase of therapy, we start the food portion of my therapy program.
Food on utensil
Look in a mirror
Tongue in “ah” position
Insert food into mouth
Close lips
Create suction and remove the utensil
With the side of the tongue move food to chosen molar area
Chew with tongue tip (first ¼ of the tongue) on the spot
Gather (suck) with tongue tip on the spot. If the individual has difficulty with this step place an orthodontic elastic on the tongue tip, position the elastic on the tongue tip (on Spot) suck and finish the swallow. Delete this step once the patient habituates tongue tip on the spot during swallow.
Smile
Bite molars together
Swallow
The tongue plays a significant role in chewing and swallowing foods, through its contact with the hard palate during the swallow. According to
Hori, Ono & Nokubi (
2006) tongue pressure against the palate can be found during the occusal phase of the swallow. This action is important in shaping the palate and also propelling the food or liquid onto its next phase.
Mahoney supported Hori, Ono, & Nokubi’s conclusion during his 2011 presentation at the IAOM Convention in Cincinnati. He felt that a correct swallow with firm pressure from the tongue against the hard palate would encourage correct development of the hard palate.
Steps 7 and 8 above are omitted. Pudding or Custard Style Yogurt Pudding or yogurt may be purchased in individual sized cups, or made or purchased in a larger amount and served in 6–8 ounce portions. The consistency should be smooth, with no chunks or pieces. Any flavor except chocolate may be used, because chocolate is difficult to see on the tongue.
Assign for homework that the individual practice eating a 6–8 ounce serving of ‘spoon food’ (pudding or yogurt). This homework exercise should be repeated two to three times a day. When Phase One is mastered, move on to Phase Two.
Use all 12 steps. Initially at conclusion of Step 9 place a small orthodontic elastic on the tip of the tongue, raise tongue tip to the spot, bite and finish the swallow. After the swallow is completed check the position of the elastic. If it stayed on the tip of the tongue without moving, it is a good indication the swallow was correct. Use easy foods to introduce chewing, gathering and swallowing. Easy foods to chew and swallow include: a medium size banana sliced into approximately 1/8 inch thick slices; cooked or canned carrots; firm gelatin. A recipe for firm gelatin is provided in
Appendix A. This exercise should be practiced three times a day as a homework assignment.
After the patient has mastered a good swallow for a couple of weeks, solid foods are introduced to the therapy program. A plate of food with meat, vegetable, potato and dessert is brought to the therapy session. The meal is eaten in the office and critiqued by the therapist. Use all 12 steps, A dessert may be included. Meals should be self-monitored (See
Appendix B). Correct swallows should become habitual. After a couple of weeks the smile step should be eliminated. It should take approximately 20 min to eat most meals. It takes approximately twenty minutes for the appestat to register that you are full.
Move to phase four when your patient is frequently exhibiting correct swallows in Phase Three. Phase Four includes foods such as: hamburgers, French fries, sandwiches, pizza, cookies, vegetable sticks, cookies, donuts, animal cookies, and pills. For finger food, take a bite using the Rule of Thumb. Put the food down and don’t pick it up until you have completed the swallow. Chew with lips closed, gather with tongue on the spot and swallow correctly.
Pill swallowing can be tricky. Unlike chewing and gathering food the patient does not have control over of the size of the pill. It is important for the orofacial myologist to check with the patient’s physician and speech therapist to be assured that pill swallowing is acceptable for the patient. If cleared by the physician and speech therapist then the orofacial myologist should start with a very small pill and gradually move on to larger pills. Cake decorating ornaments and cinnamon dots work well for practicing pill swallows.
Squeezing soft bread into pill sizes also works well.
Steps for pill swallowing include:
Place a pill on the posterior portion of the tongue. Raise the tongue tip to ‘spot’. Bite and pour water into the mouth keeping the tongue tip on the ‘Spot’ as the water enters the mouth, then swallow.
Acceptable Liquids for normal patients: Lemonade, Milk, Juice, Water, Non-carbonated drinks.
If a patient has been diagnosed with dysphasia or you suspect a physical disability be sure to check with their dentist and physician regarding any problems. Carbonated liquids, thick liquids like tomato juice, milk shakes or the addition of food thickeners are generally recommended for patients that have difficulty swallowing thin liquids. Check with the patient’s referring sources before introducing any foods or liquids.
When teaching single liquid swallows and continuous swallows, a small orthodontic elastic is placed on the edge of the tongue tip, then the tip with the elastic is placed on the ‘spot’. Using this technique, the tongue tip does not scoop the liquid. The liquid is sucked past the anterior teeth and suctioned over the posterior teeth. The teeth are lightly touching and the liquid is sucked into a hollow on the posterior portion of the tongue. The teeth bite together and the liquid is swallowed in a teeth together position.
The molars should be together when a sip of liquid or a continuous swallow is completed. Liquid may go into the mouth in one of two ways. One way is for the liquid to be poured past the lips and sucked into the mouth. The tongue tip rests on the ‘spot’ and the liquid is suctioned onto the dorsum of the tongue. An alternate way to collect liquid is for the liquid to be poured into the mouth when the tongue tip is in the tip-down position. With the tongue tip in a down position the tongue should scoop up the liquid and bring the tongue tip to the ‘spot’. Either way of collecting liquid is acceptable. After the liquid is collected the patient should proceed with a correct swallow.
When swallowing with a straw, the straw should be positioned between the lips and in front of the anterior teeth. If the straw goes into the mouth, it generally rests on the tongue. If that happens the tongue then assumes a tip down position which frequently leads to a tongue thrusting swallow.
Occasionally a patient may complain about how cold or hot the liquid feels. When patients are used to swallowing with a teeth apart posture, the liquid doesn’t touch the teeth. When using the newly taught swallow the anterior teeth are together and the liquid touches them. Therefore, when you are teaching a teeth together swallow, the patient may be more sensitive to the temperature of liquids. Using a sensitivity type toothpaste may help relieve this discomfort.
Phase Six includes foods such as: milk and cereal, soup with chunks, chili & beans, green salad, seedless grapes, and orange segments.
Both the liquid and solid are inserted at the same time. The patient should bite and swallow. The solid is moved to the molars on one side, the patient chews the food once or twice, and then bites the teeth together. The teeth remain together until the liquid is swallowed. The solid is then chewed until it is ready to form a bolus. Once the bolus is formed, a trough is then created by the intrinsic muscles. The bolus is sucked onto the posterior portion of the tongue. The superior longitudinal muscle elevates the apex of the tongue to make contact with the hard palate and the bolus is propelled to the posterior portion of the oral cavity. Once the bolus reaches the palatoglossal arch of the oropharynx, the pharyngeal phase is initiated. The reflexive and involuntary phases begin those phases are not under our direct control (
Hori, Ono & Nokubi, 2006).
It is important to observe the movement of the tongue during eating and drinking. It is important to understand the interaction between the tongue and the contact it has with the hard palate (
Hori, Ono & Nokubi, 2006). Using an experimental palatal plate with 7 pressure sensors, and recording jaw movement using mandibular kinesiography,
Hori, Ono & Nokubi (
2006) assessed healthy subjects. They measured coordination of tongue and jaw movements during the entire masticatory sequence of solids. They also found evidence that supported the theory that eating food can reduce stress.
Using both solids and liquids, can help a patient reinforce their orofacial myofunctional goals. Whether the patient is a child or an adult, it is important to be firm, creative, and flexible. A patient who follows directions and practices their assignments as assigne,dhas the highest probability of achieving habituation. While working toward habituation my patients frequently create reminder signs to use at mealtime. Signs similar to the following are used:
From the moment a patient walks into your office they should be under informal observation. You can gain important diagnostic waiting room just chatting. It has been exciting to notice that many of my patients have developed habitually correct resting postures and correct swallowing behaviors as they achieved correct food and liquid swallows.
As a therapis,tone of the most important tools in your tool box is the knowledge gained from informal observation. Look and look again! Watch your patien,t not only while they are sitting in your office but when they are chewing and swallowing food, but when they handle their knife and fork and spoon. Watch how they manage their utensils, and how fast they are eating. Let their behavior guide you in developing the right treatment plan for them.
